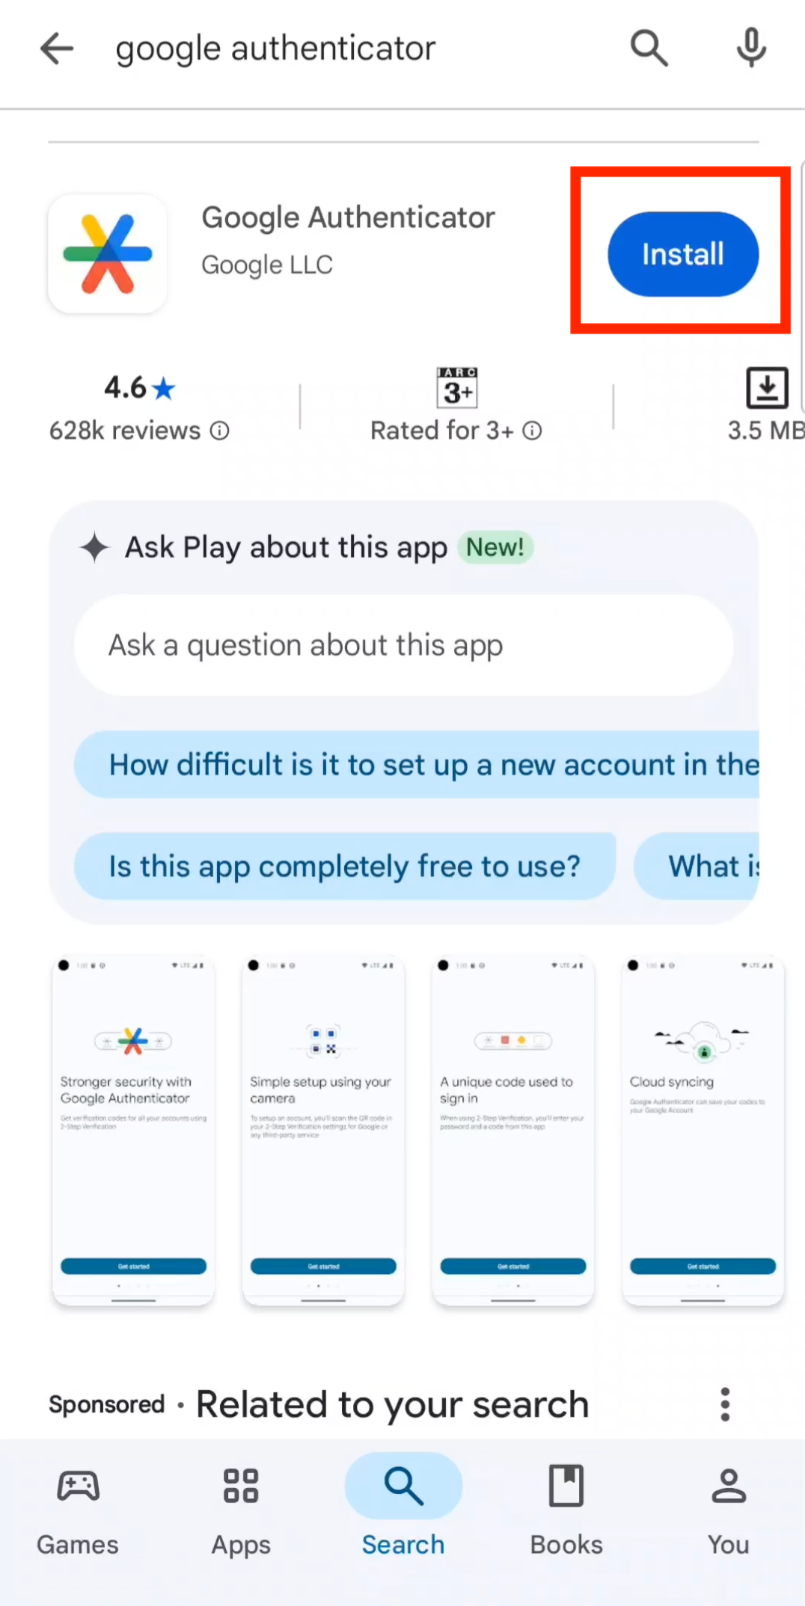
Download Google Authenticator
Step 1: Download Google Authenticator
Download the Google Authenticator app from the App Store (iOS) or Google Play Store (Android). This free app generates time-based verification codes for your accounts.
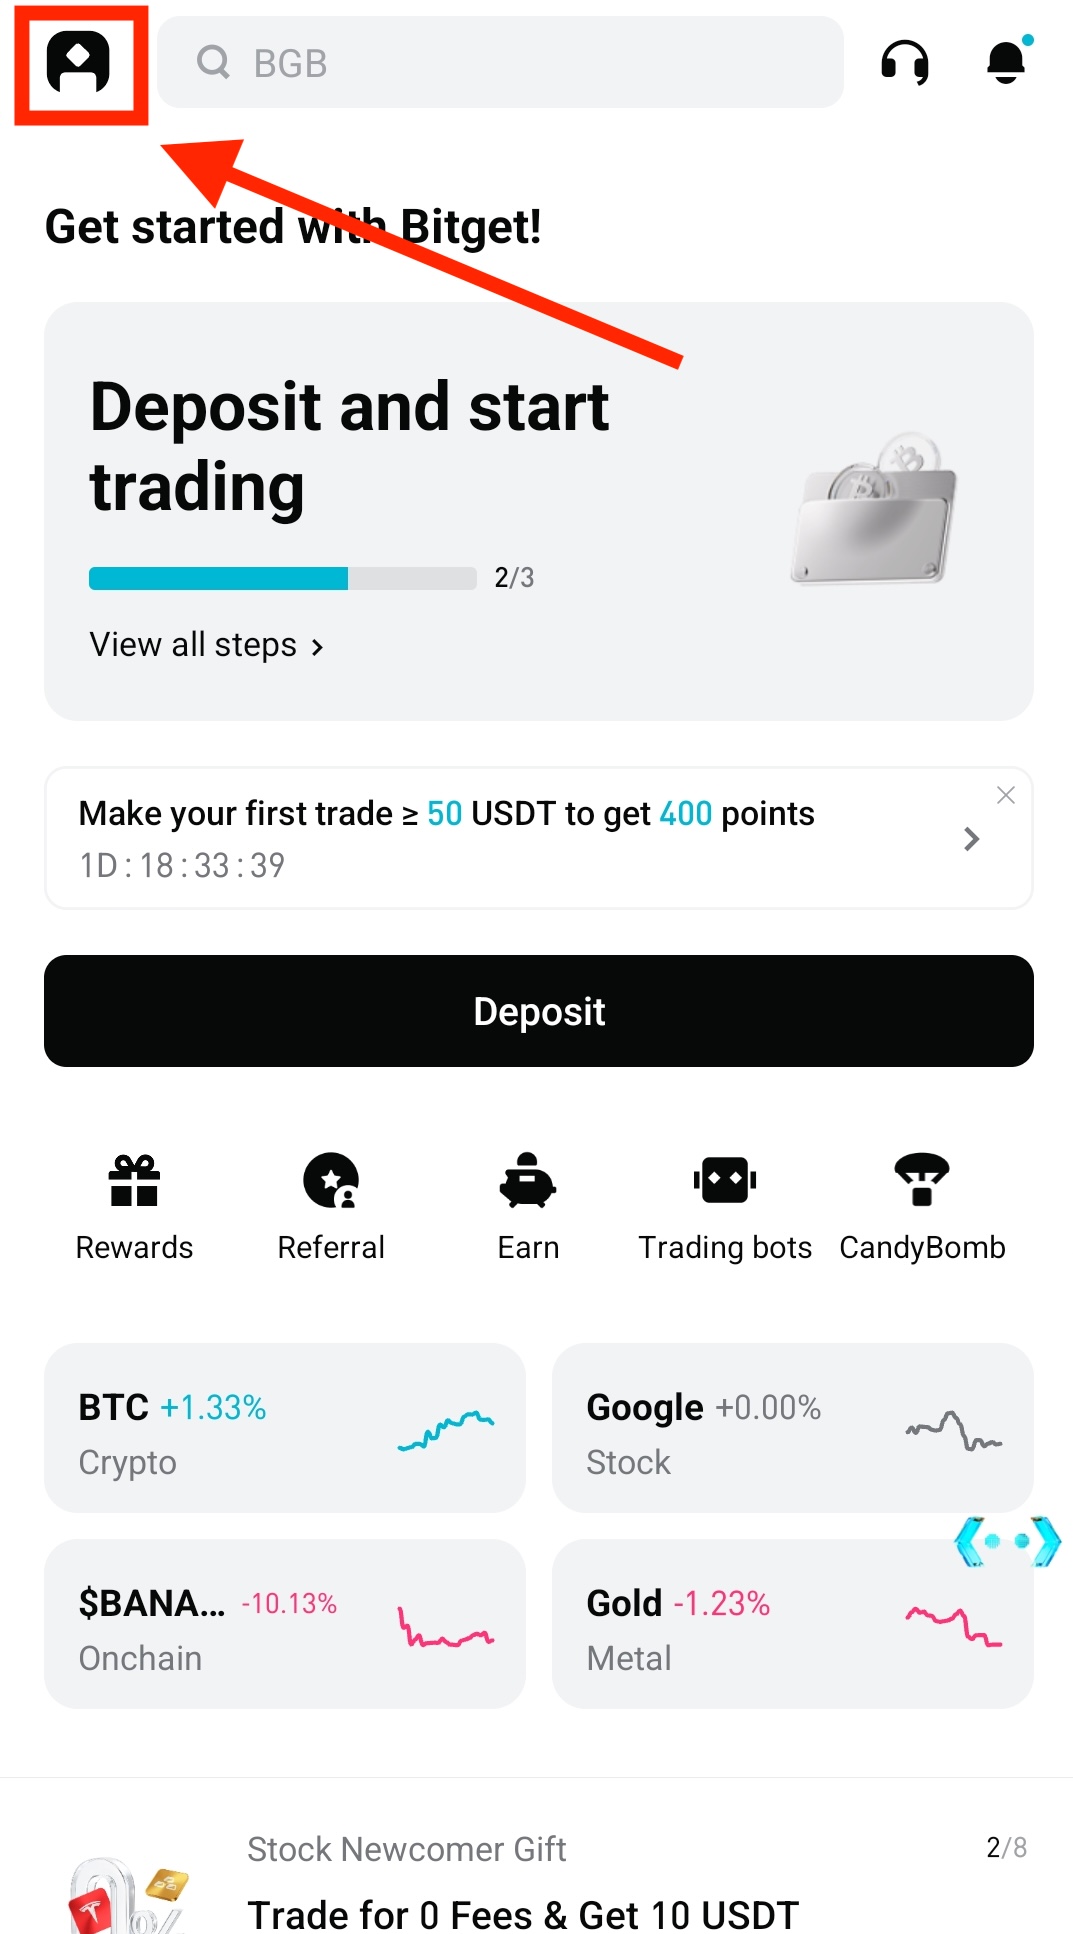
Bind in Bitget
Step 2: Open Your Bitget Profile
On the Bitget app homepage, tap the Profile icon in the top-left corner to access your account settings.
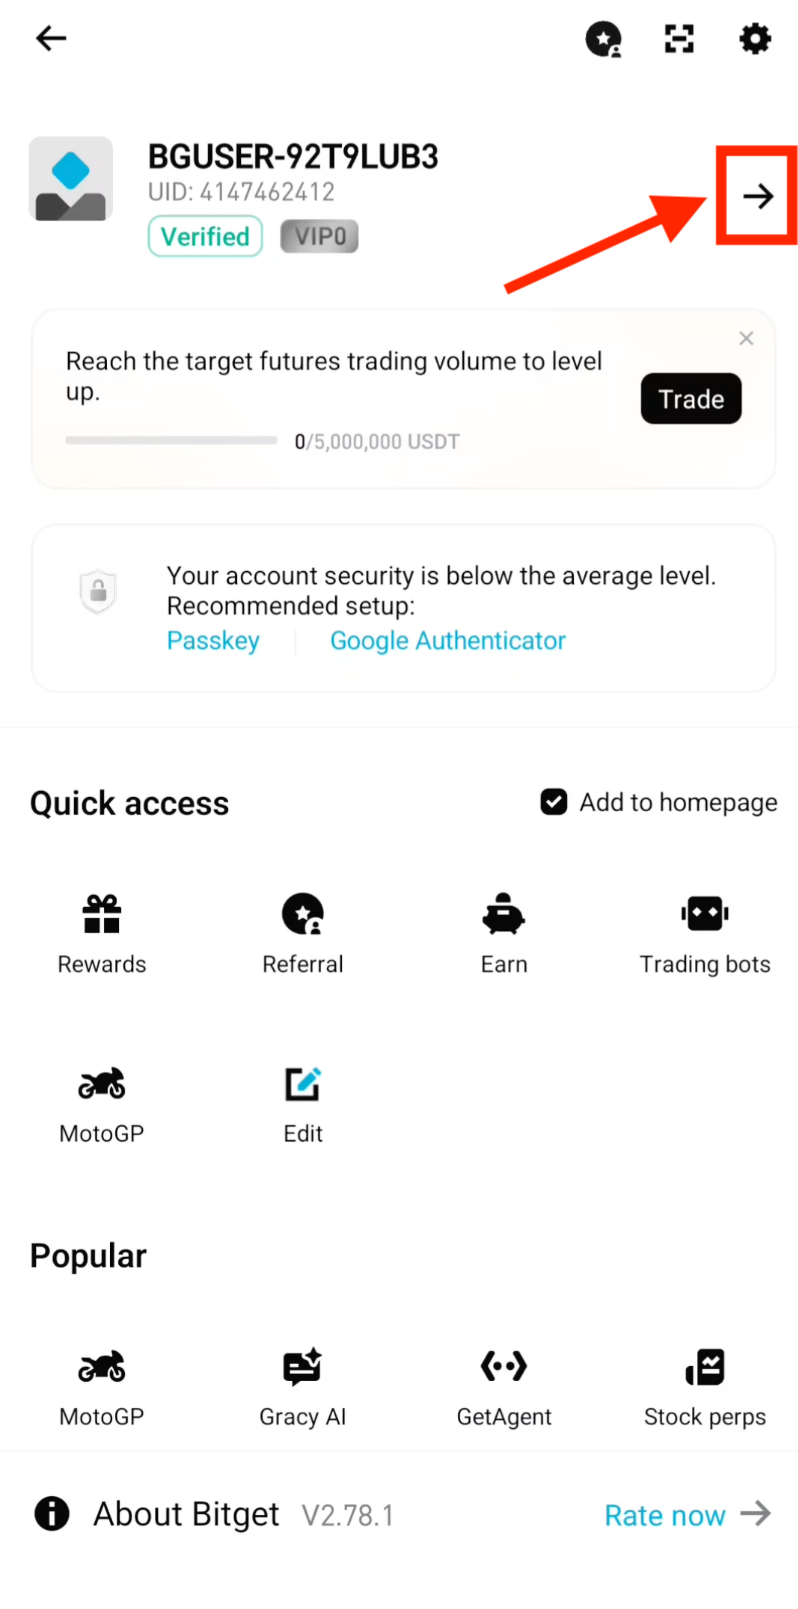
Step 3: Access Account Settings
Tap the Arrow icon in the top-right corner to navigate to your account settings.
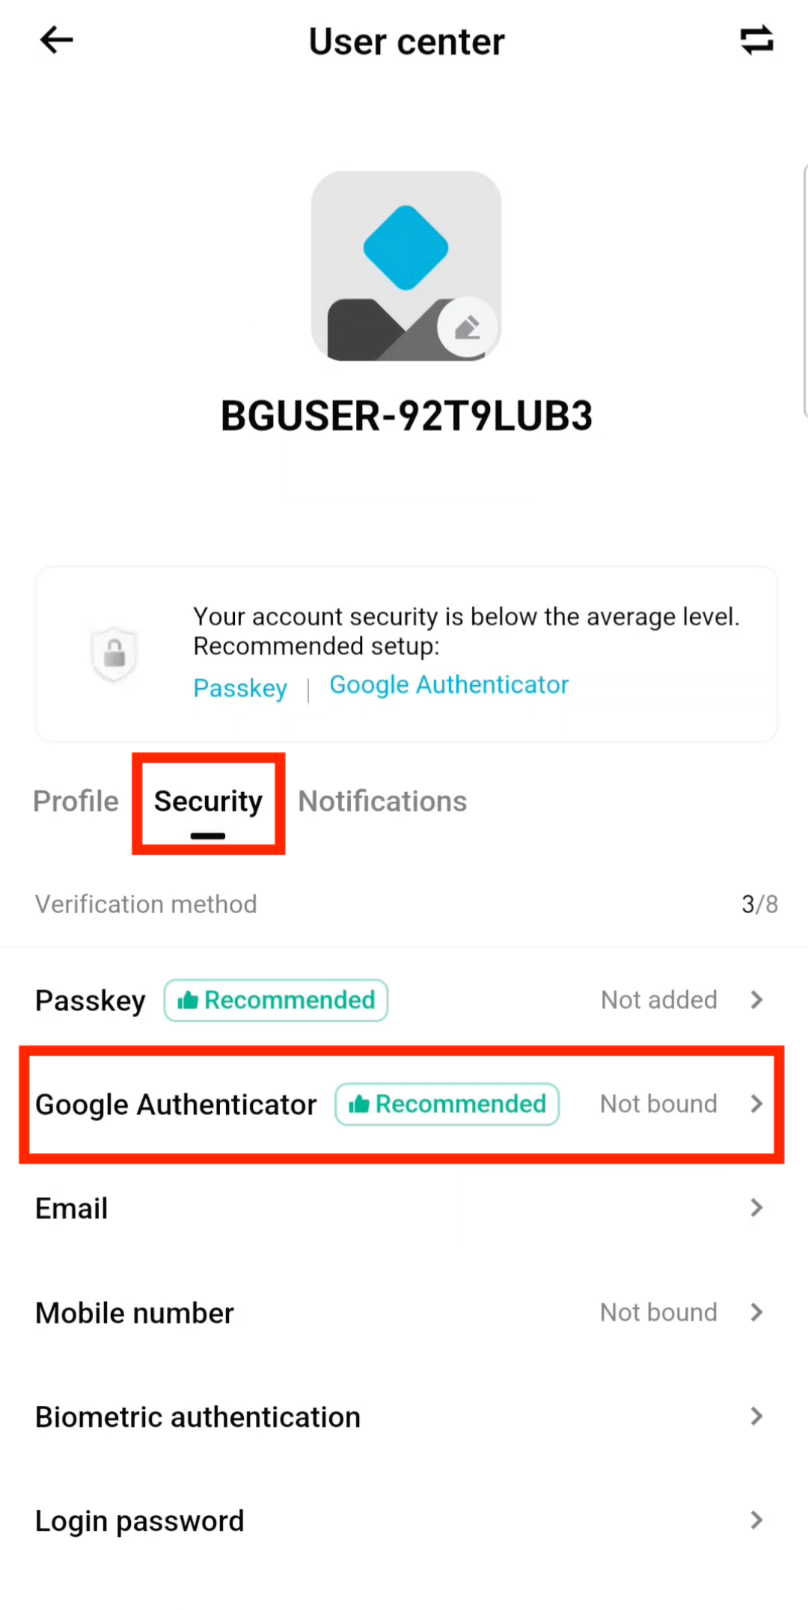
Step 4: Open Security and Google Authenticator
Tap Security, then tap Google Authenticator to begin the 2FA setup process.
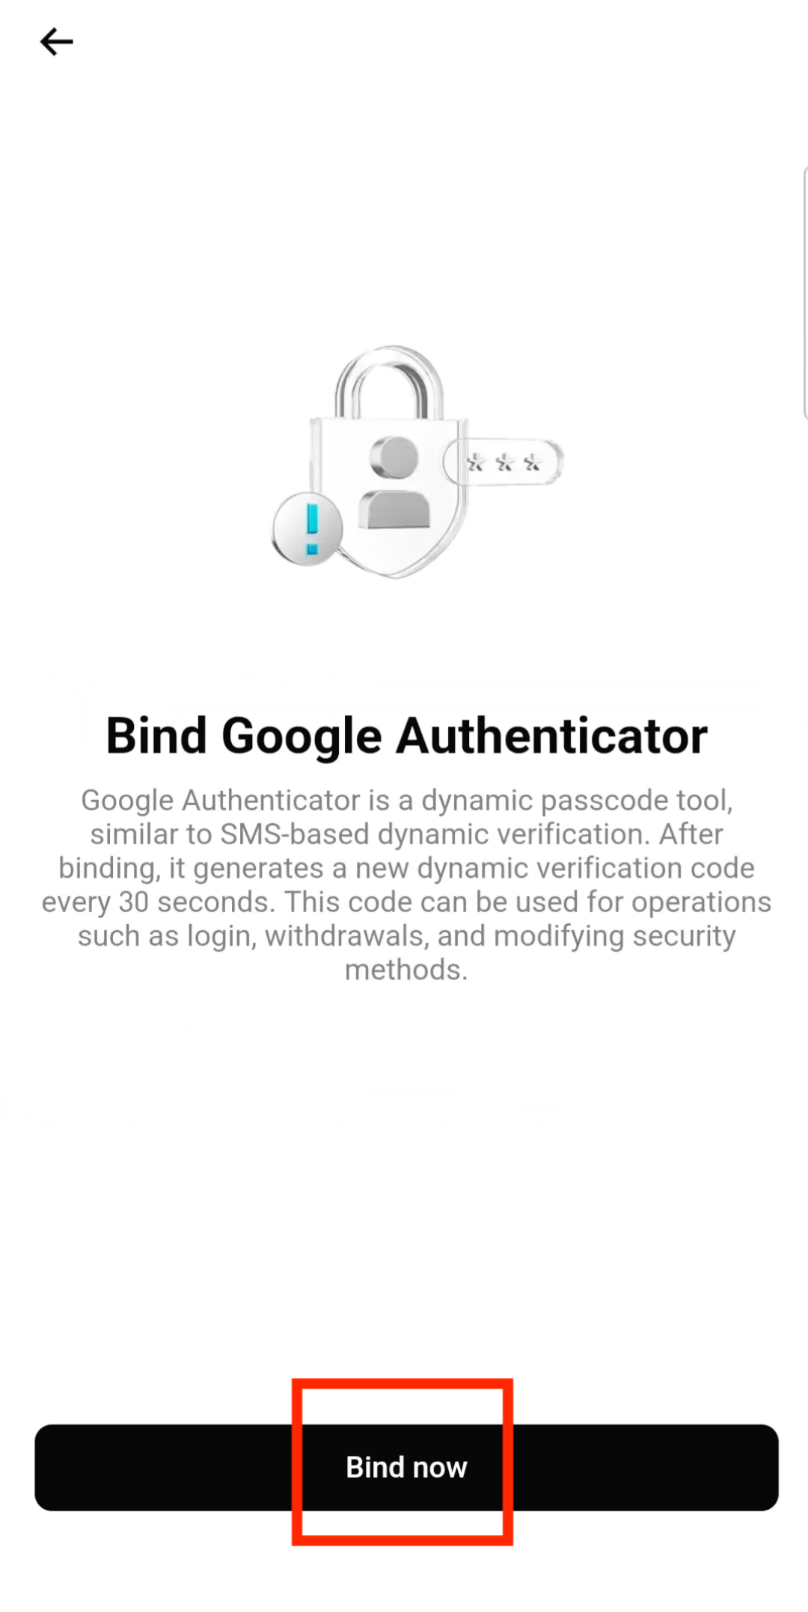
Step 5: Tap "Bind Now"
Tap Bind now to start linking Google Authenticator to your Bitget account.
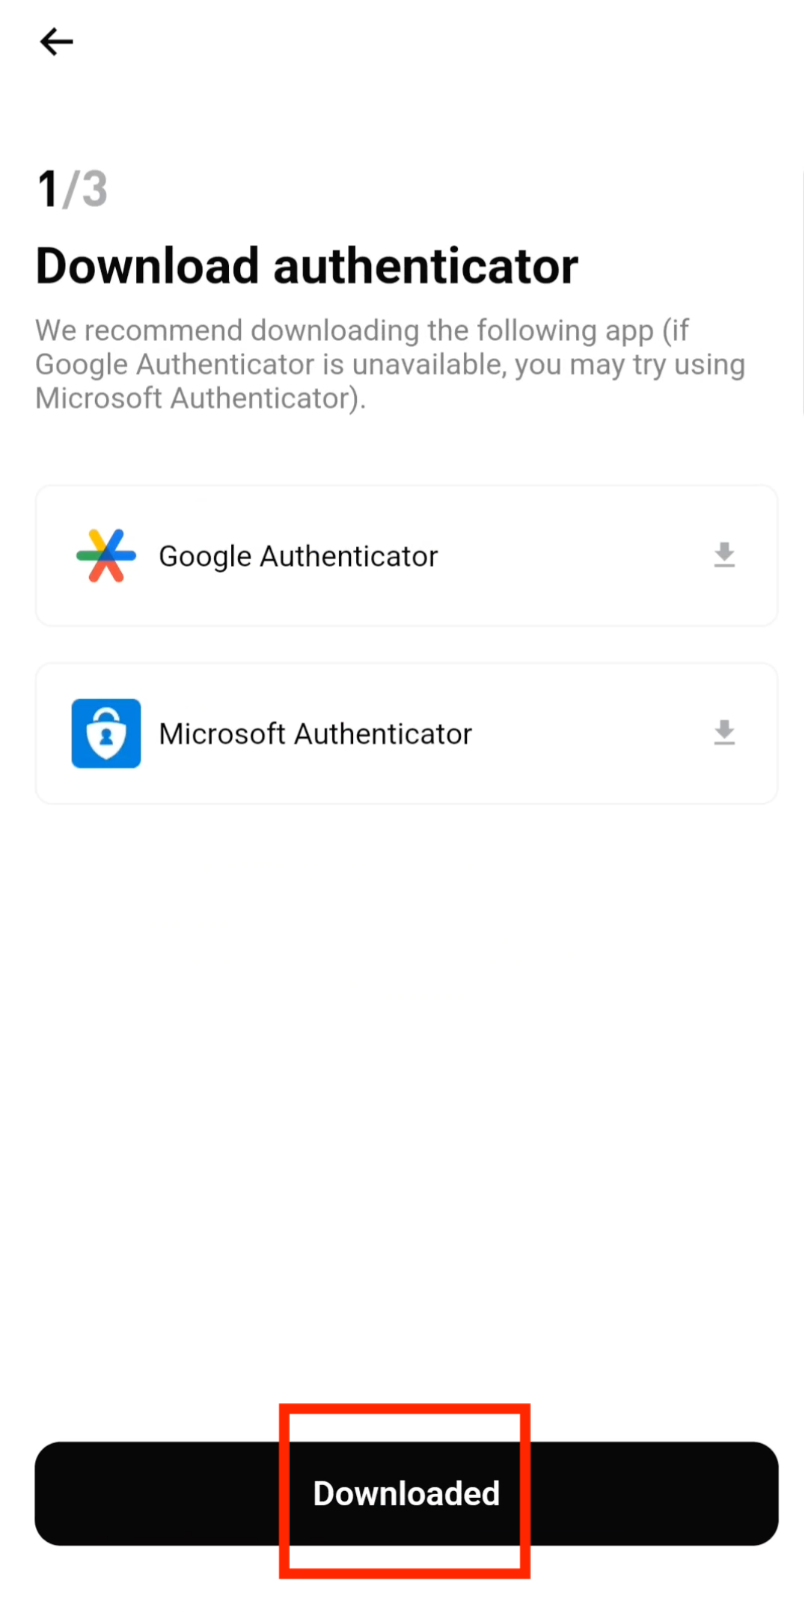
Step 6: Confirm App Downloaded
Tap Downloaded to confirm you have the Google Authenticator app installed on your device.
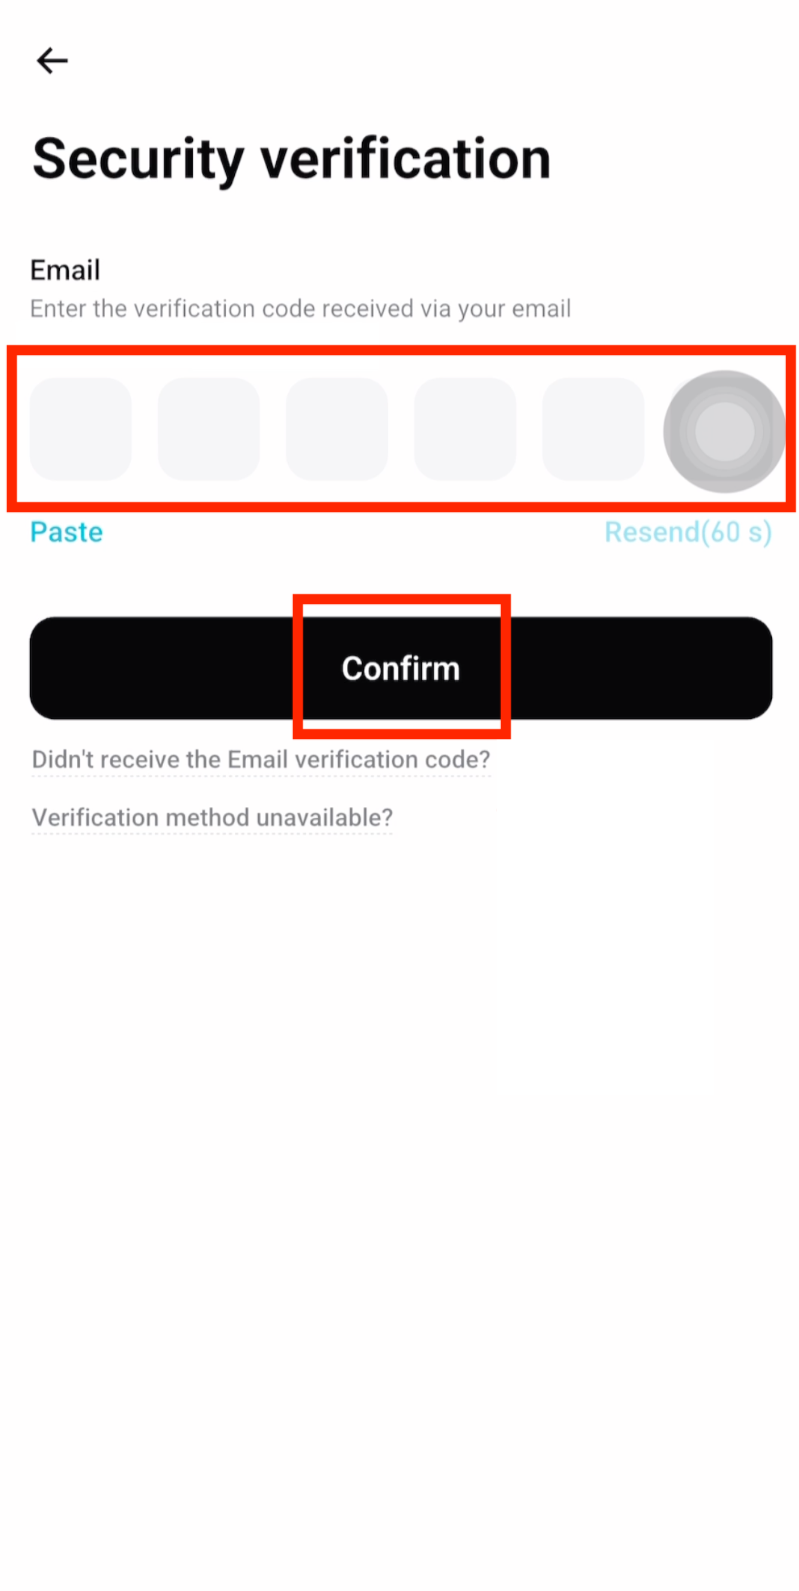
Step 7: Enter Email Verification Code
Enter the Email Verification Code sent to your registered email address, then tap Confirm.
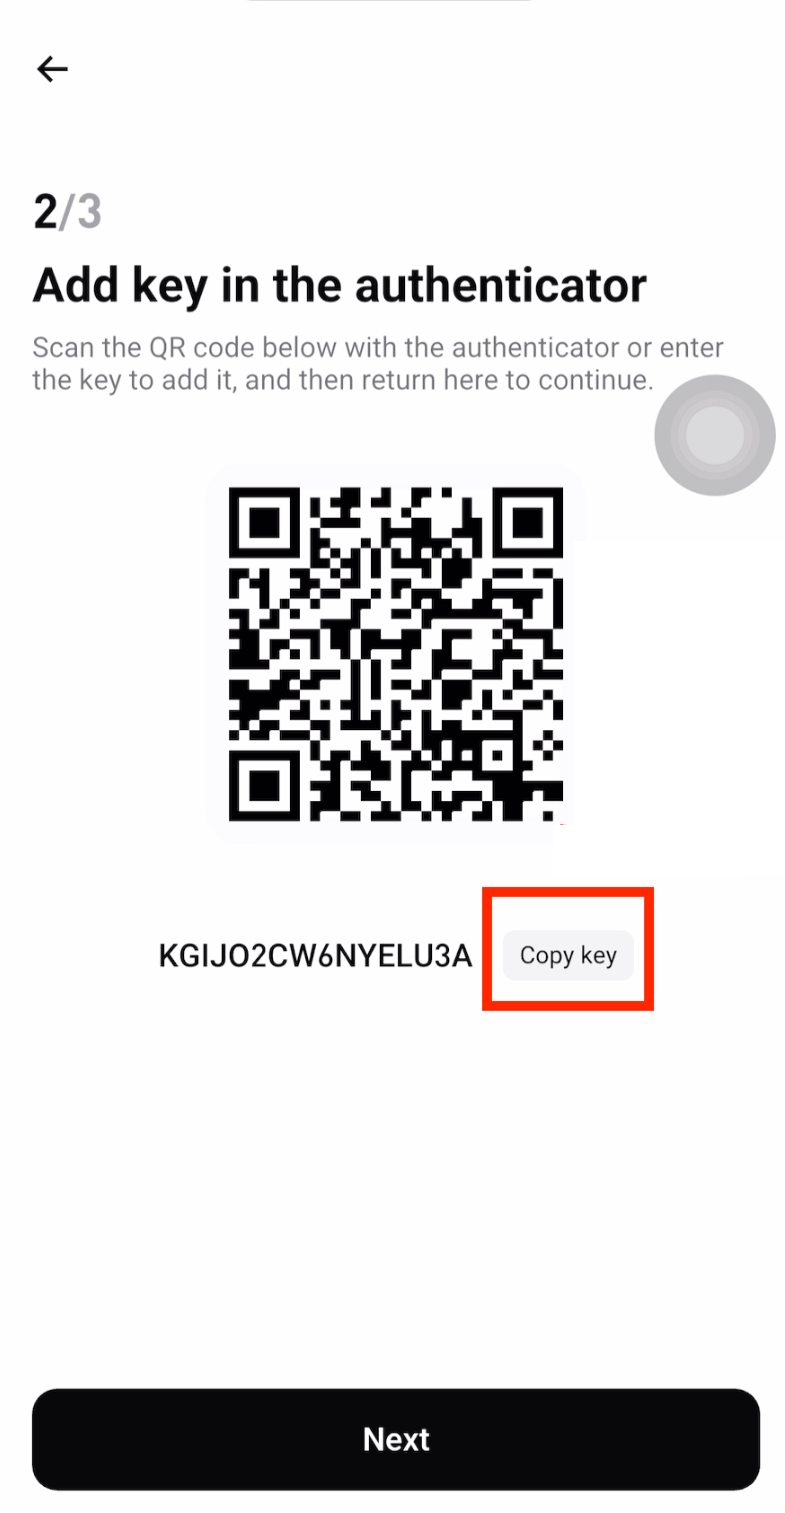
Step 8: Copy the Secret Key
Tap Copy key to copy the secret key. Important: Save this key in a secure offline location as a backup. You will need it to restore your authenticator if you lose your phone.
Complete Verification
Step 9: Open Google Authenticator
Open the Google Authenticator app and tap the + button to add a new account.

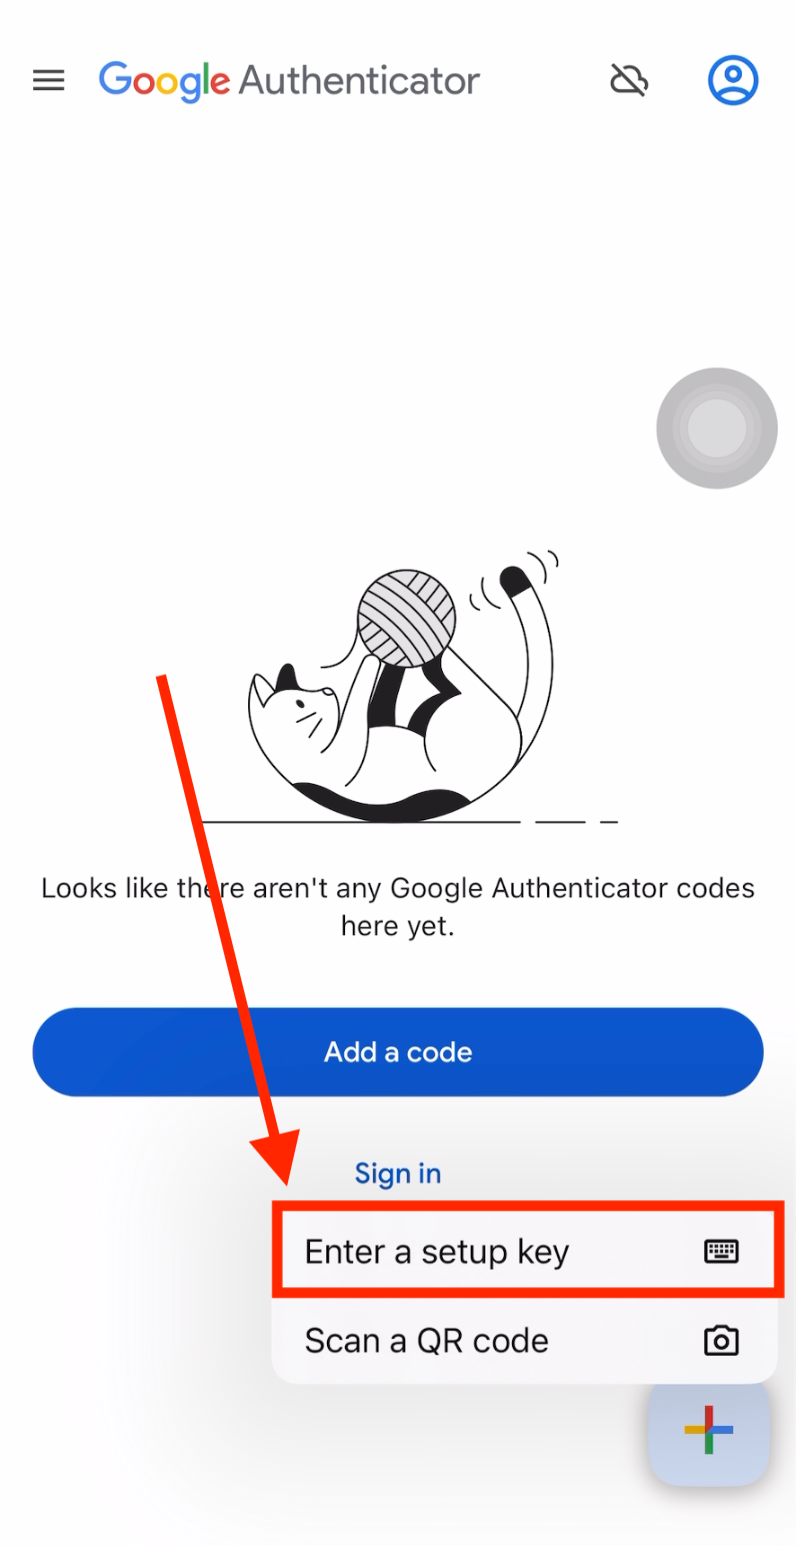
Step 10: Select "Enter a Setup Key"
Tap Enter a setup key to manually add your Bitget account using the secret key you copied.
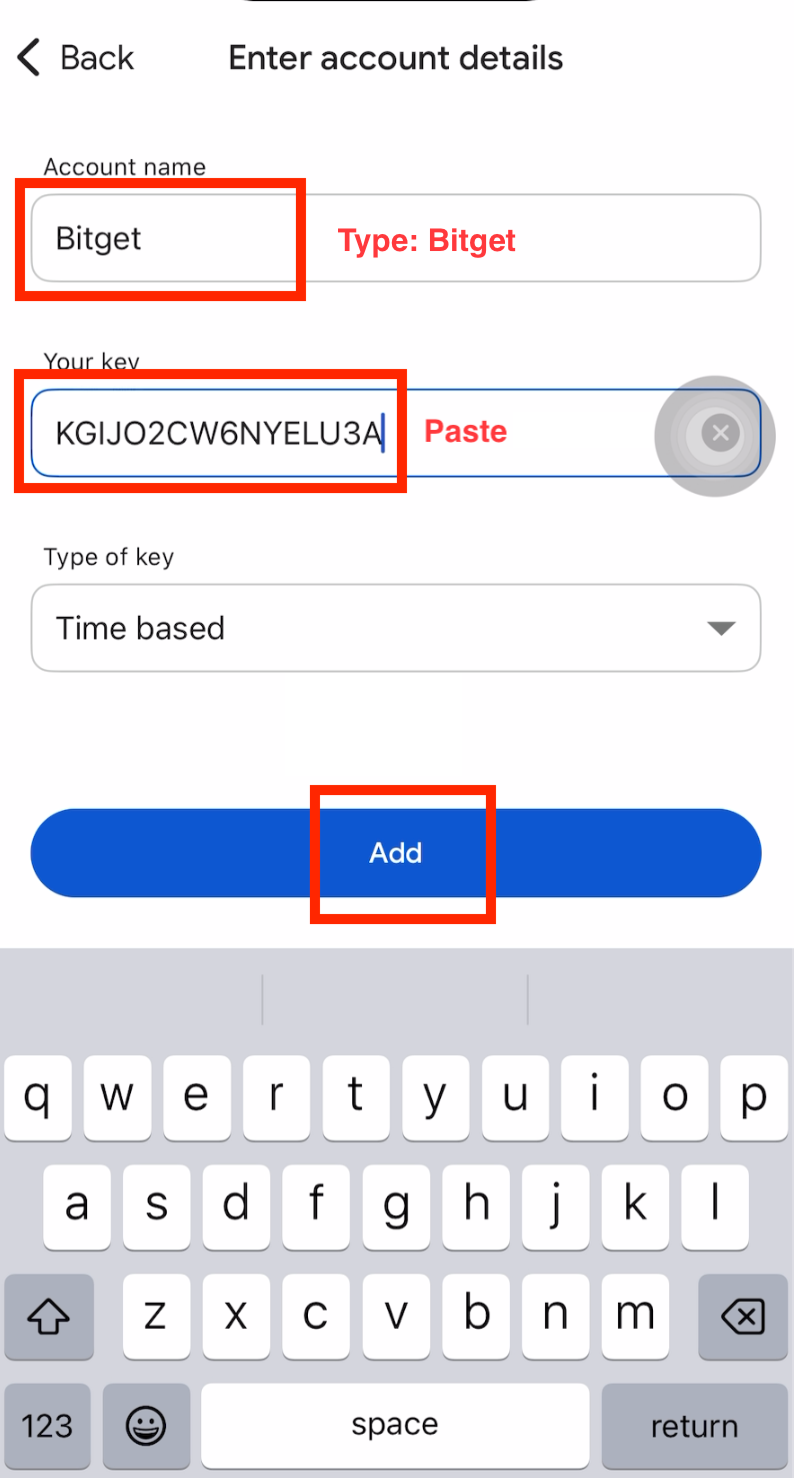
Step 11: Add Your Bitget Account
Enter "Bitget" as the account name, tap to Paste the secret key you copied earlier, then tap Add.
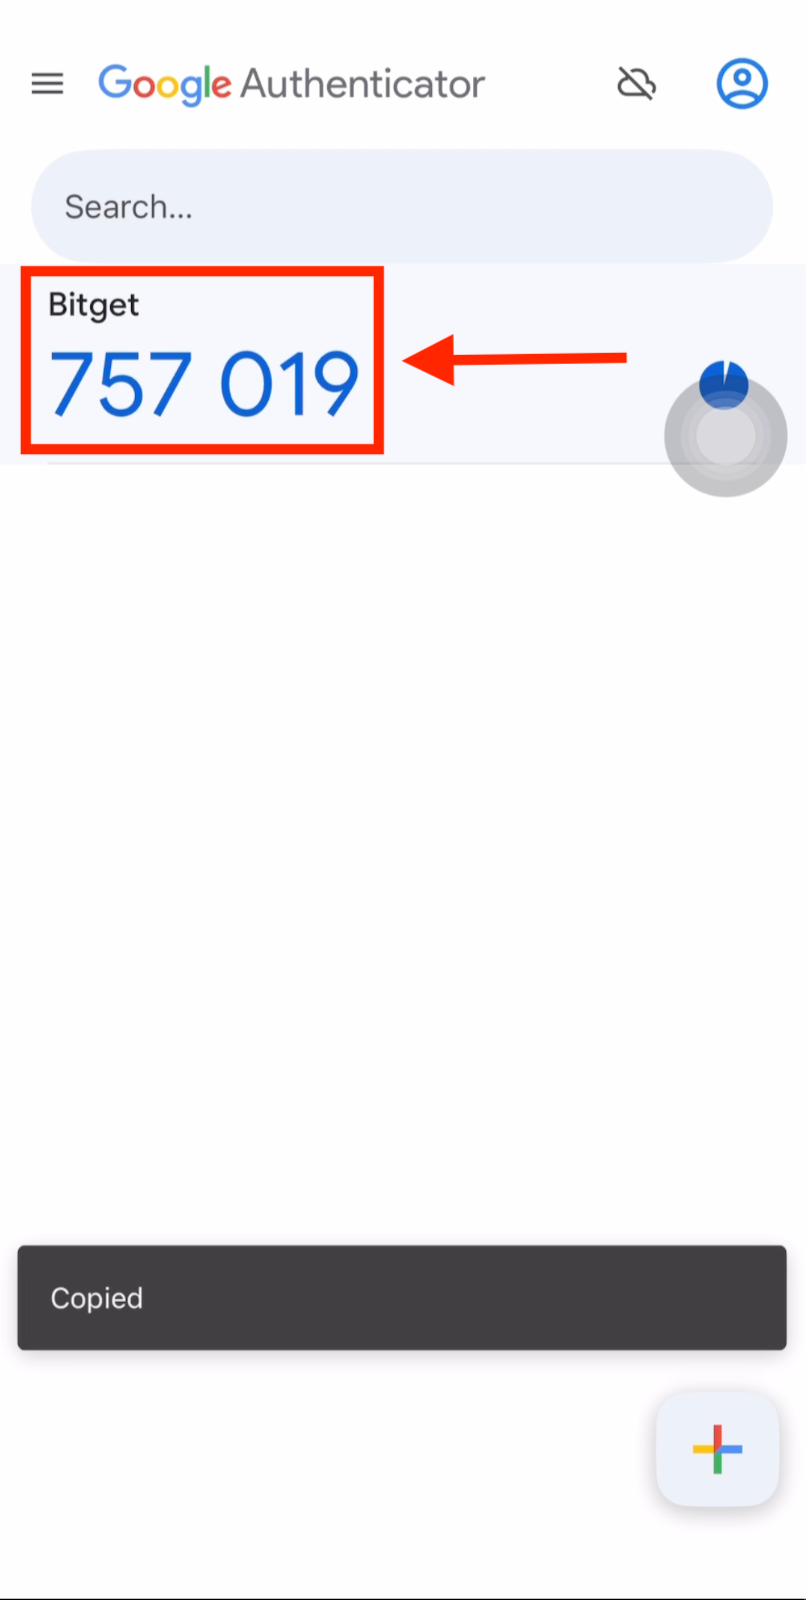
Step 12: Copy the Verification Code
Copy the 6-digit verification code generated by Google Authenticator for your Bitget account. This code changes every 30 seconds.
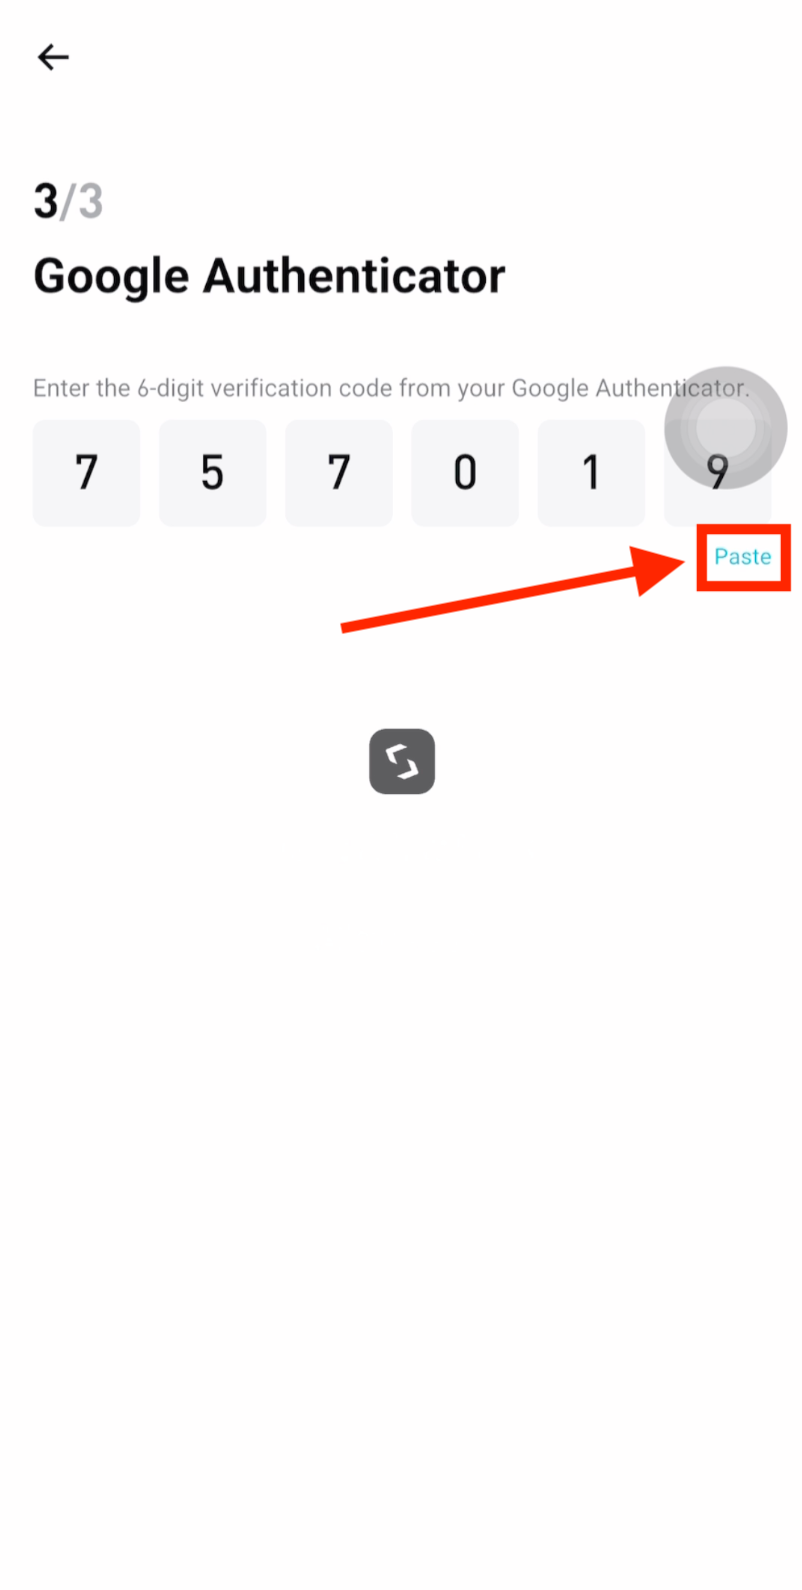
Step 13: Paste the Code in Bitget
Return to the Bitget app and tap Paste to enter the verification code from Google Authenticator.
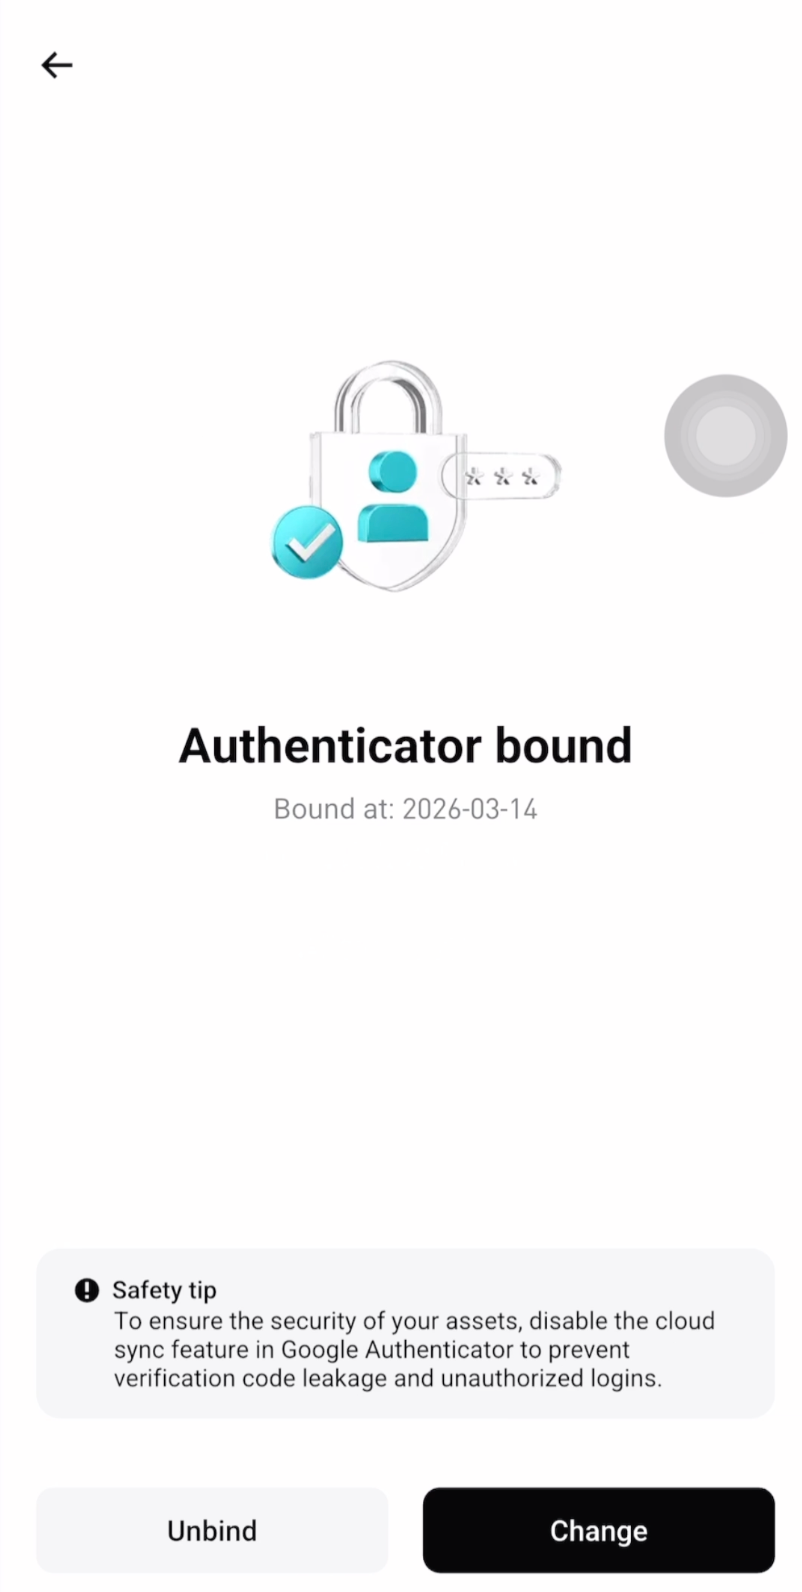
Step 14: 2FA Successfully Enabled
Google Authenticator has been successfully enabled on your Bitget account. Your account is now protected with an additional layer of security.
Frequently Asked Questions
What is 2-Factor Authentication (2FA) and why do I need it?
Two-Factor Authentication (2FA) is an extra layer of security that requires both your password and a time-based verification code from an authenticator app to log in. Even if someone steals your password, they cannot access your account without the 2FA code. Enabling 2FA on Bitget is essential to protect your cryptocurrency assets and is required for API binding.
Why is 2FA important for my Bitget account?
2FA is critical because cryptocurrency transactions are irreversible. If a hacker gains access to your account without 2FA, they could withdraw your funds permanently. With Google Authenticator enabled, every login and withdrawal requires a unique 6-digit code that changes every 30 seconds, making it virtually impossible for attackers to compromise your account remotely.
What should I do if I lose my phone with Google Authenticator?
If you lose your phone, you can recover access by contacting Bitget support and completing identity verification. To prevent this, save the secret key shown during setup in a secure offline location. You can use this key to restore your authenticator on a new device. Never store the backup key online for security reasons.
Can I use other authenticator apps besides Google Authenticator?
Yes, you can use any TOTP-compatible authenticator app such as Microsoft Authenticator, Authy, or 1Password. These apps all support the same time-based one-time password (TOTP) standard. Simply use the setup key provided by Bitget to add the account to your preferred app.
What's Next?
Now that your Bitget account is secured with 2FA, the next step is to bind your Bitget account to CoinTech2u using Fast API for automated trading.
Next: Bind Bitget Fast API →Ready to Start Trading?
Secure your Bitget account with 2FA and start AI-powered crypto trading with CoinTech2u today.