Get Deposit Address
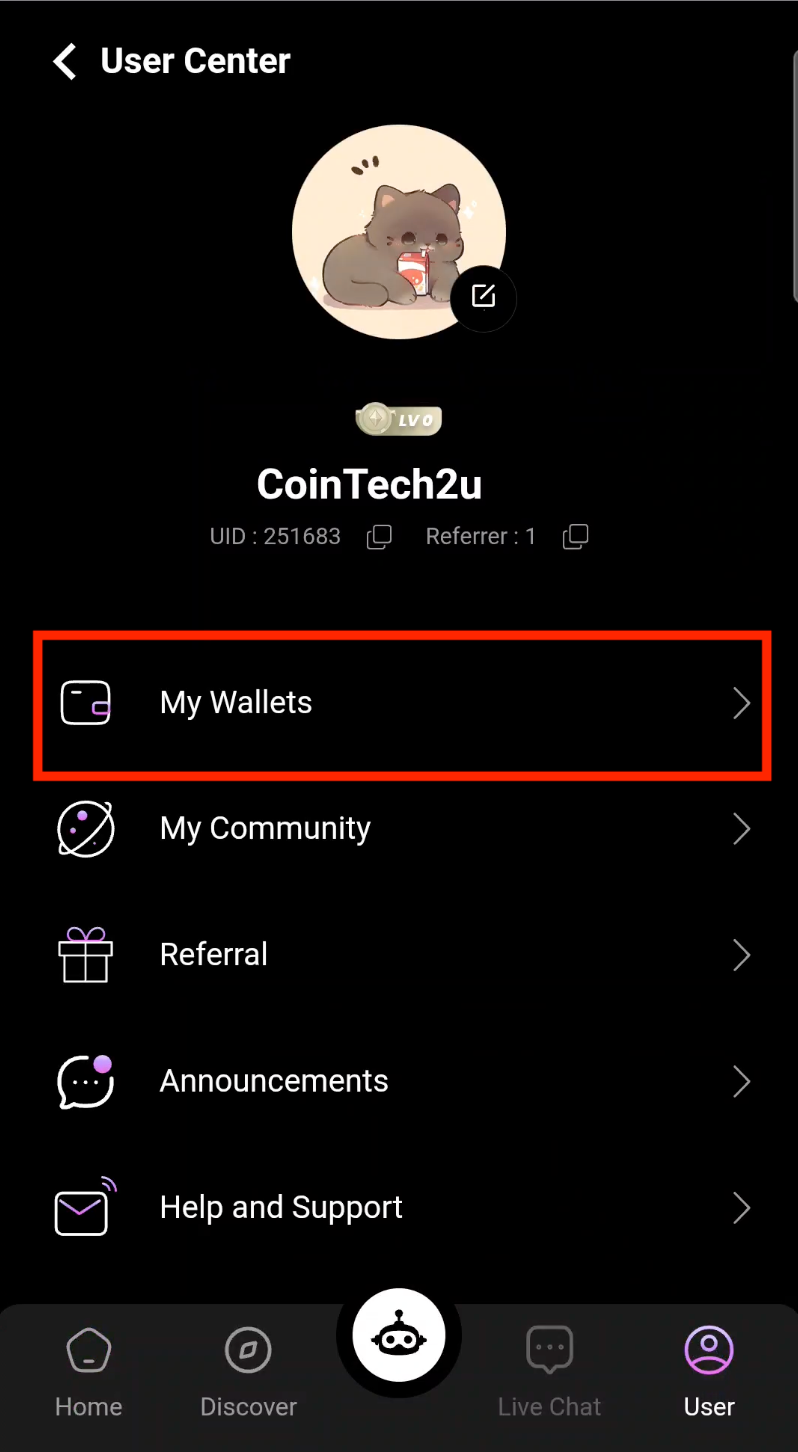
Step 1: Open Your CoinTech2u Profile
On the CoinTech2u homepage, tap User in the bottom-right corner to access your profile.

Step 2: Access My Wallets
Tap My Wallets to view your CoinTech2u wallet balance and options.
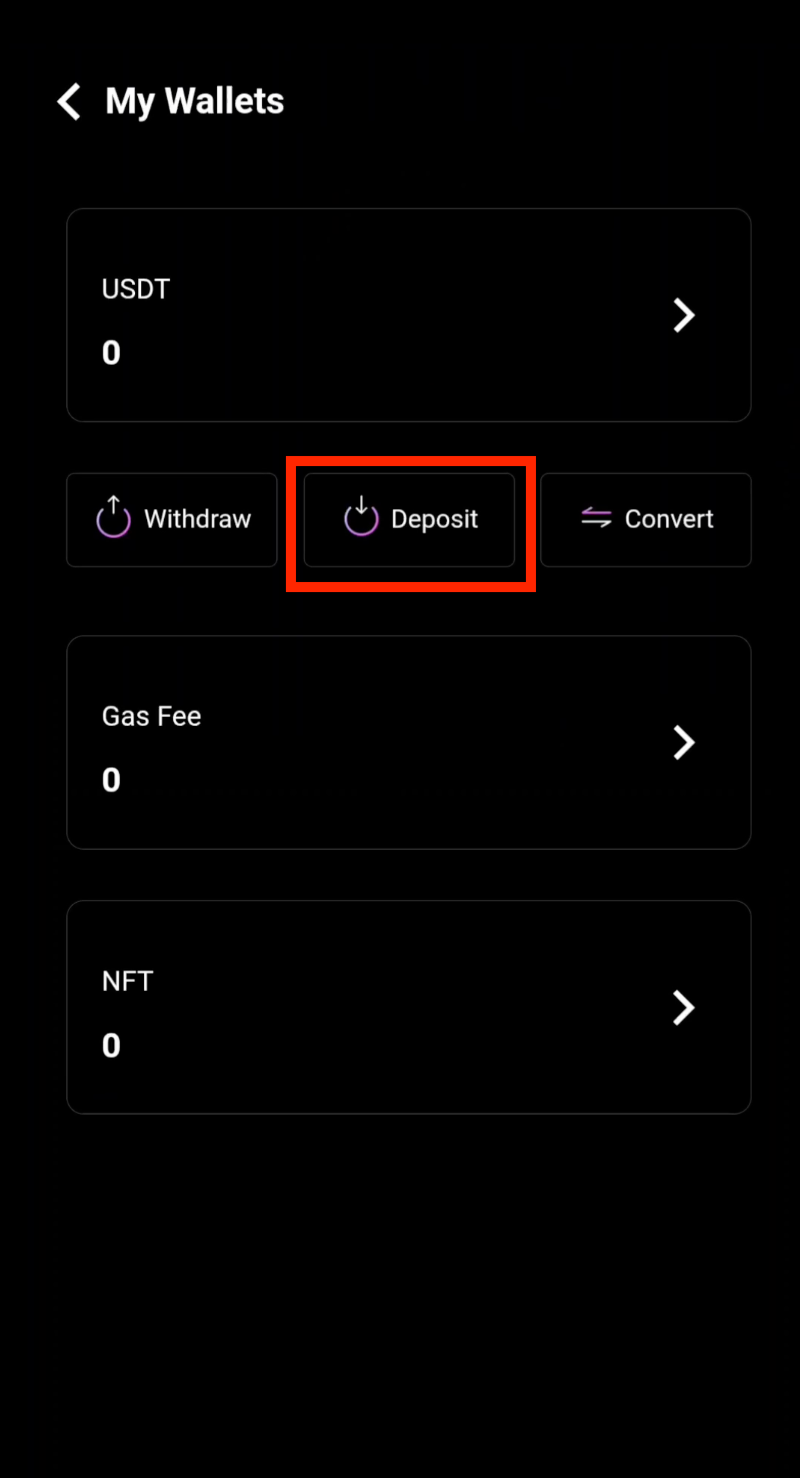
Step 3: Tap "Deposit"
Tap Deposit to view your wallet deposit address.
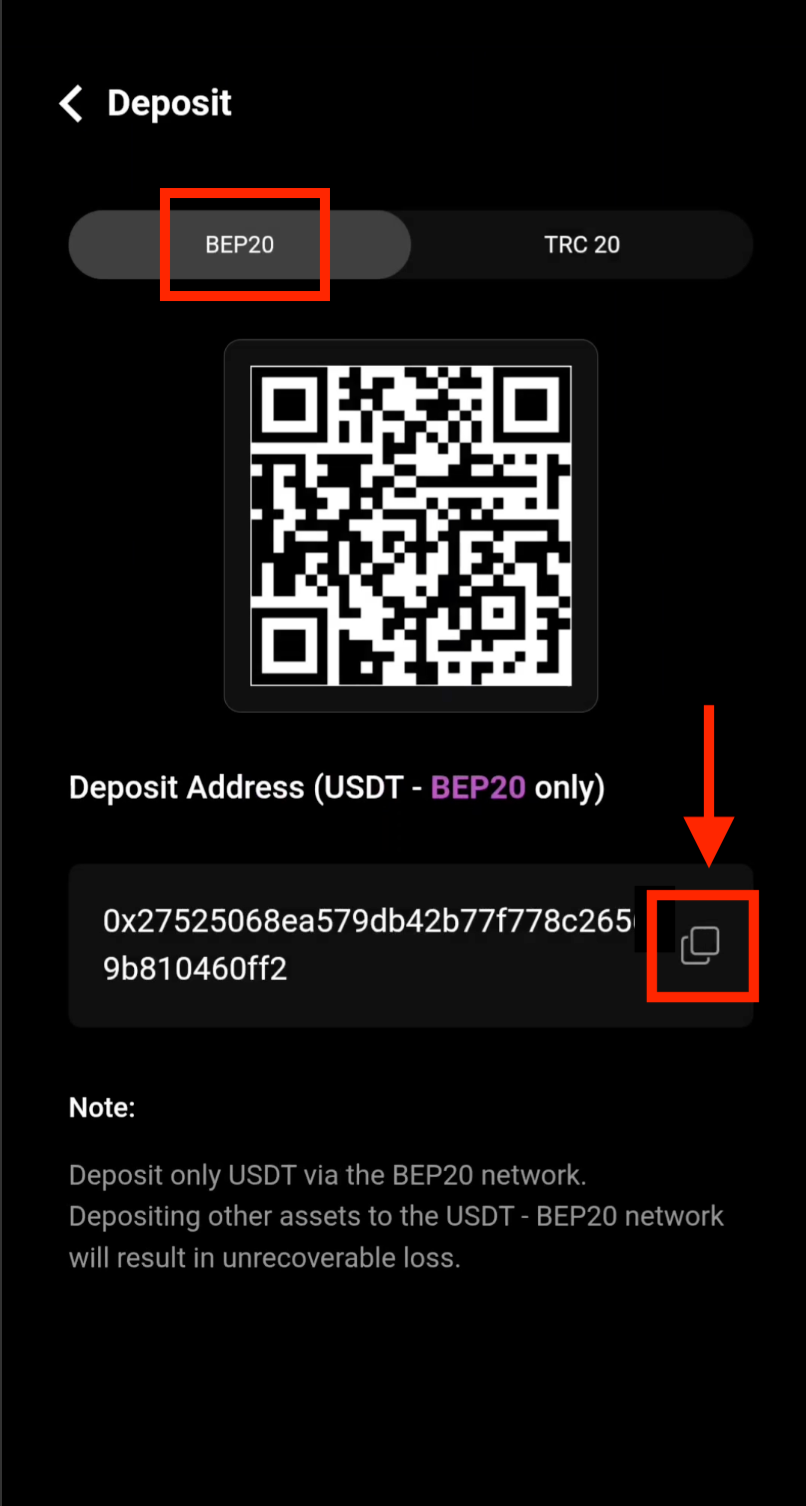
Step 4: Copy Your BEP20 Deposit Address
Select the BEP20 network, then tap the Copy icon to copy your deposit address. Make sure BEP20 is selected before copying.
Withdraw from Bitget
Important: Use BEP20 Network Only
You MUST select the BEP20 network for both deposit and withdrawal. Using any other network (ERC20, TRC20, etc.) will result in permanent and irreversible loss of your funds. Always double-check the network before confirming.
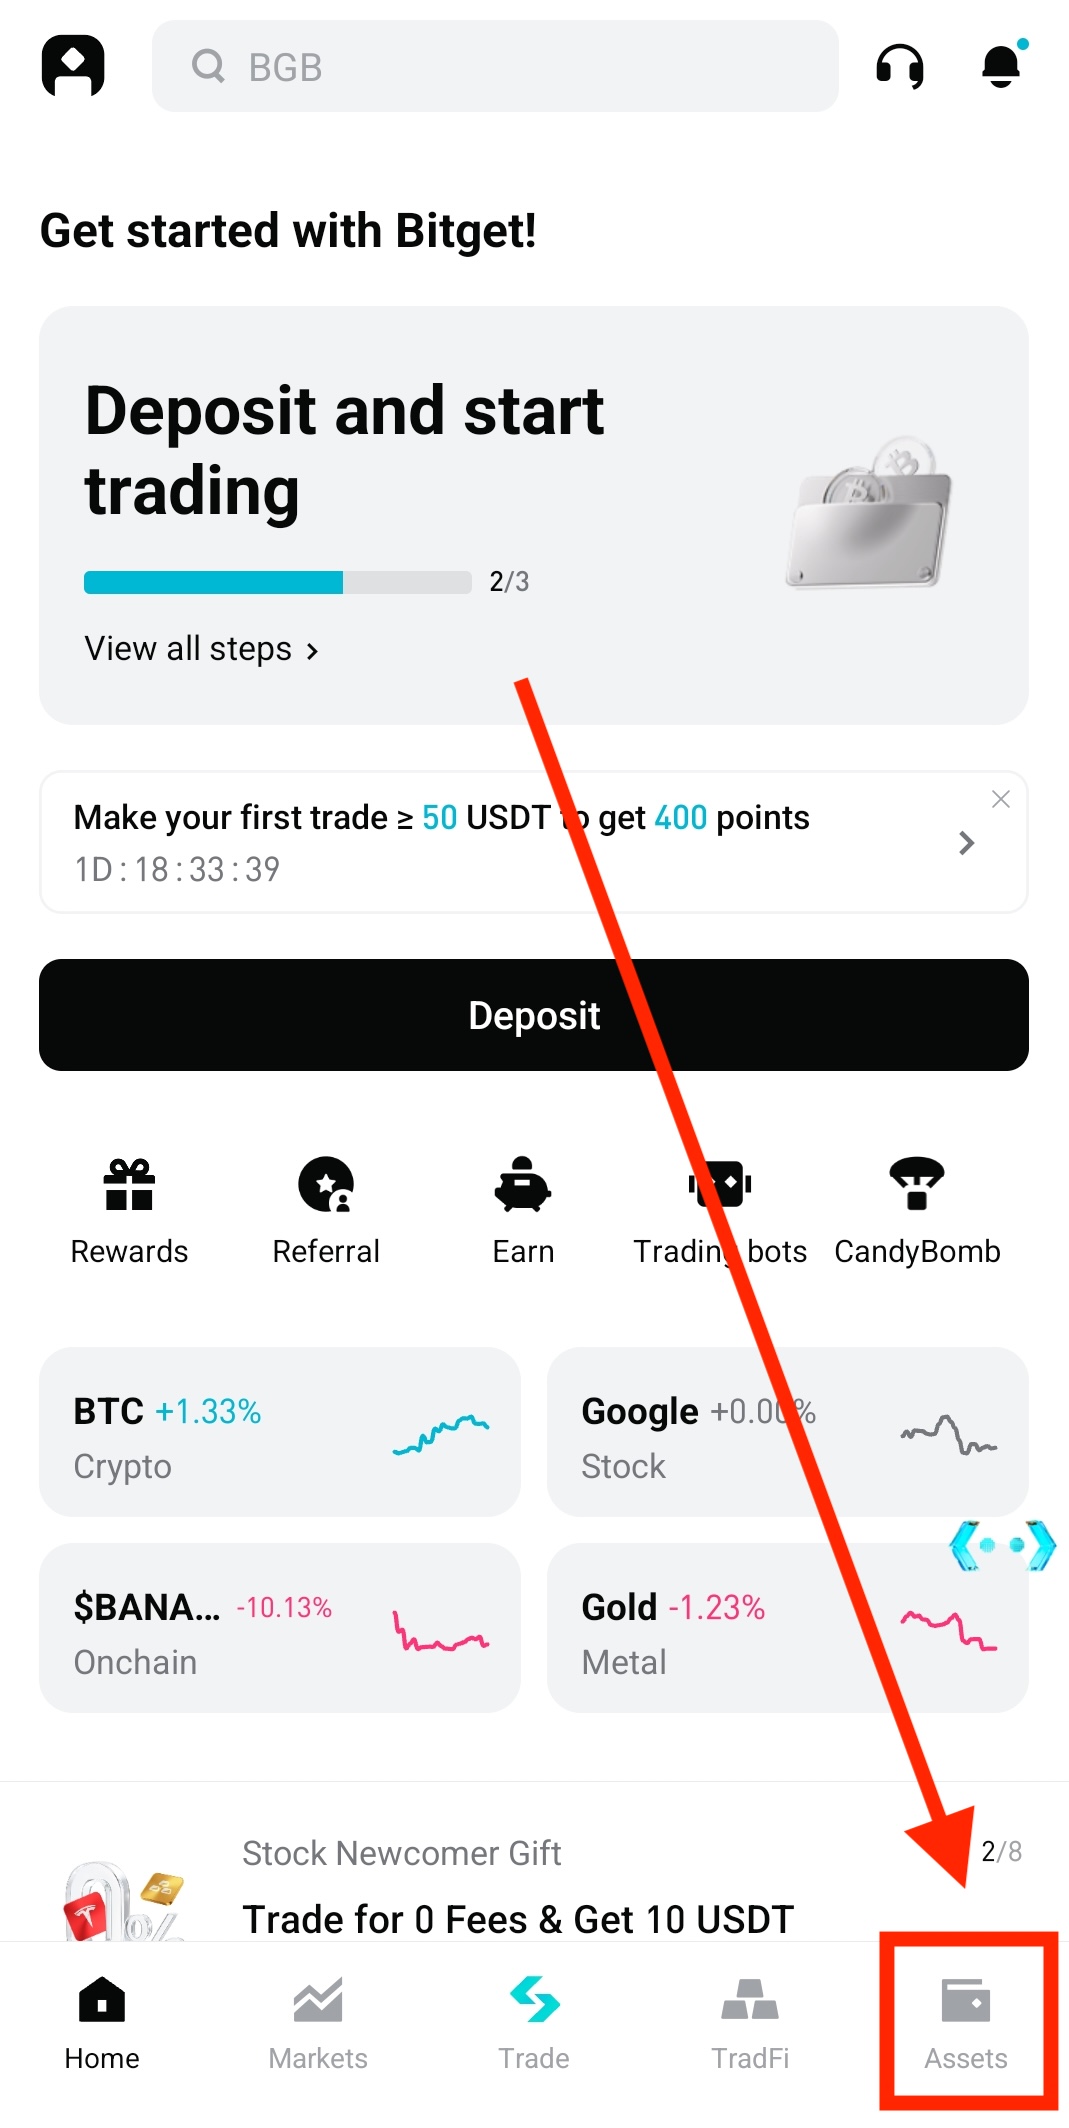
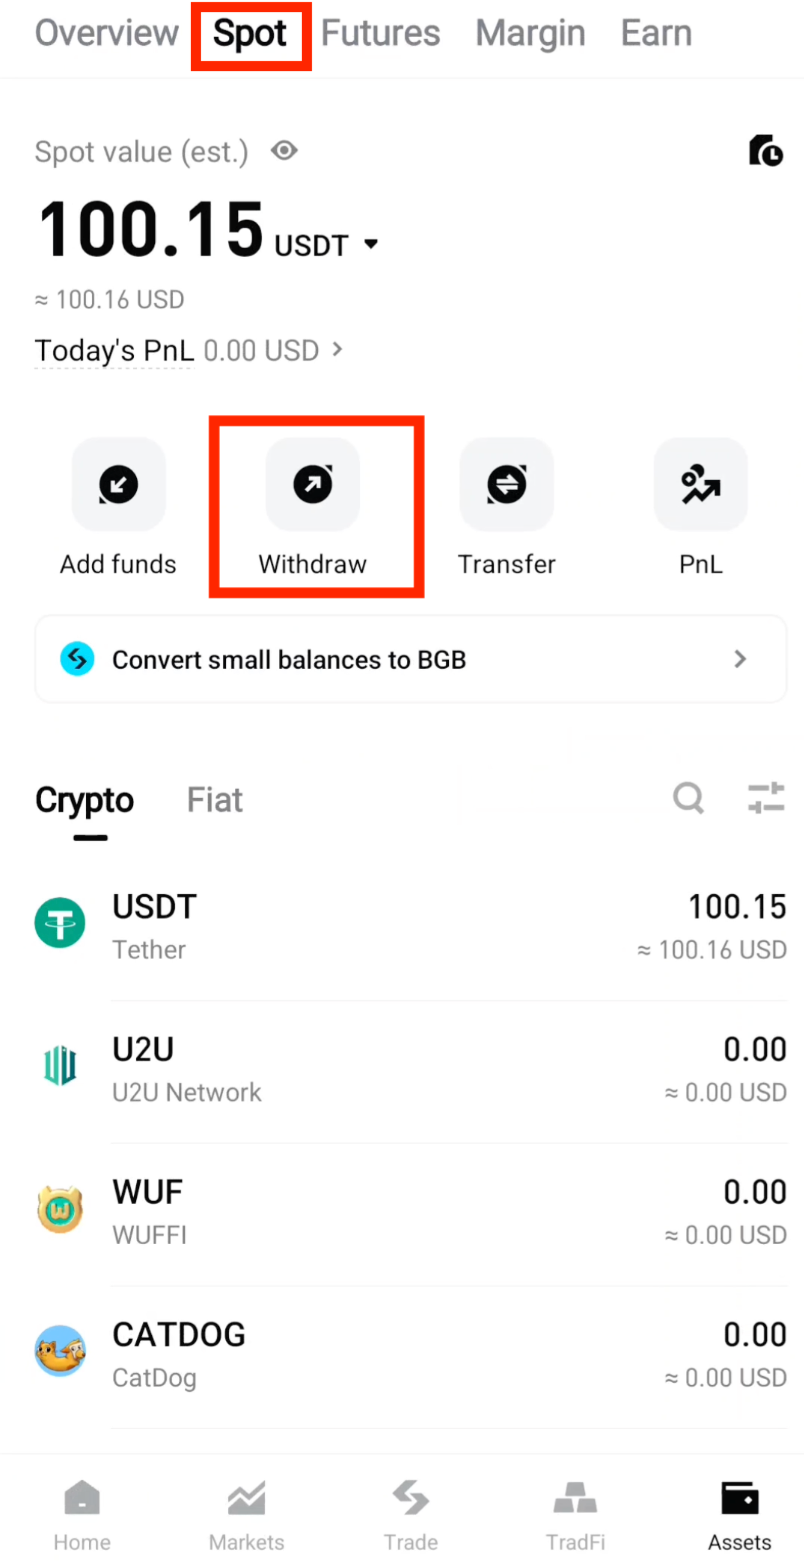
Step 5: Open Bitget Assets
On the Bitget app homepage, tap Assets in the bottom-right corner to view your holdings.
Step 6: Select Spot and Withdraw
Tap Spot to view your spot wallet, then tap Withdraw to start the withdrawal process.
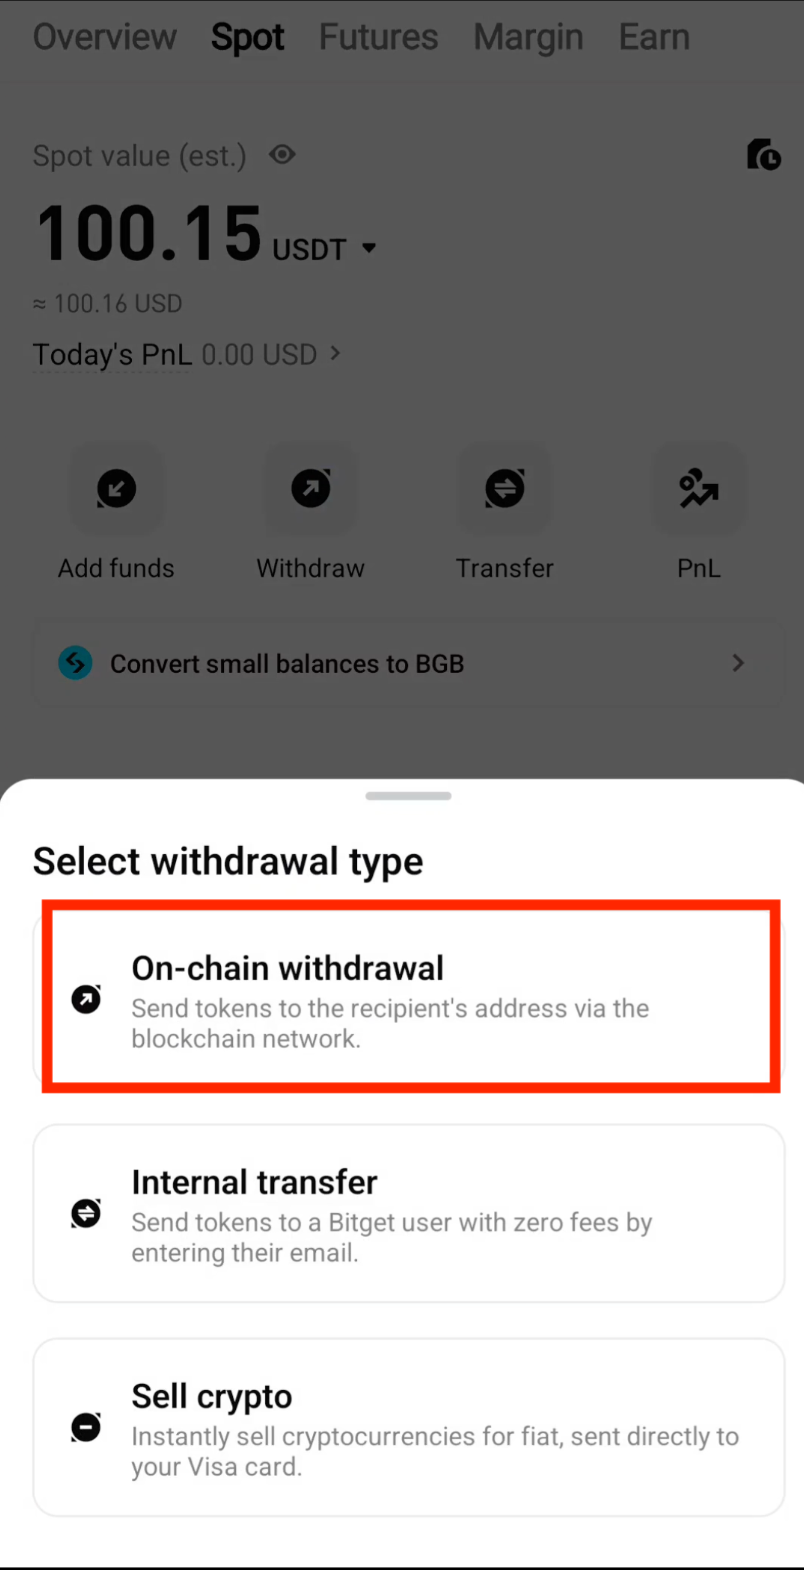
Step 7: Select On-Chain Withdrawal
Select On-chain withdrawal to send USDT to your CoinTech2u wallet address.
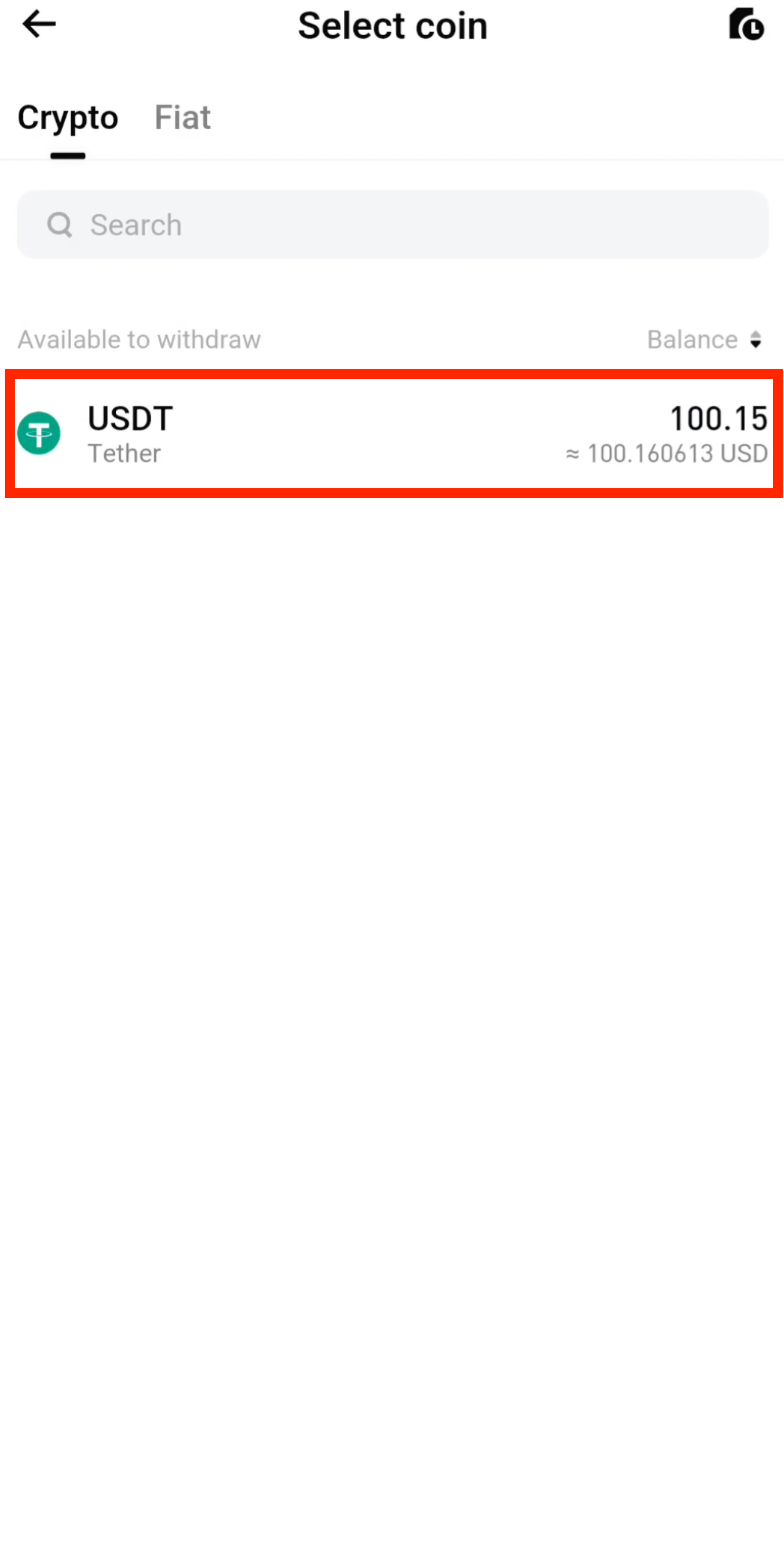
Step 8: Select USDT
Select USDT as the asset you want to withdraw.
Step 9: Paste Your Deposit Address
Tap Paste to enter your CoinTech2u wallet deposit address that you copied earlier.
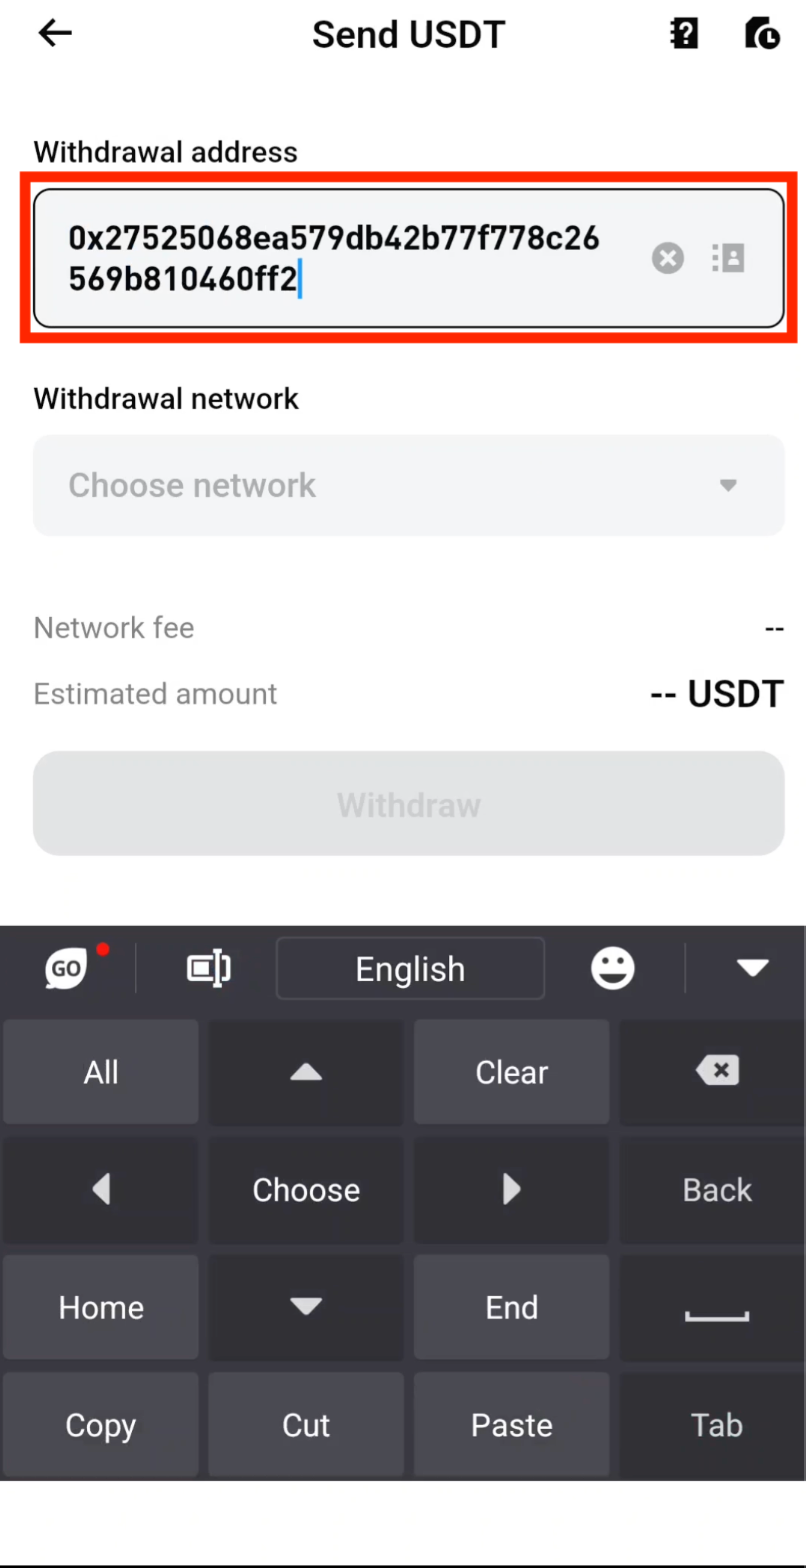
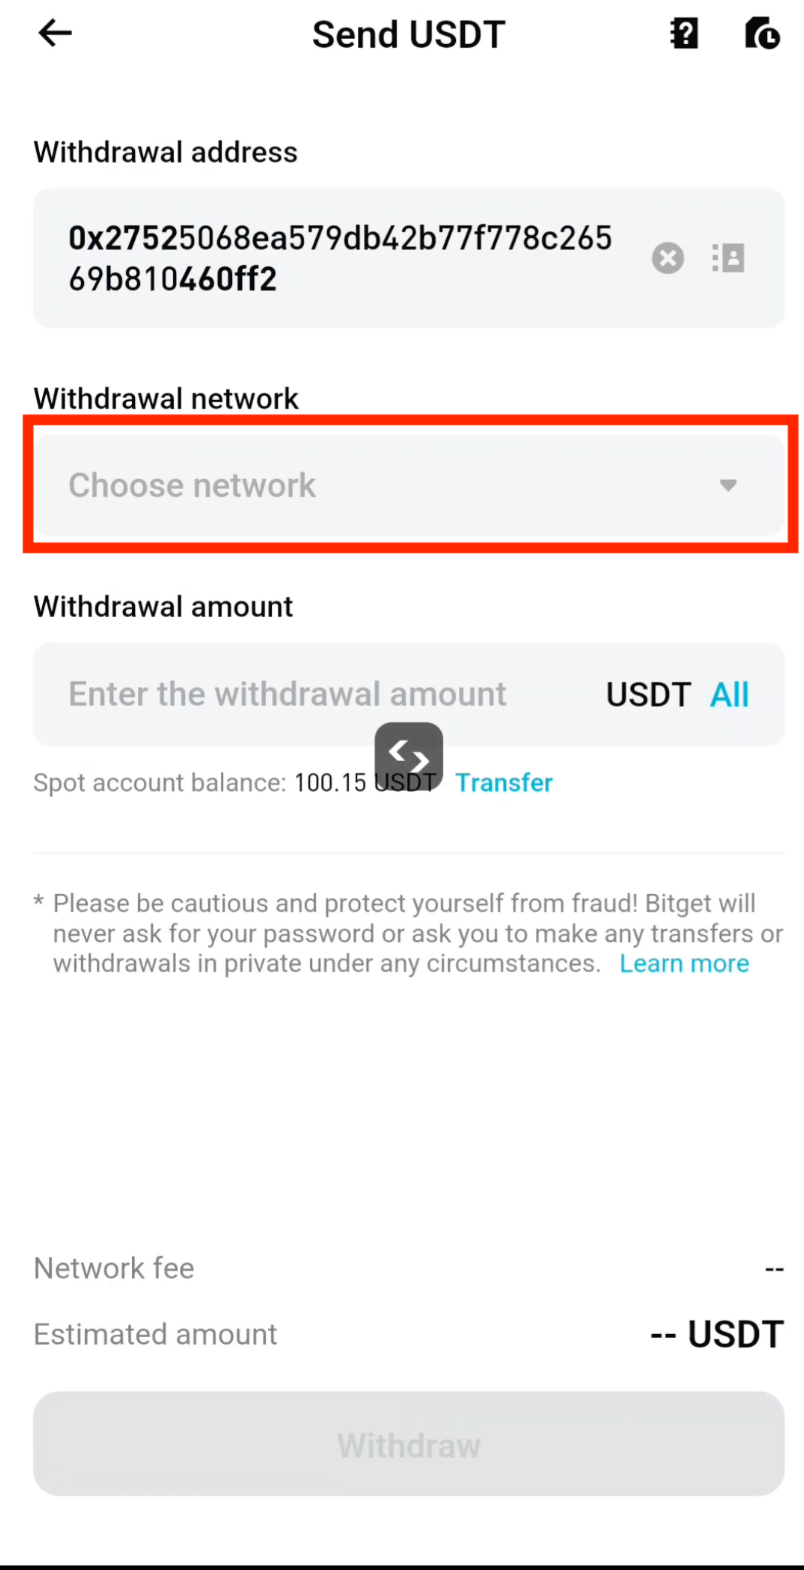
Step 10: Choose Network
Tap Choose network to select the withdrawal network.
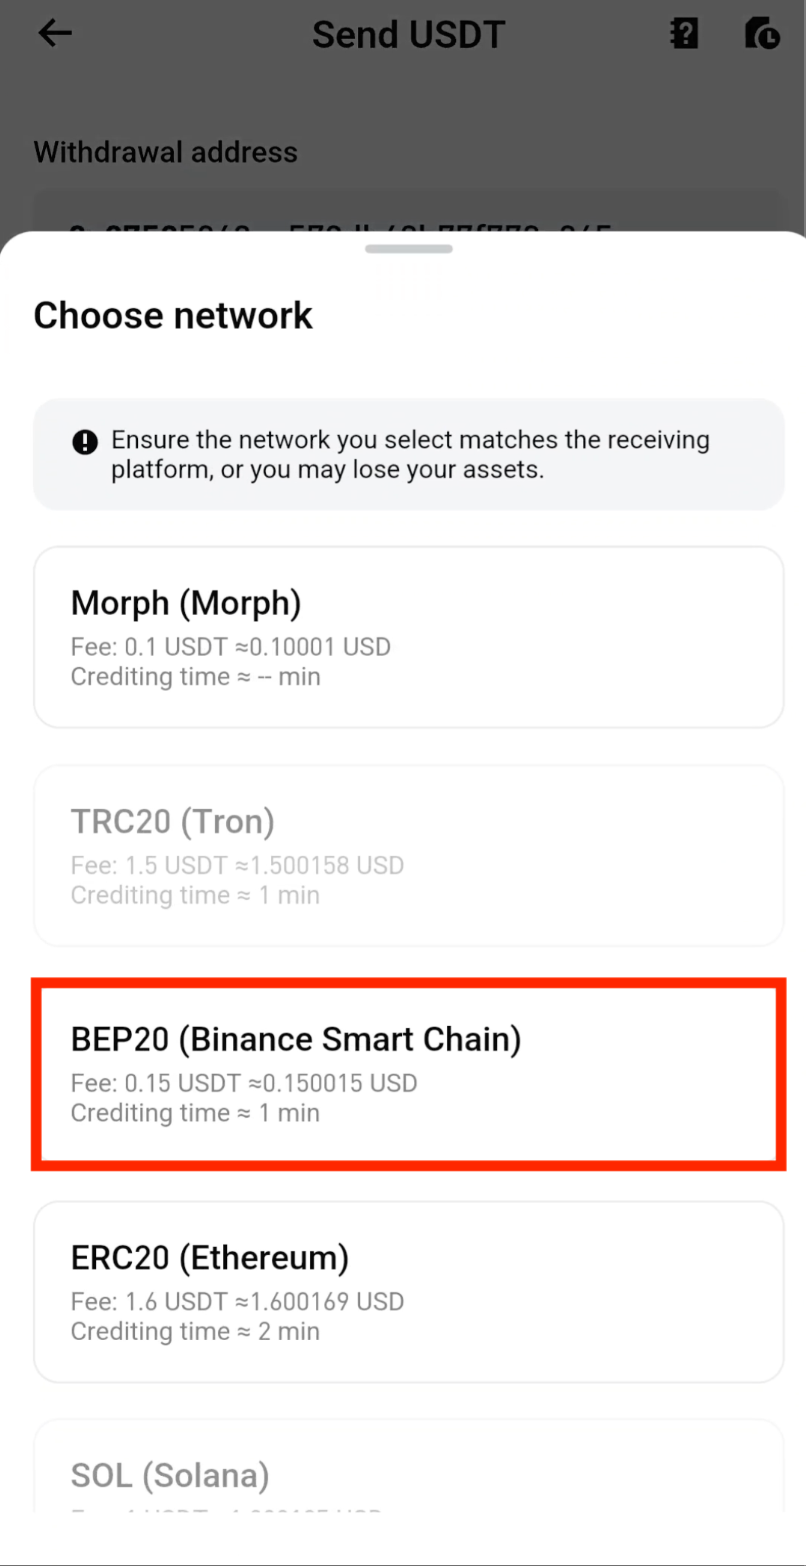
Step 11: Select BEP20 Network
Select BEP20 as the withdrawal network. This must match the deposit address network on CoinTech2u.
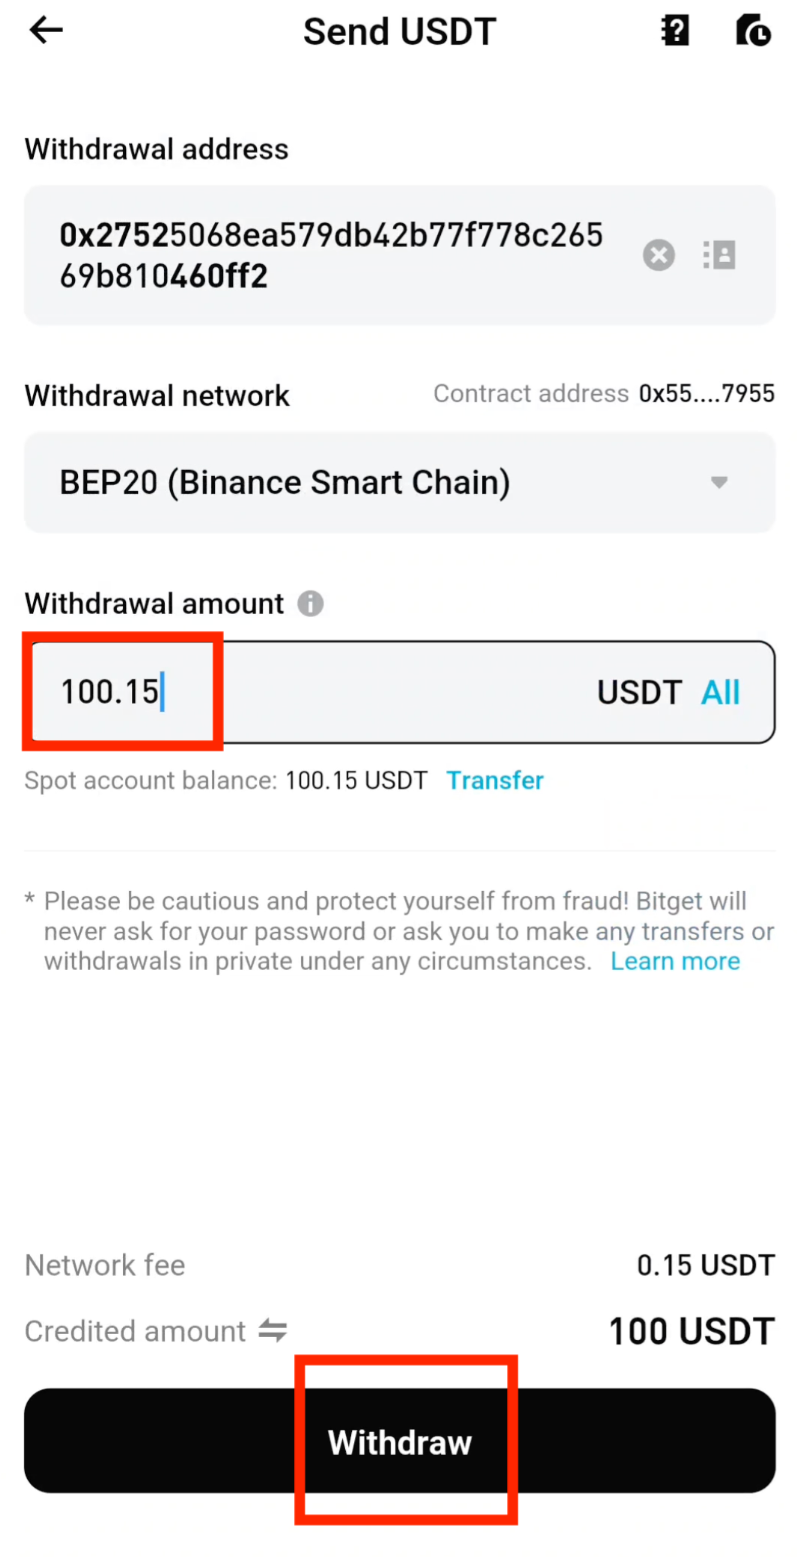
Step 12: Enter Amount and Withdraw
Enter the USDT amount you want to withdraw to your CoinTech2u wallet, then tap Withdraw.
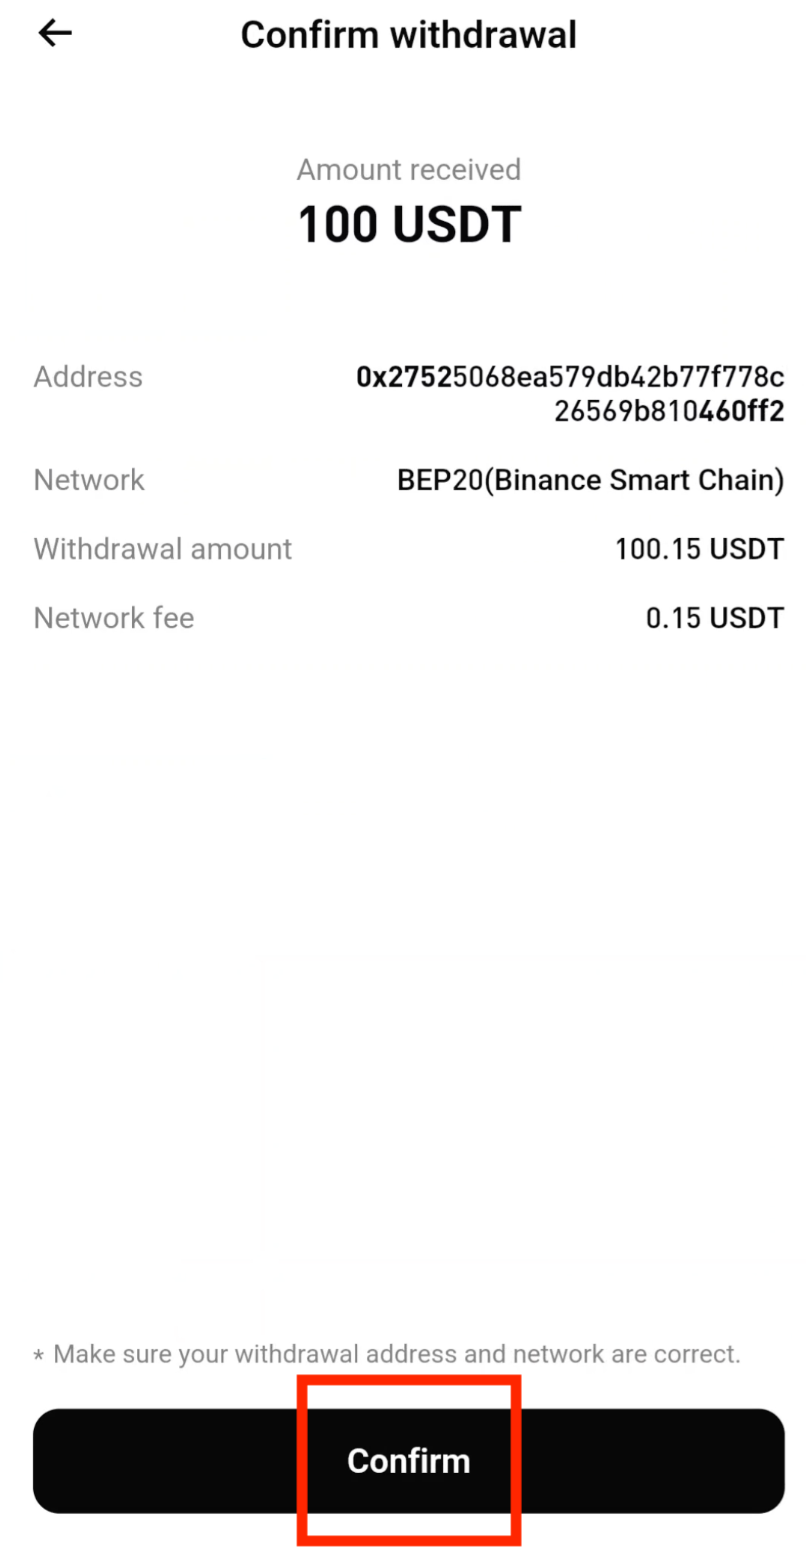
Step 13: Verify Details and Confirm
Carefully verify that the deposit address is correct and that you are withdrawing USDT via the BEP20 network. After confirming all details are correct, tap Confirm.
Step 14: Enter Verification Codes
Enter the Email Verification Code and the Google Authenticator Code, then tap Confirm to proceed with the withdrawal.

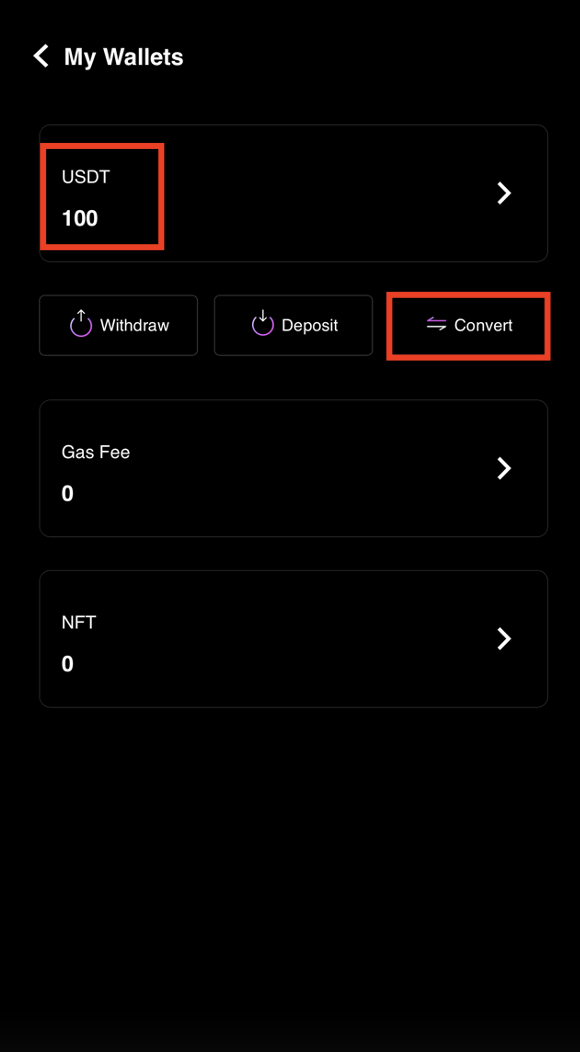
Convert to Gas Fee
Step 15: Check Your CoinTech2u Wallet and Tap "Convert"
Return to your CoinTech2u wallet. After receiving your USDT (usually within a few minutes), tap Convert to begin converting USDT to Gas Fee.
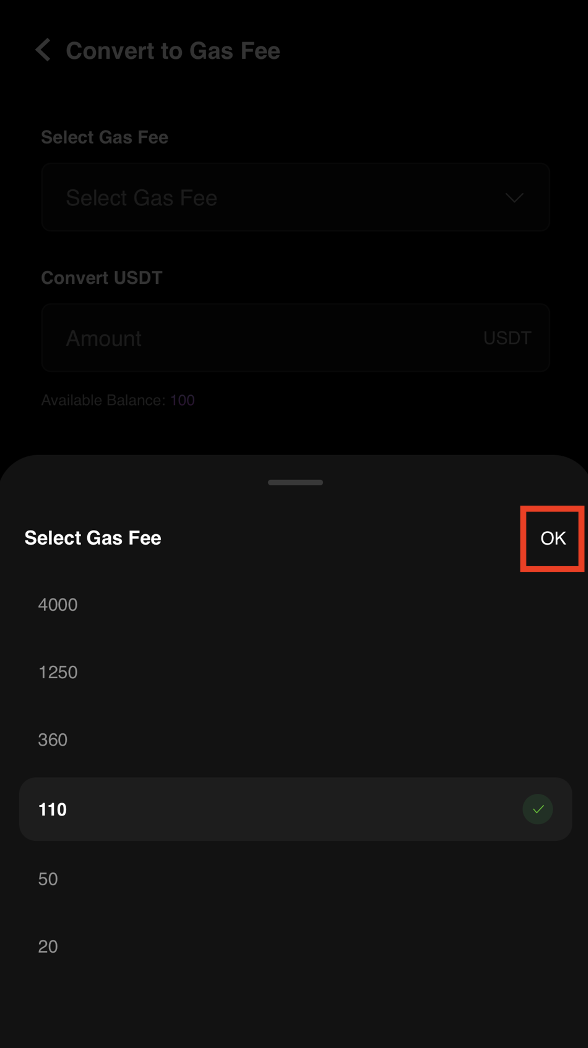
Step 16: Select Gas Fee Amount
Select the amount of Gas Fee you want to purchase based on your trading needs, then tap OK.
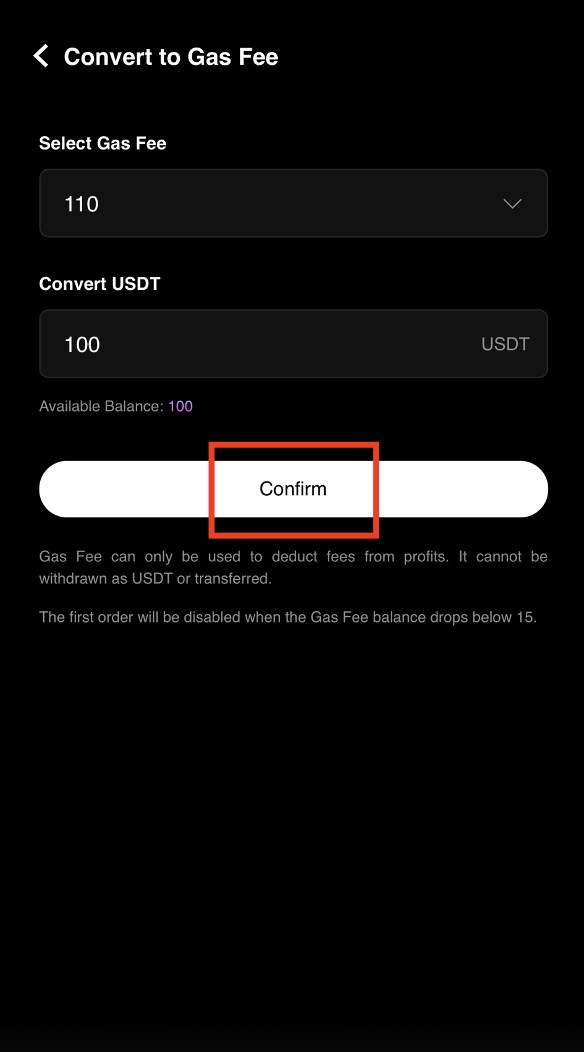
Step 17: Confirm the Conversion
Tap Confirm to complete the conversion from USDT to Gas Fee. Your Gas Fee balance will be updated immediately and you can now start AI trading.
Frequently Asked Questions
What is Gas Fee in CoinTech2u and why do I need it?
Gas Fee in CoinTech2u is the operational cost required to run the AI trading bot. It covers the computational resources and API calls needed for the AI to analyze markets, execute trades, and manage your portfolio 24/7. Without sufficient Gas Fee balance, the AI trading bot cannot operate.
Which network should I use to deposit USDT to CoinTech2u?
You must use the BEP20 (BSC - BNB Smart Chain) network to deposit USDT to your CoinTech2u wallet. This is the only supported network. Using any other network such as ERC20, TRC20, or others will result in permanent loss of your funds. Always double-check both the sending and receiving network before confirming.
What happens if I use the wrong network to deposit USDT?
If you send USDT using the wrong network (e.g., ERC20 or TRC20 instead of BEP20), your funds will be permanently lost and cannot be recovered. Different blockchain networks have incompatible addresses, and tokens sent to the wrong network cannot be retrieved. Always verify you have selected BEP20 on both sides before confirming.
What's Next?
You now have Gas Fee in your CoinTech2u wallet. The final step is to start AI trading using Quick Setup!
Next: Start AI Trading →Ready to Start Trading?
Convert your USDT to Gas Fee and let the AI trading bot work for you 24/7.