Enable 2-Factor Authentication
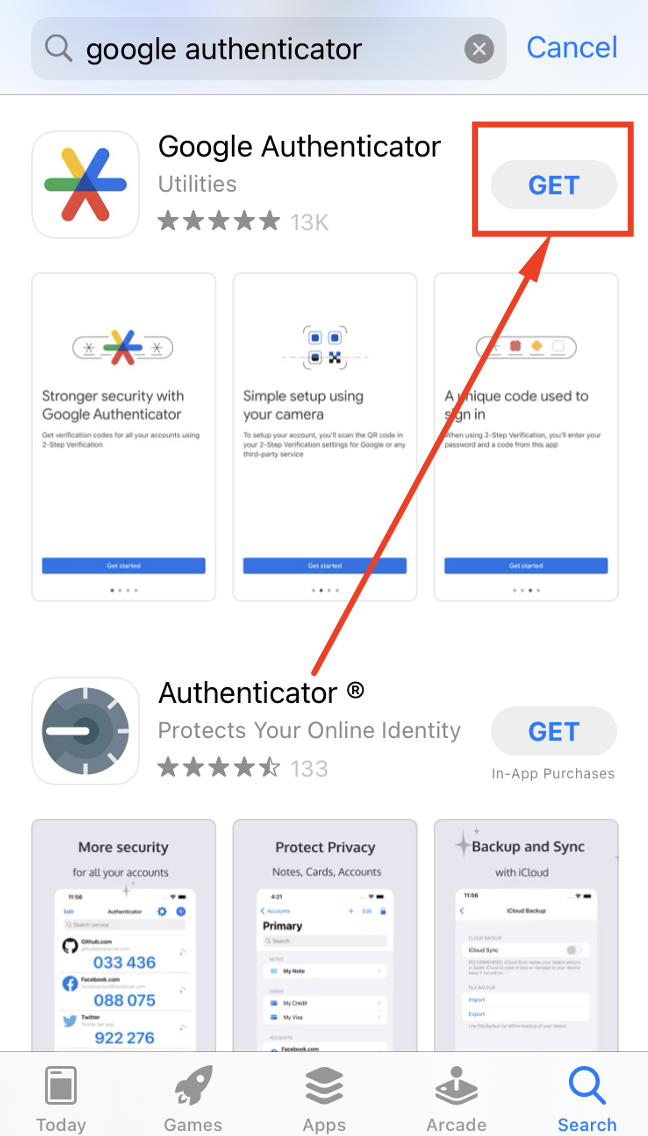
Step 1: Download Google Authenticator
Download Google Authenticator from the App Store (iOS) or Play Store (Android).
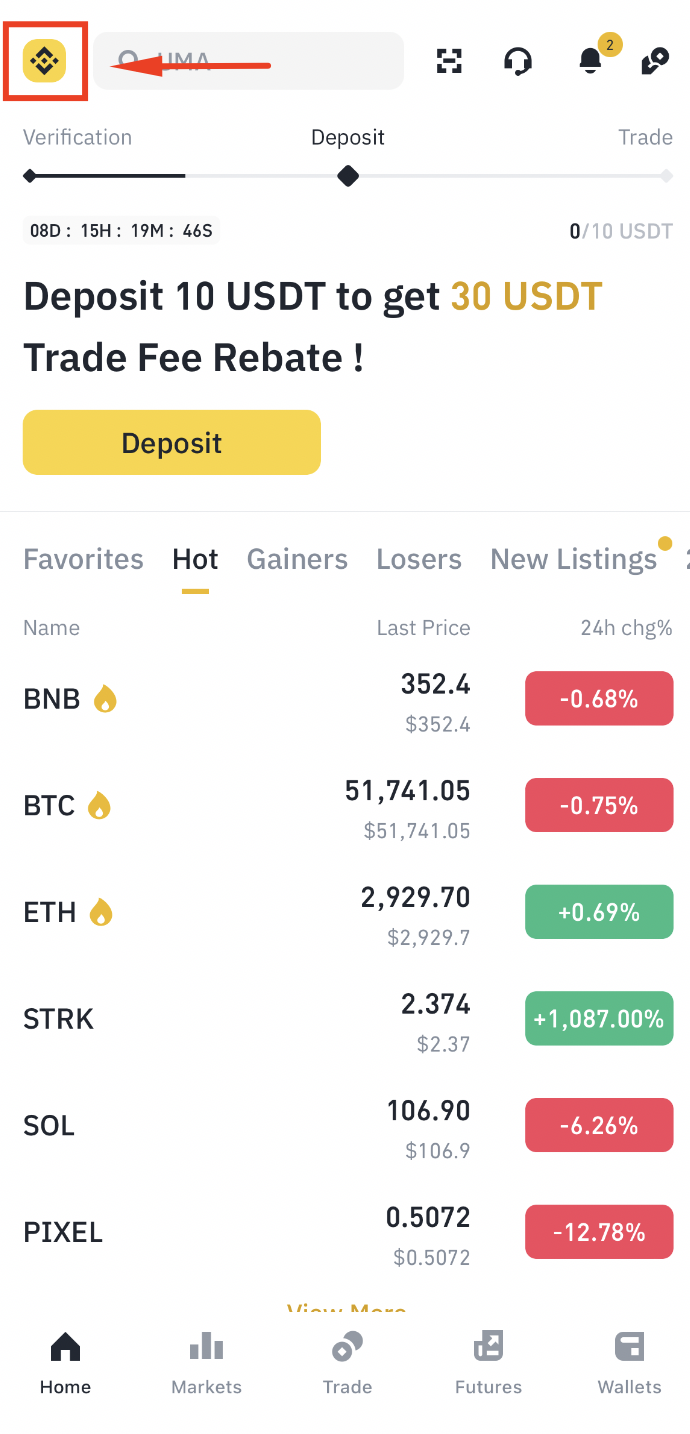
Step 2: Open Your Binance Profile
Go to the Binance App homepage and tap the profile icon in the top left.
Step 3: Tap Your Account ID
Tap your account ID to open account settings.

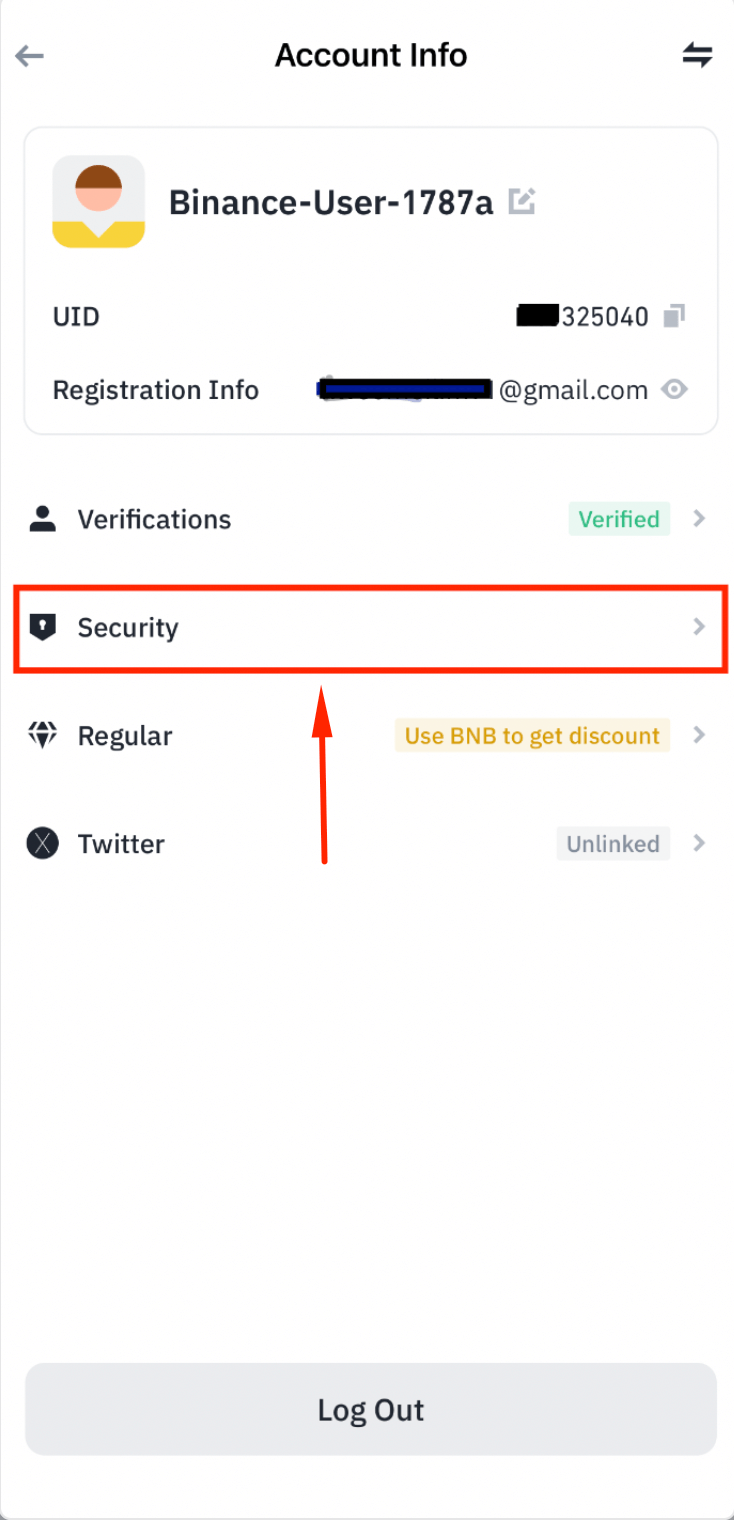
Step 4: Go to Security Settings
Tap [Security] to access security options.
Step 5: Select Authenticator App
Tap [Authenticator App] from the security options list.

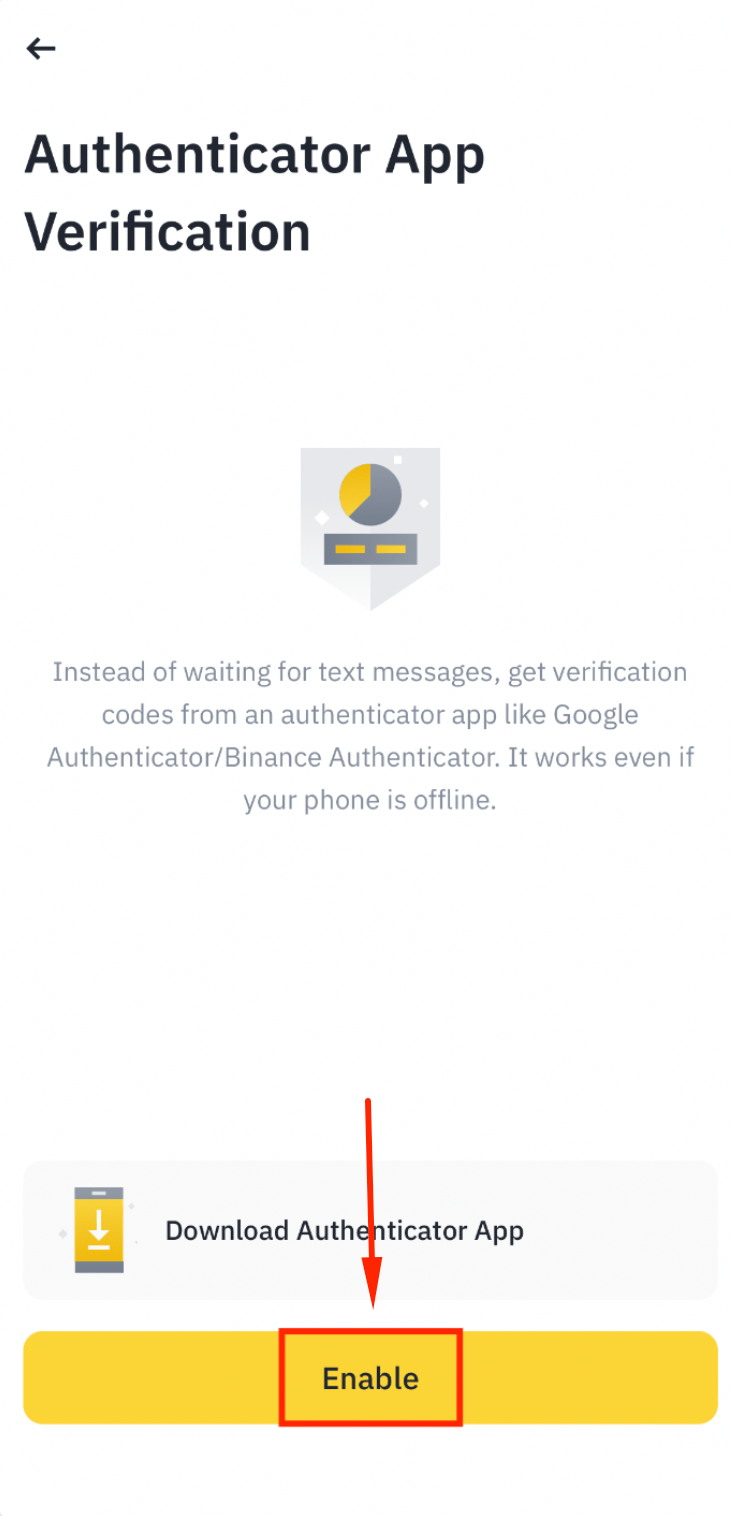
Step 6: Enable the Authenticator
Tap [Enable] to begin the 2FA setup.
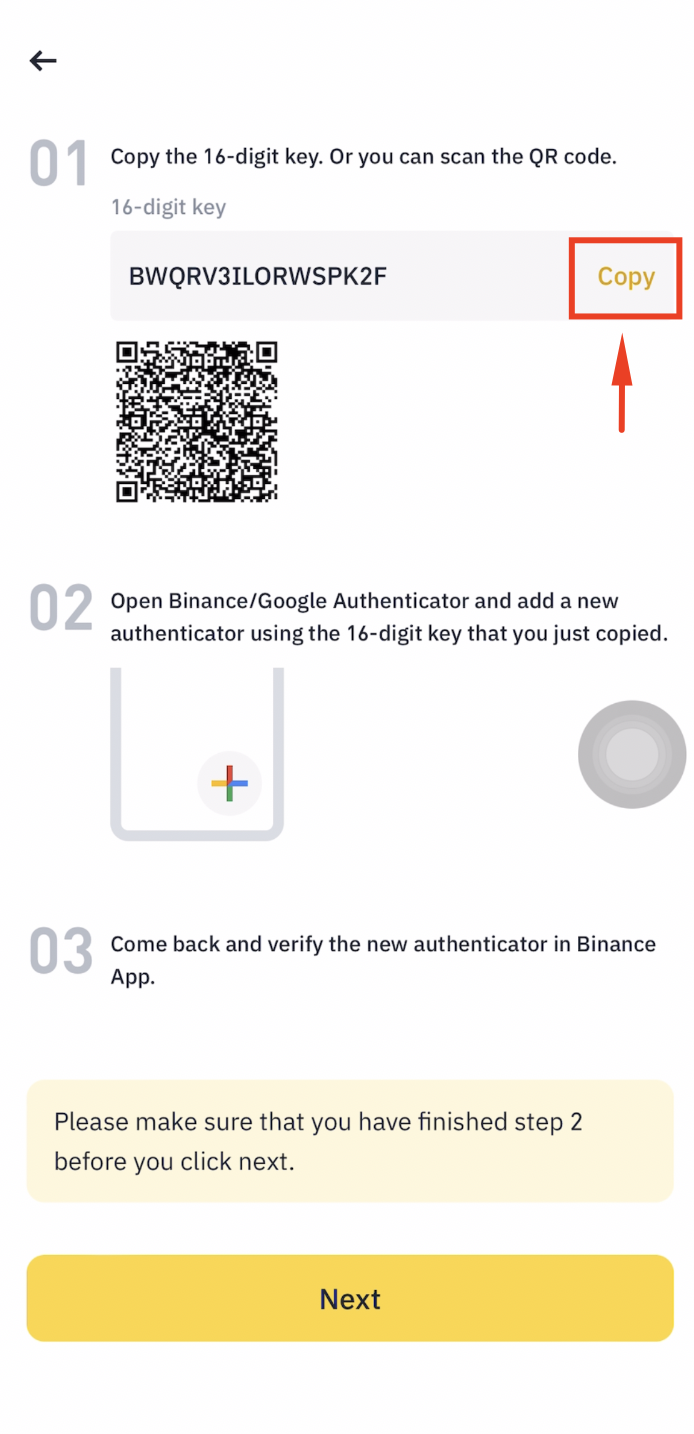
Step 7: Copy the Setup Key
Tap [Copy] to copy the setup key to your clipboard.
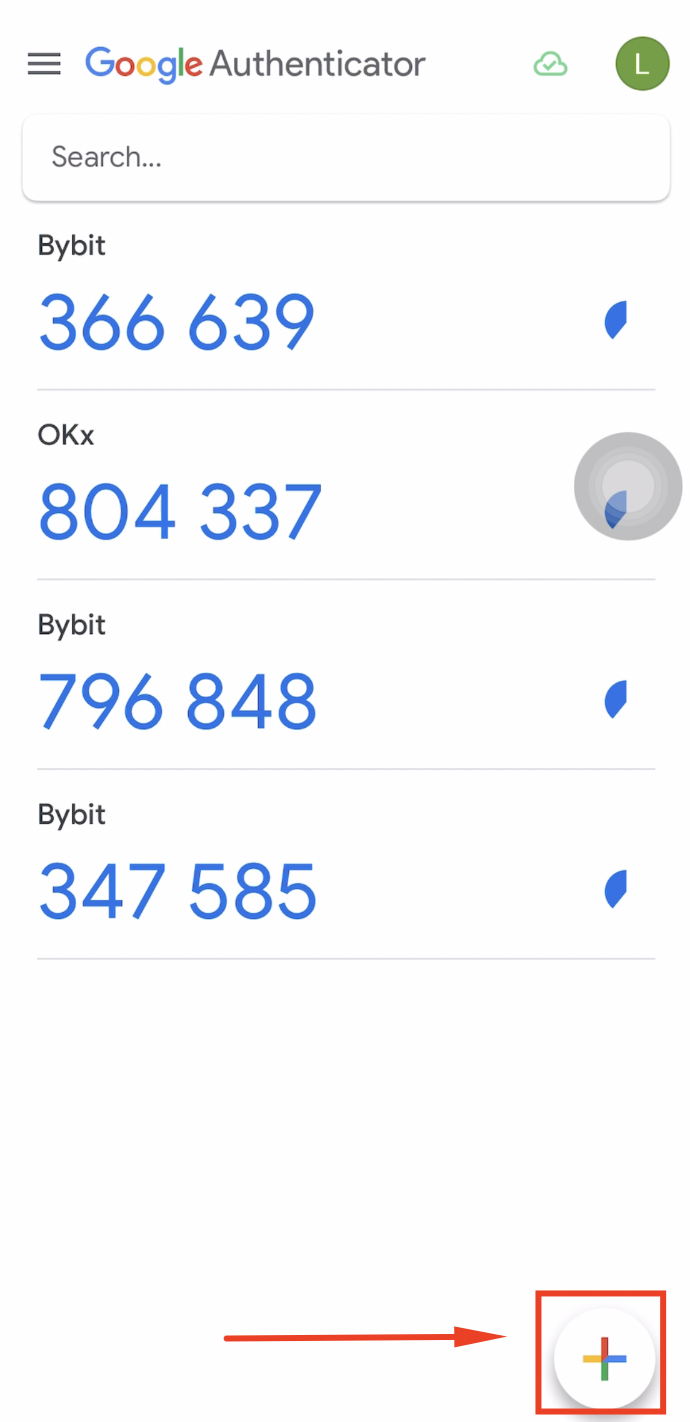
Step 8: Open Google Authenticator
Open the Google Authenticator app and tap the [+] button.
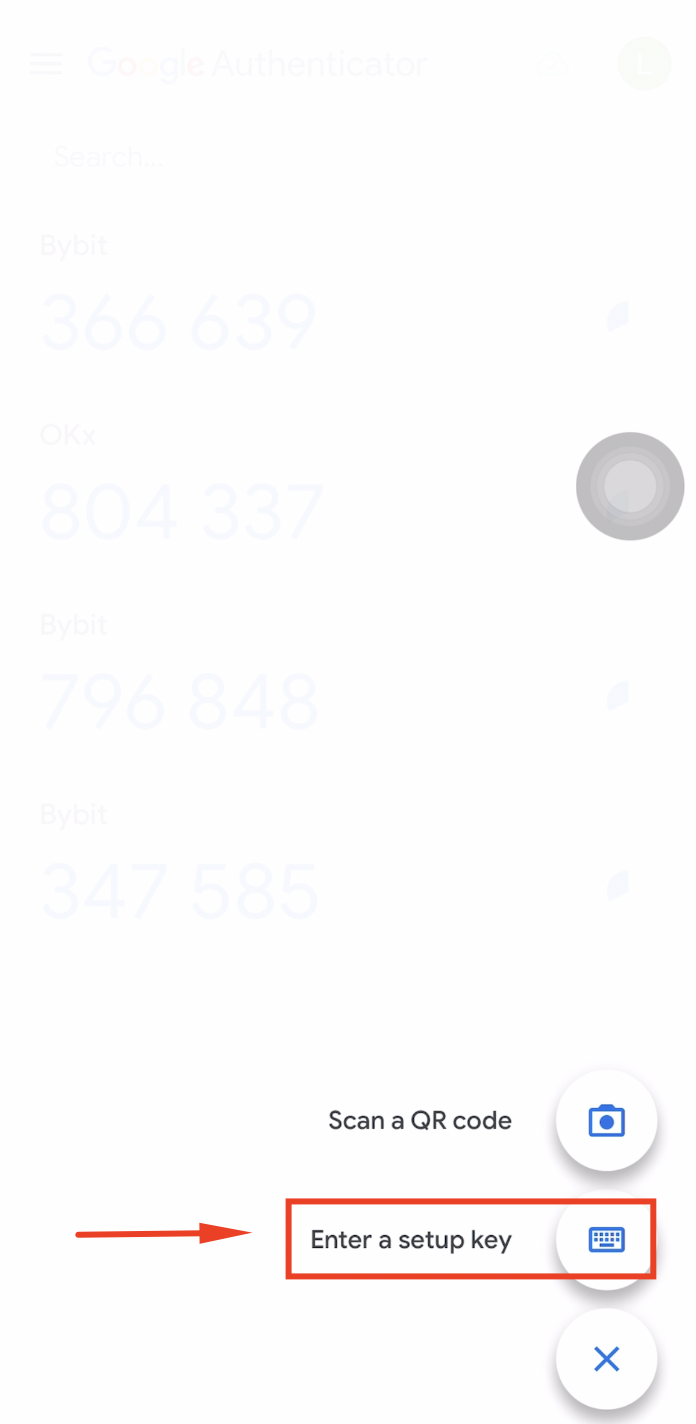
Step 9: Enter a Setup Key
Tap [Enter a setup key] to manually add the account.
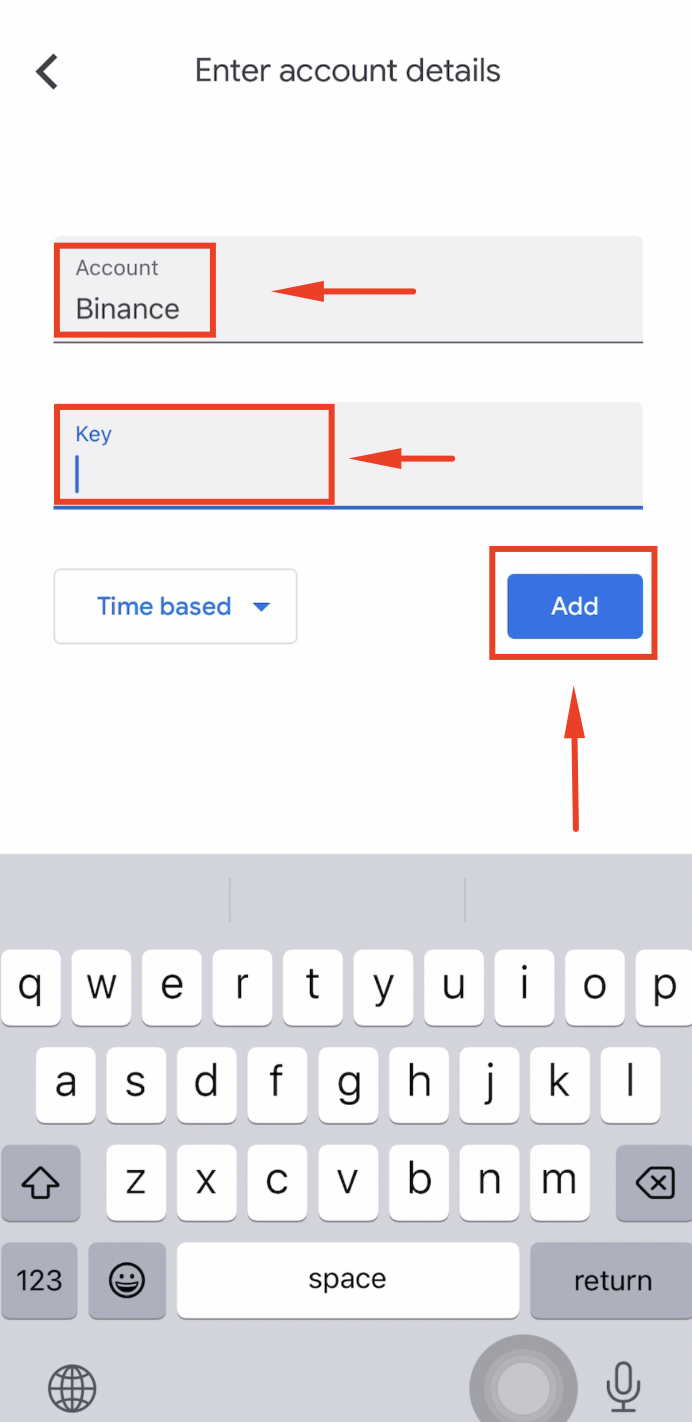
Step 10: Add the Binance Account
Type "Binance" as the account name, paste the setup key, and tap [Add].
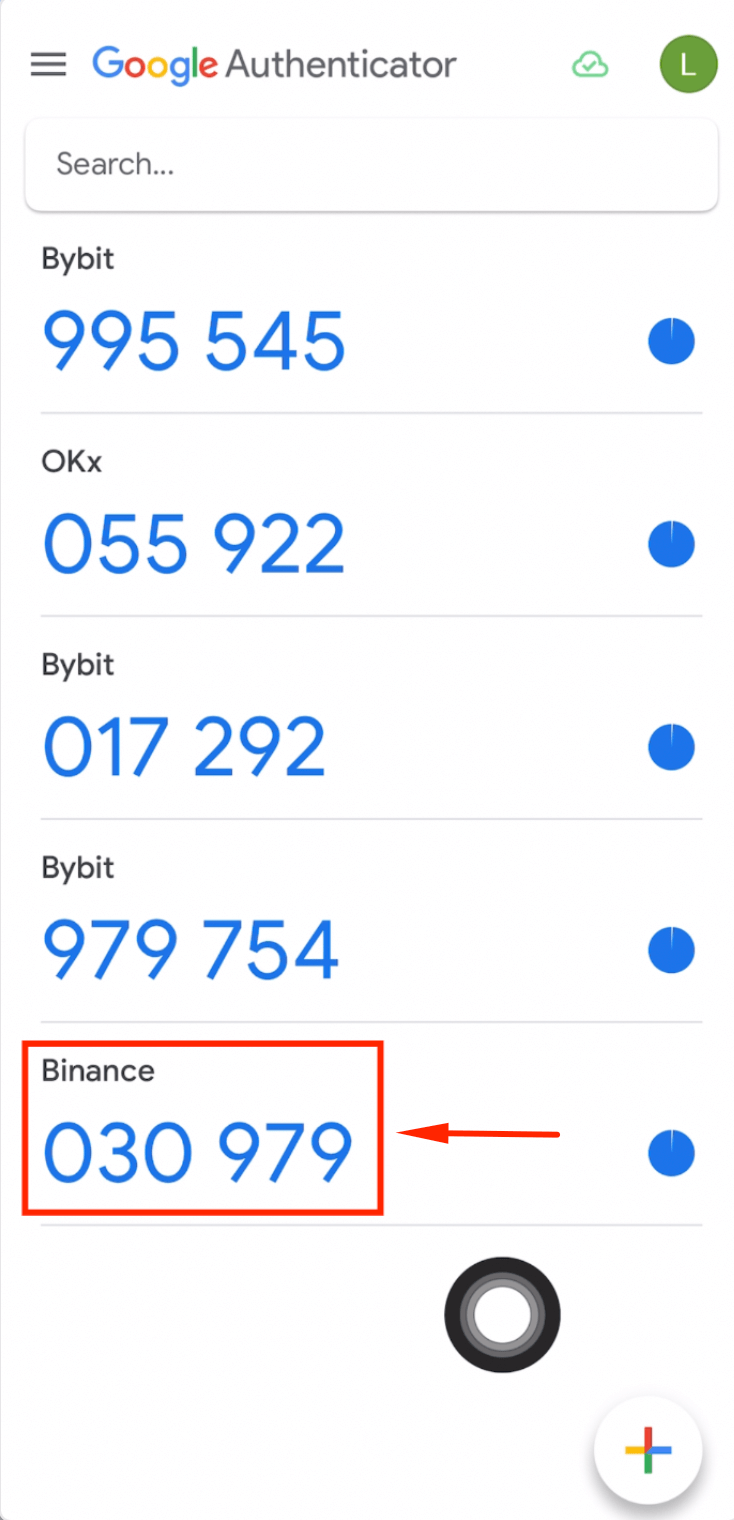
Step 11: Copy the 6-Digit Code
Copy the 6-digit verification code displayed for Binance in Google Authenticator.
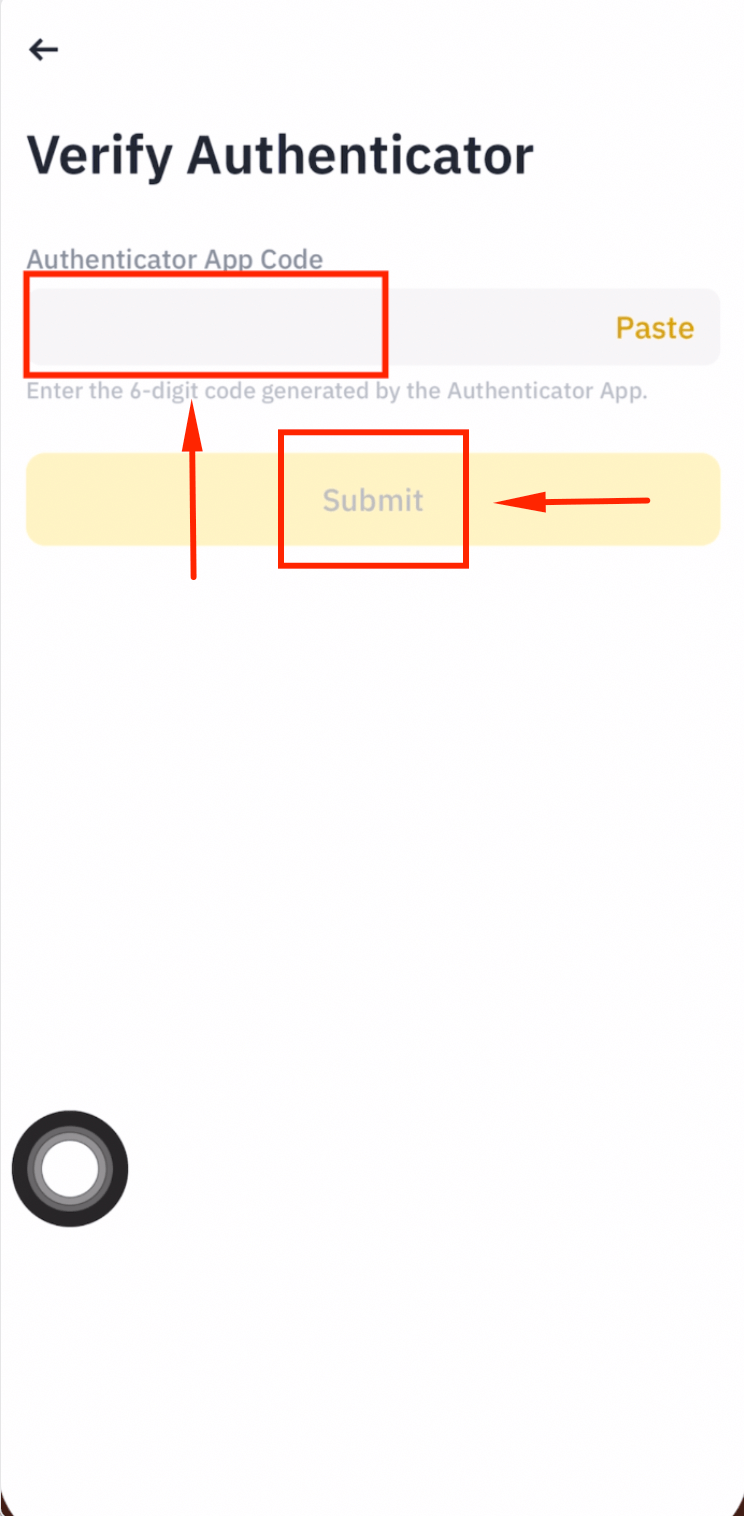
Step 12: Submit the Code in Binance
Go back to Binance, paste the 6-digit code, and tap [Submit].
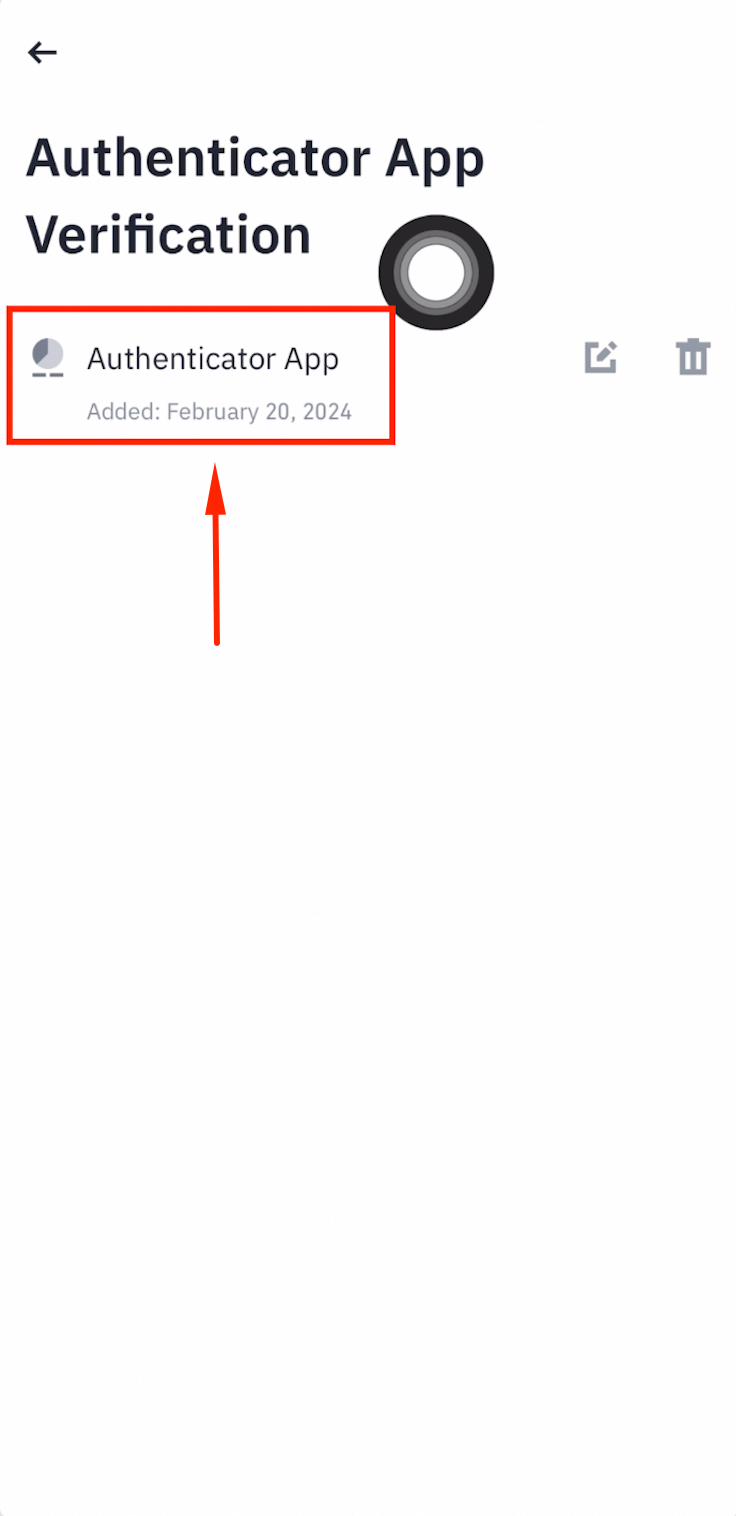
Step 13: 2FA Enabled Successfully
Authenticator App Verification is now enabled on your Binance account.
Activate Futures & Enable Hedge Mode
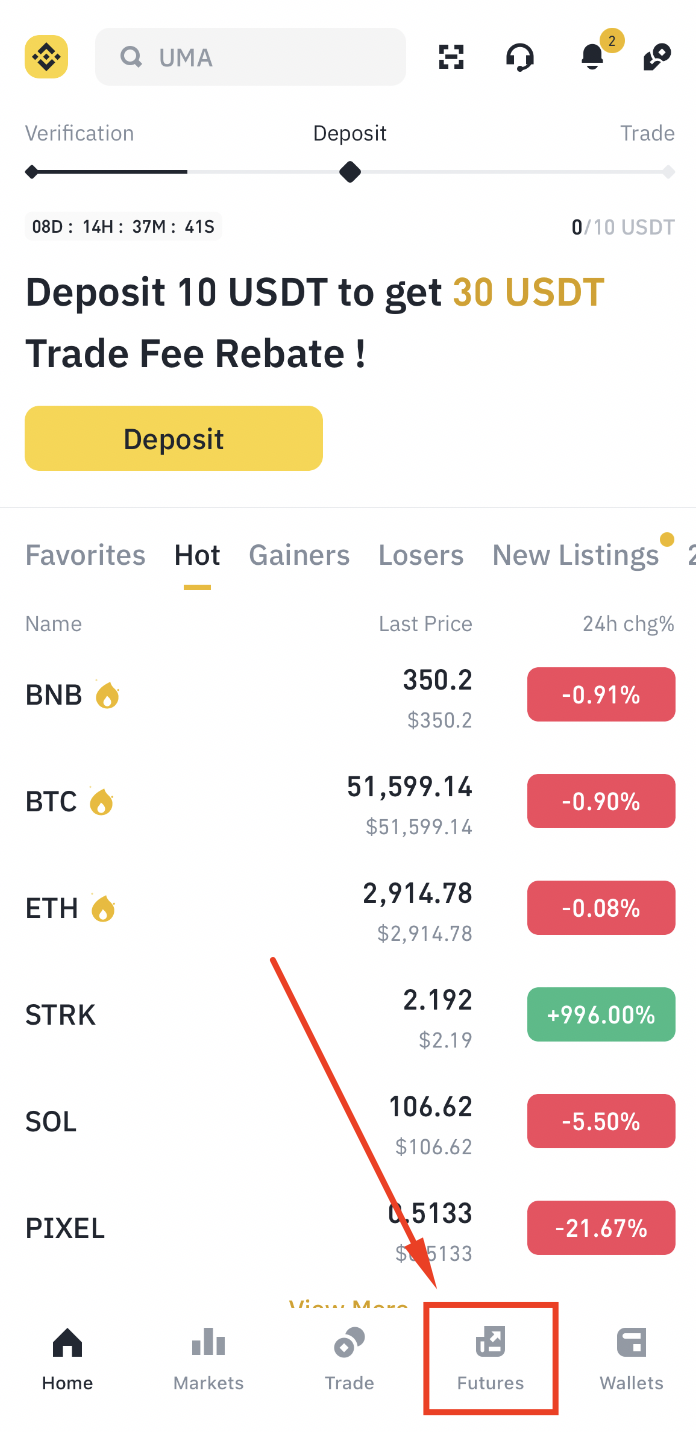
Step 1: Open the Futures Tab
Go to the Binance App homepage and tap [Futures].
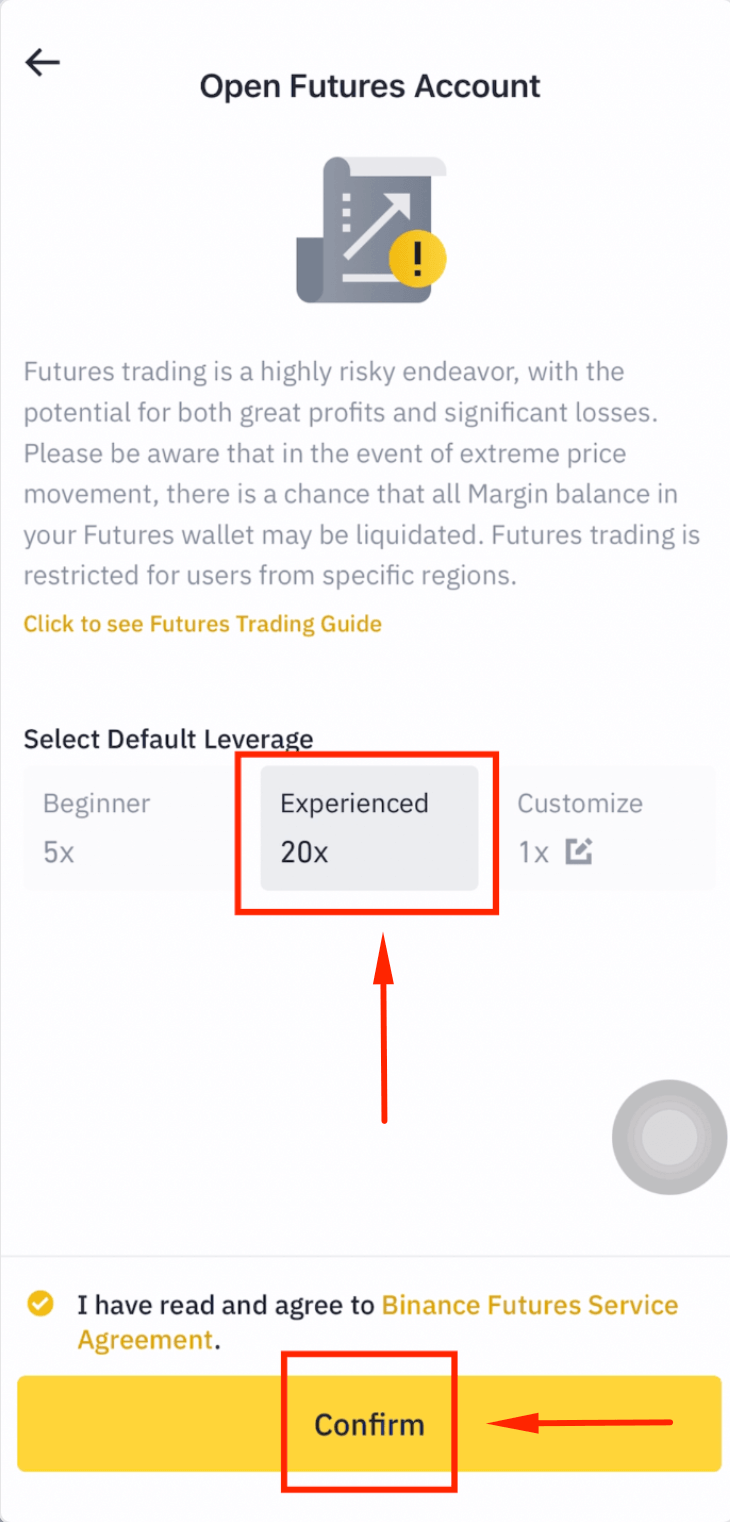
Step 2: Select 20x Leverage
Choose [20x] and tap [Confirm].
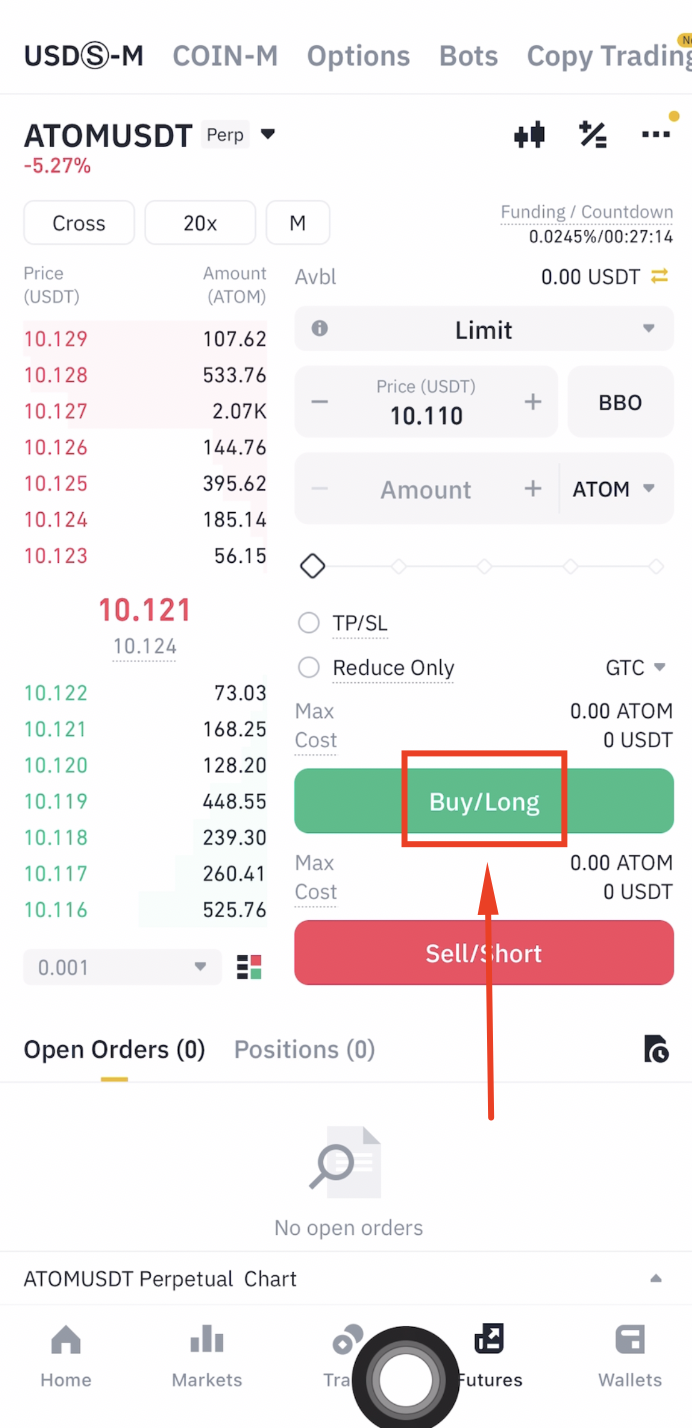
Step 3: Trigger the Futures Quiz
Tap [Buy/Long] to trigger the futures quiz popup.
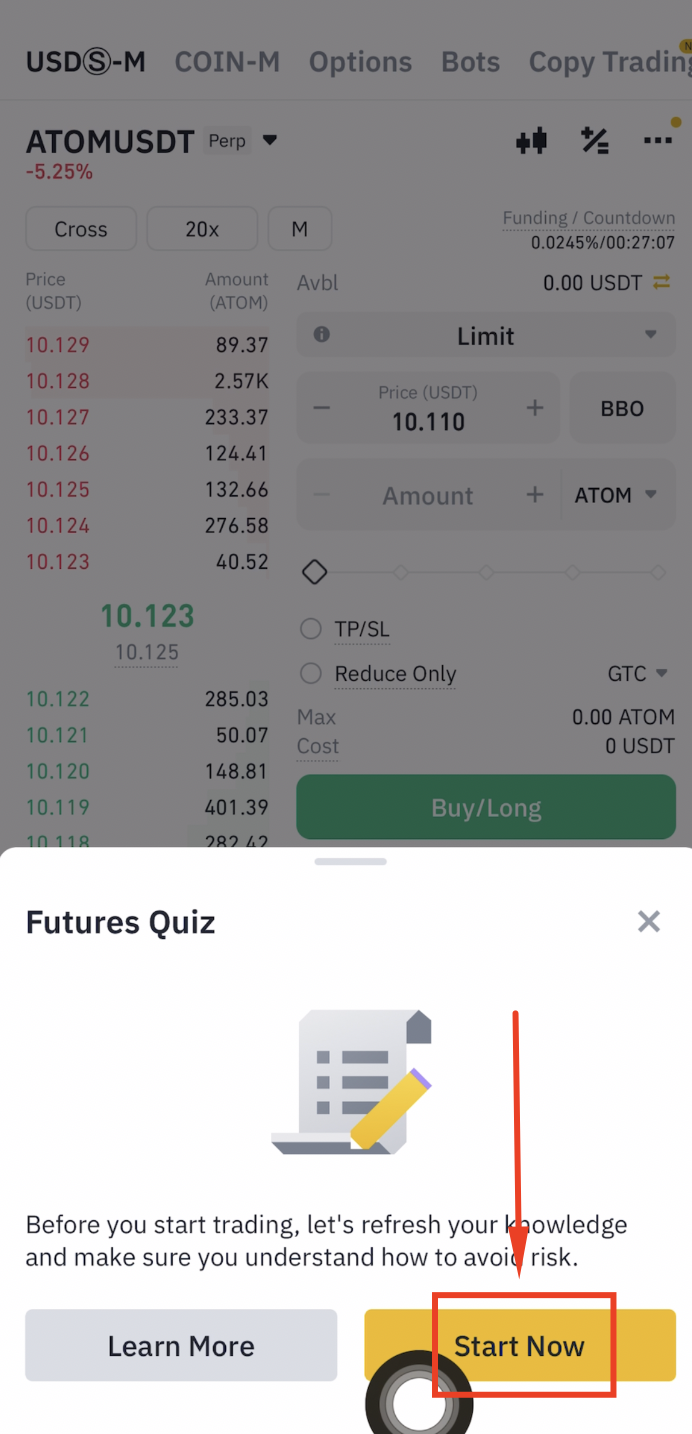
Step 4: Start the Quiz
Tap [Start Now] when the futures quiz pops up.
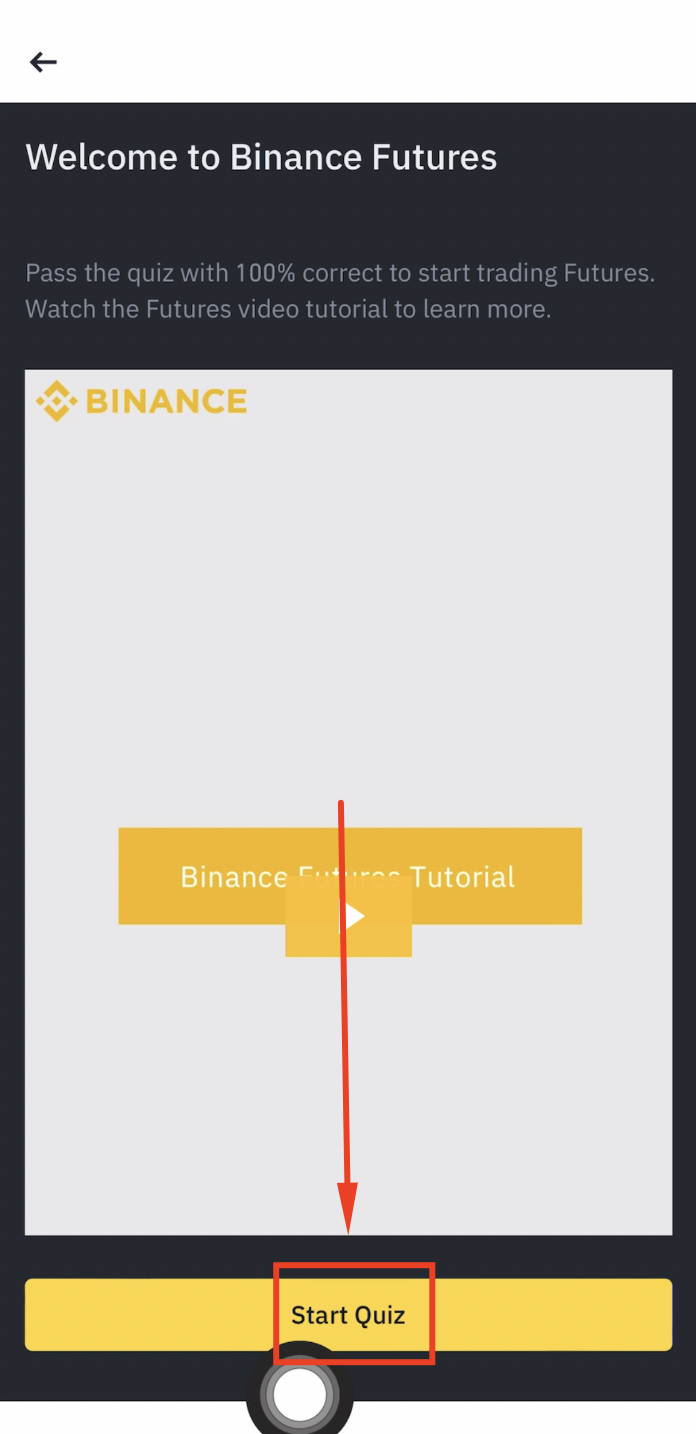
Step 5: Complete the Quiz
Tap [Start Quiz] and answer all questions correctly. Your futures account will be activated once you pass.
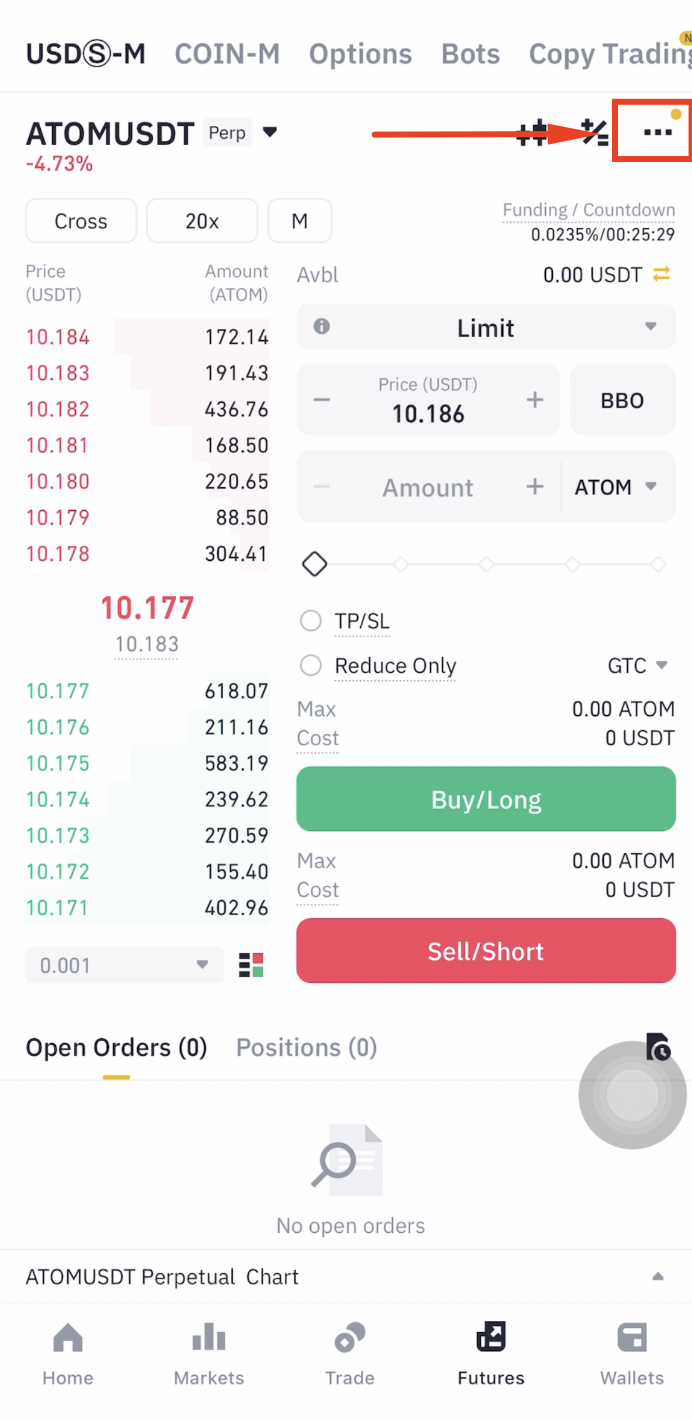
Step 6: Open Futures Settings
On the Futures page, tap the [...] menu icon.
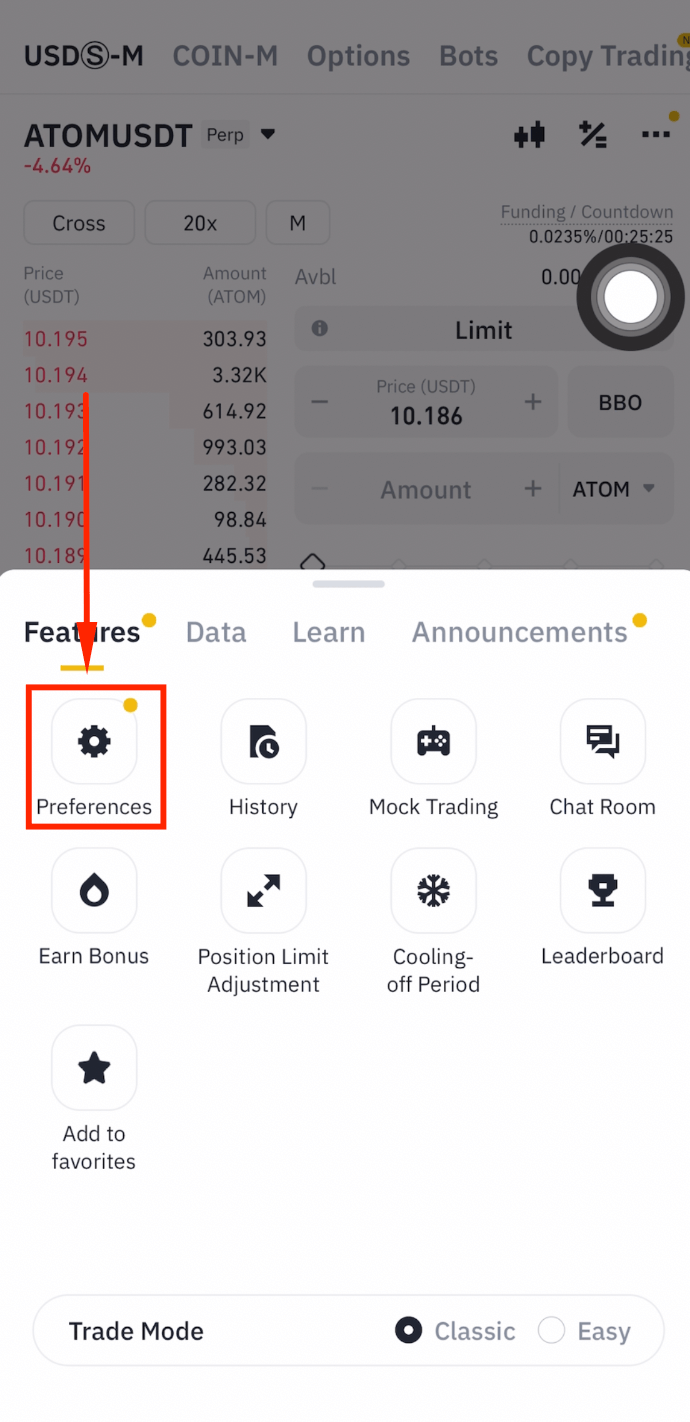
Step 7: Go to Preferences
Tap [Preferences].
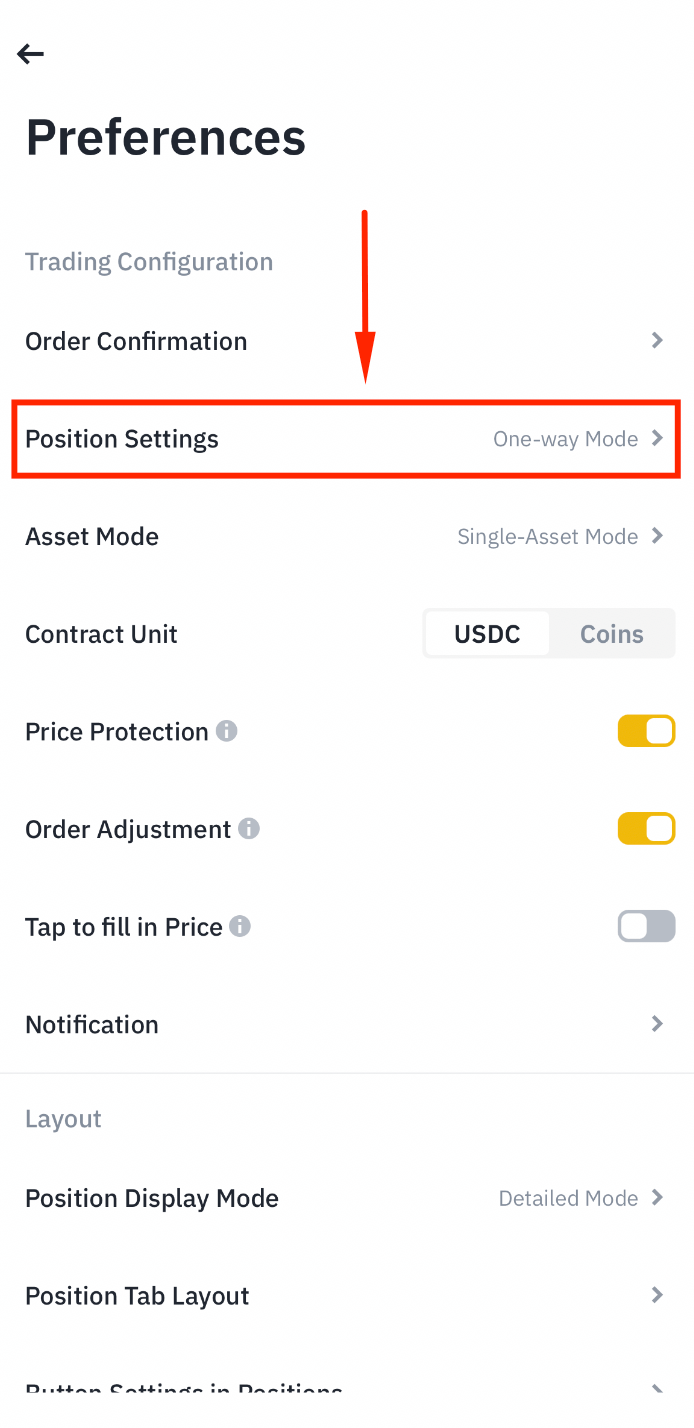
Step 8: Open Position Settings
Tap [Position Settings].
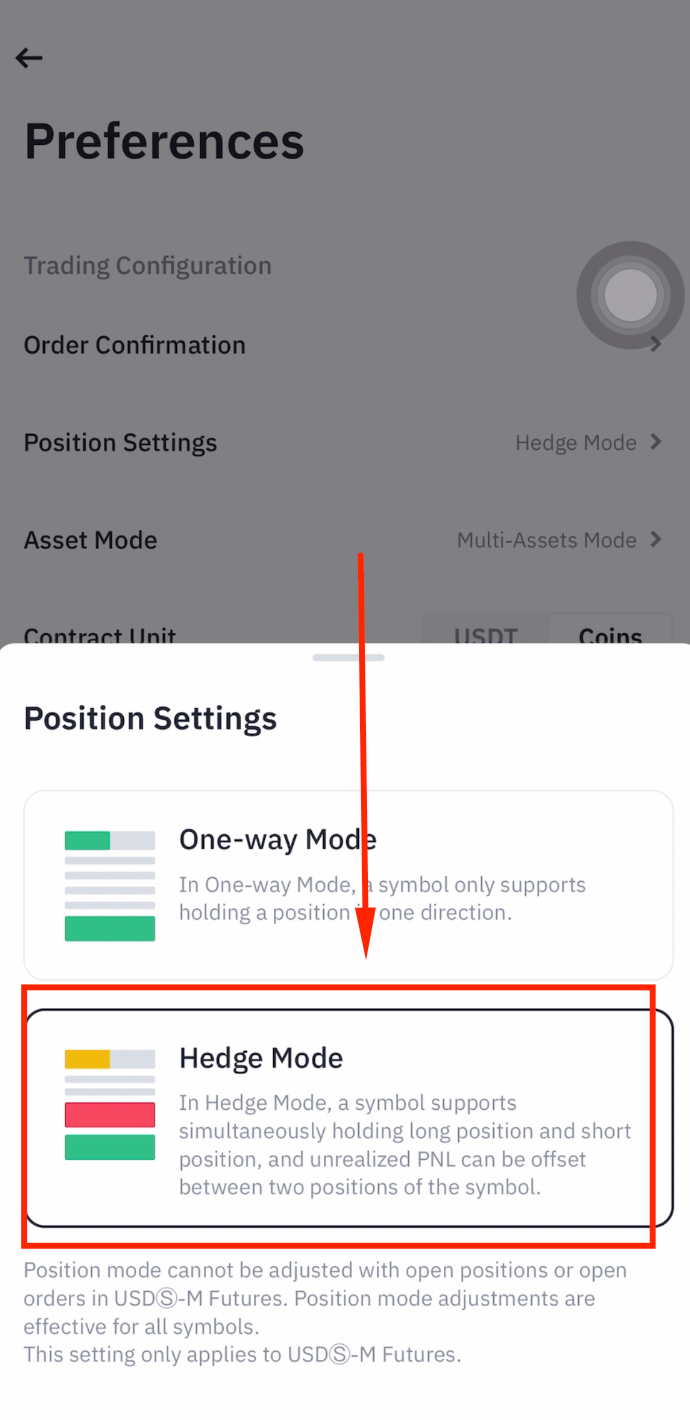
Step 9: Enable Hedge Mode
Select [Hedge Mode]. This allows the AI bot to hold both long and short positions simultaneously.
Create an API Key in Binance
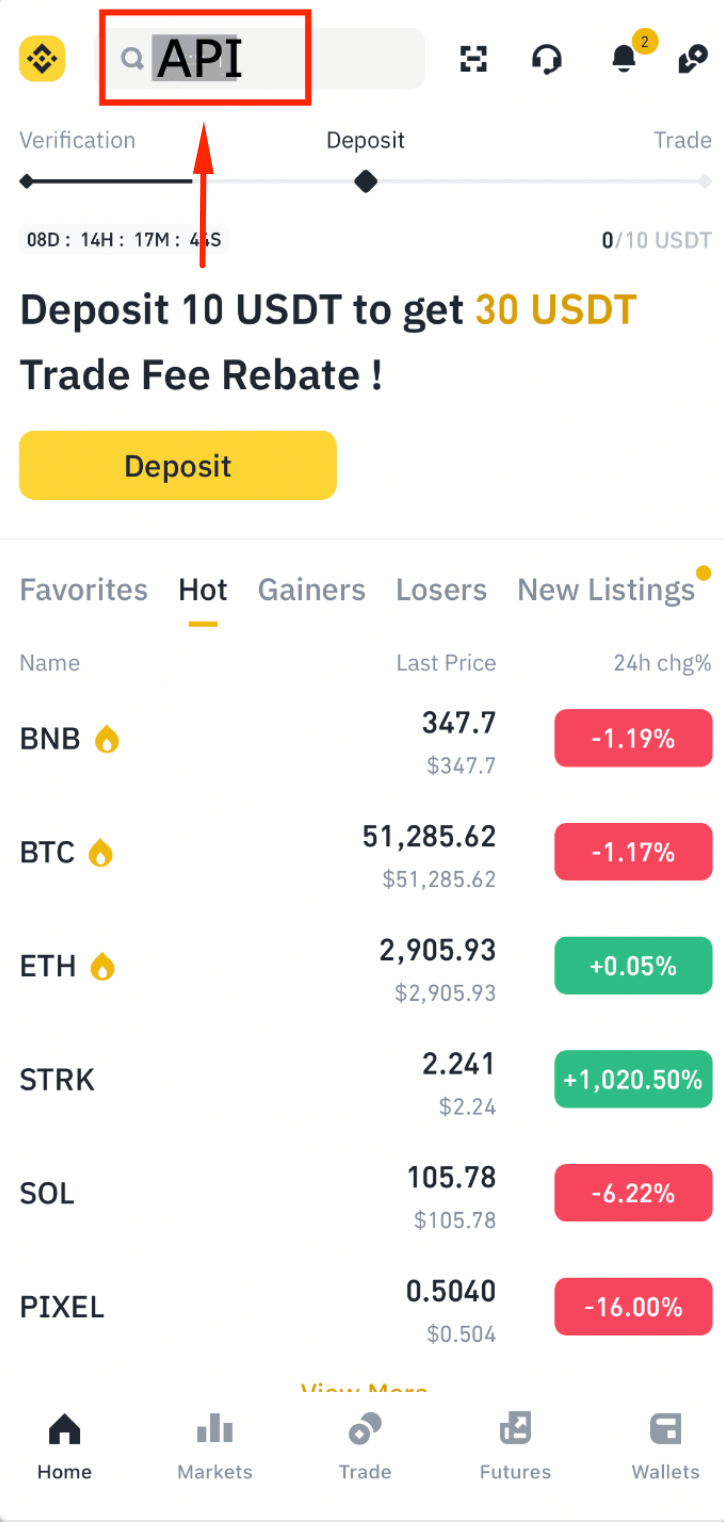
Step 1: Search for API
Go to the Binance App homepage and search for "API".
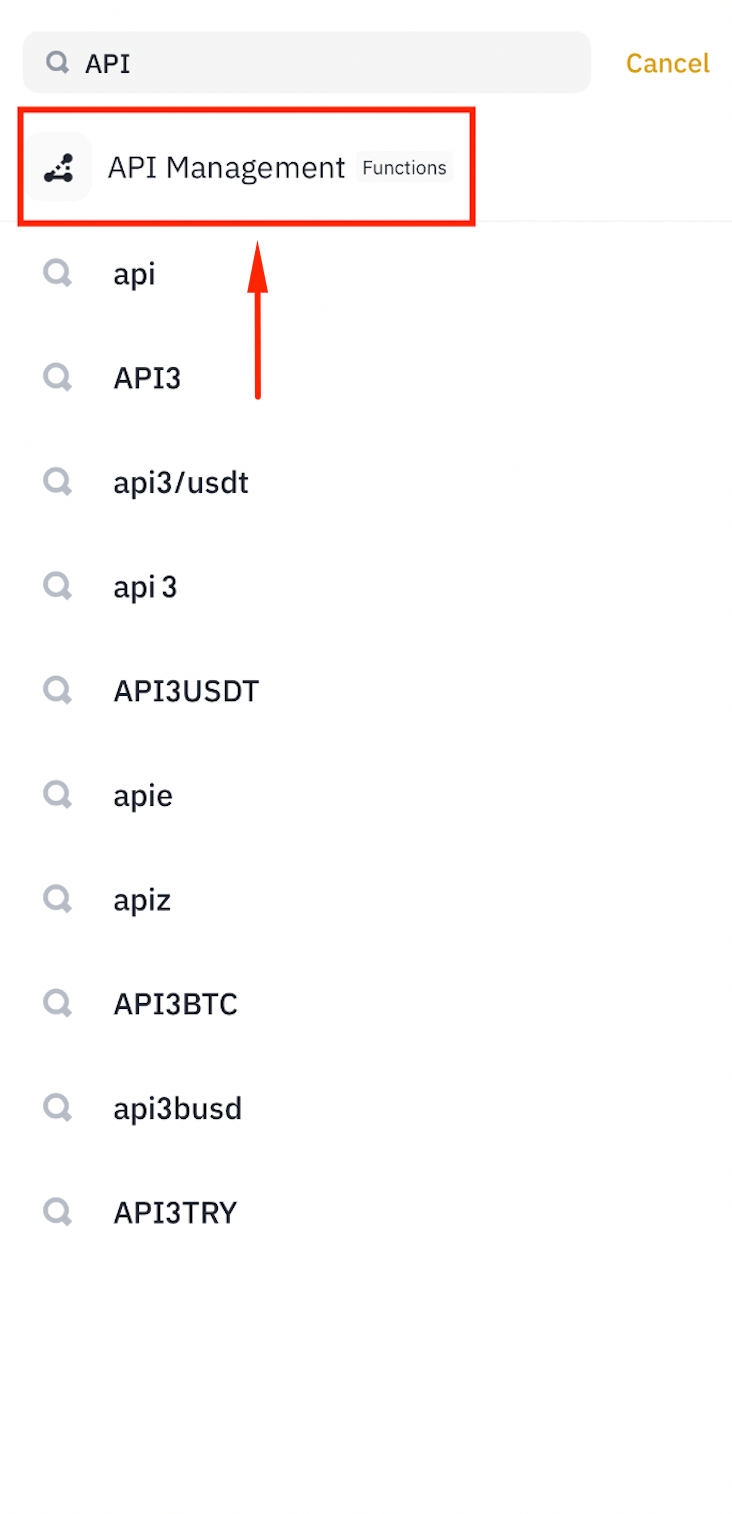
Step 2: Open API Management
Tap [API Management].
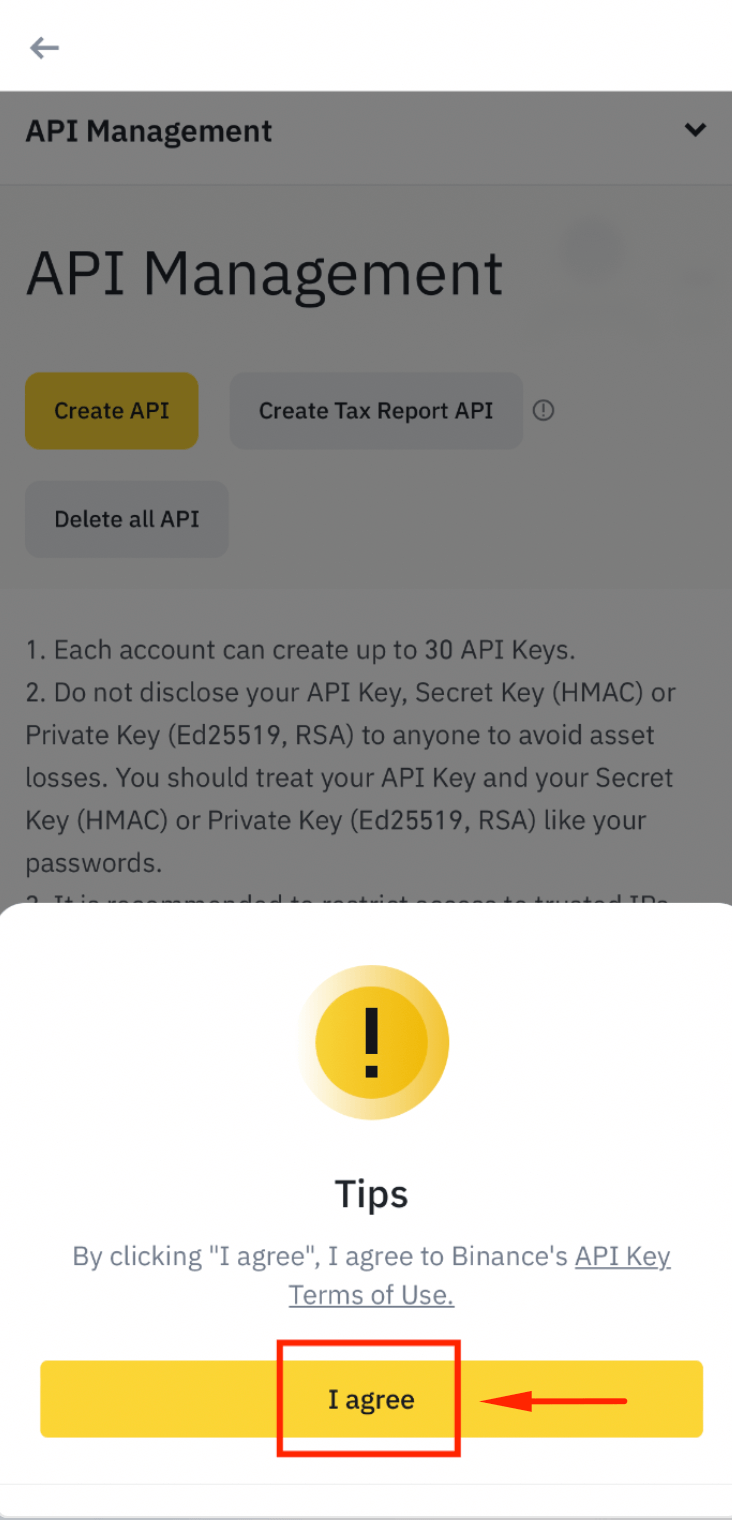
Step 3: Agree to the Terms
Tap [I agree] to accept the API terms.
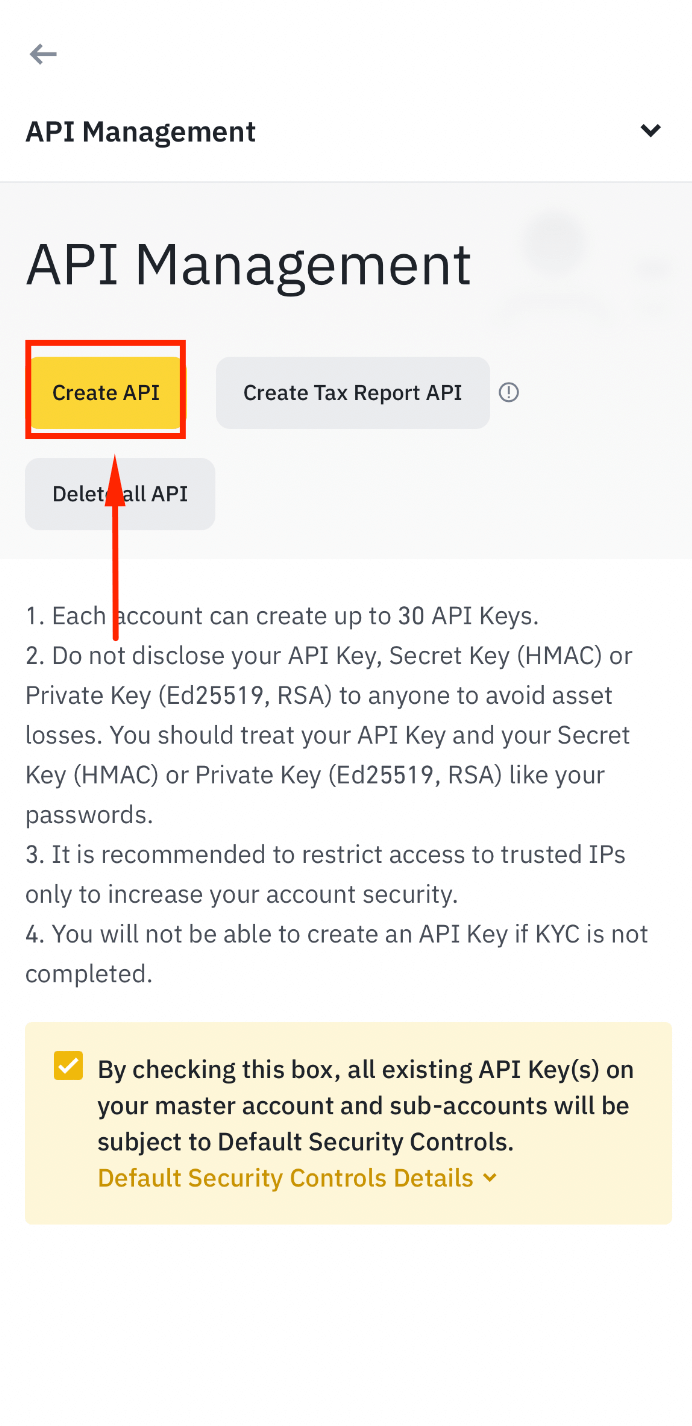
Step 4: Create a New API Key
Tap [Create API].
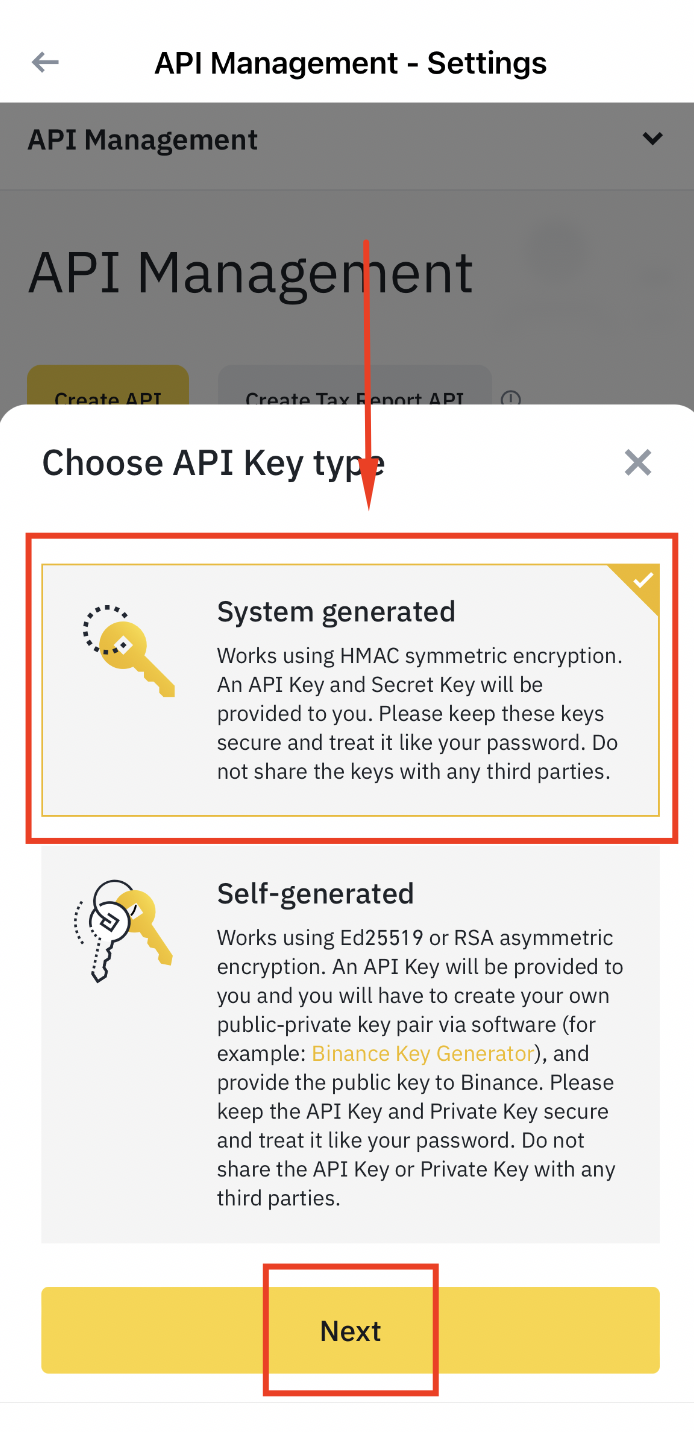
Step 5: Choose System Generated
Select [System generated] and tap [Next].
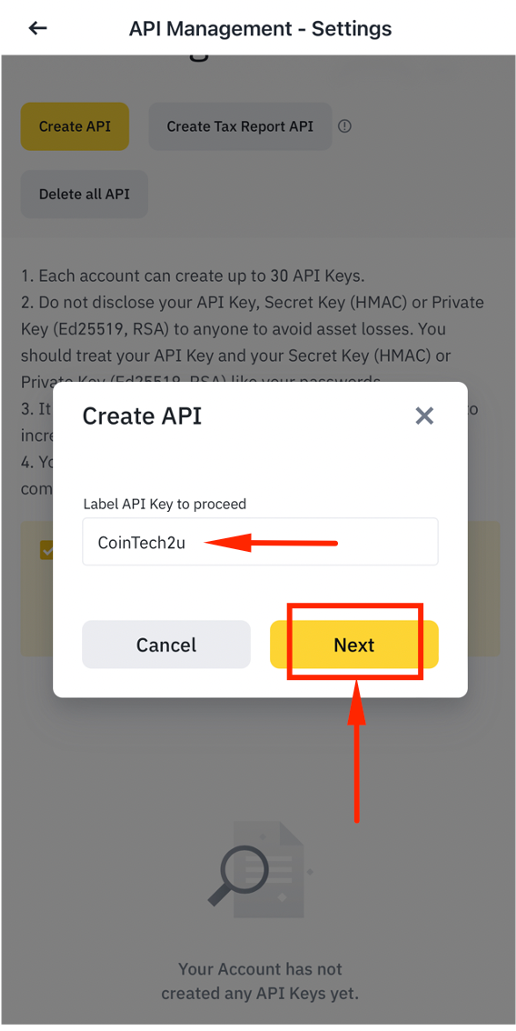
Step 6: Name Your API Key
Type "CoinTech2u" as the API key label and tap [Next].
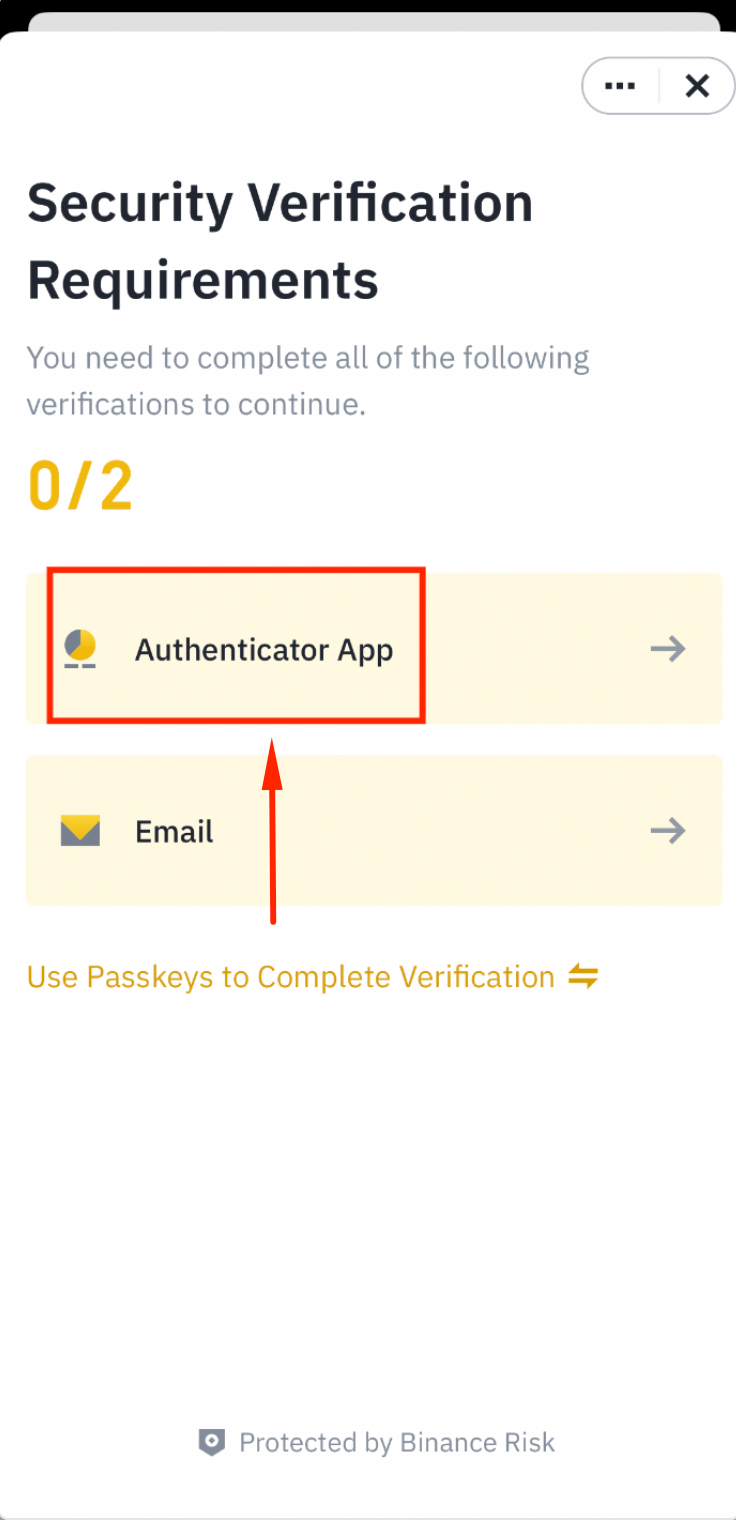
Step 7: Verify with Authenticator App
Tap [Authenticator App] for verification.
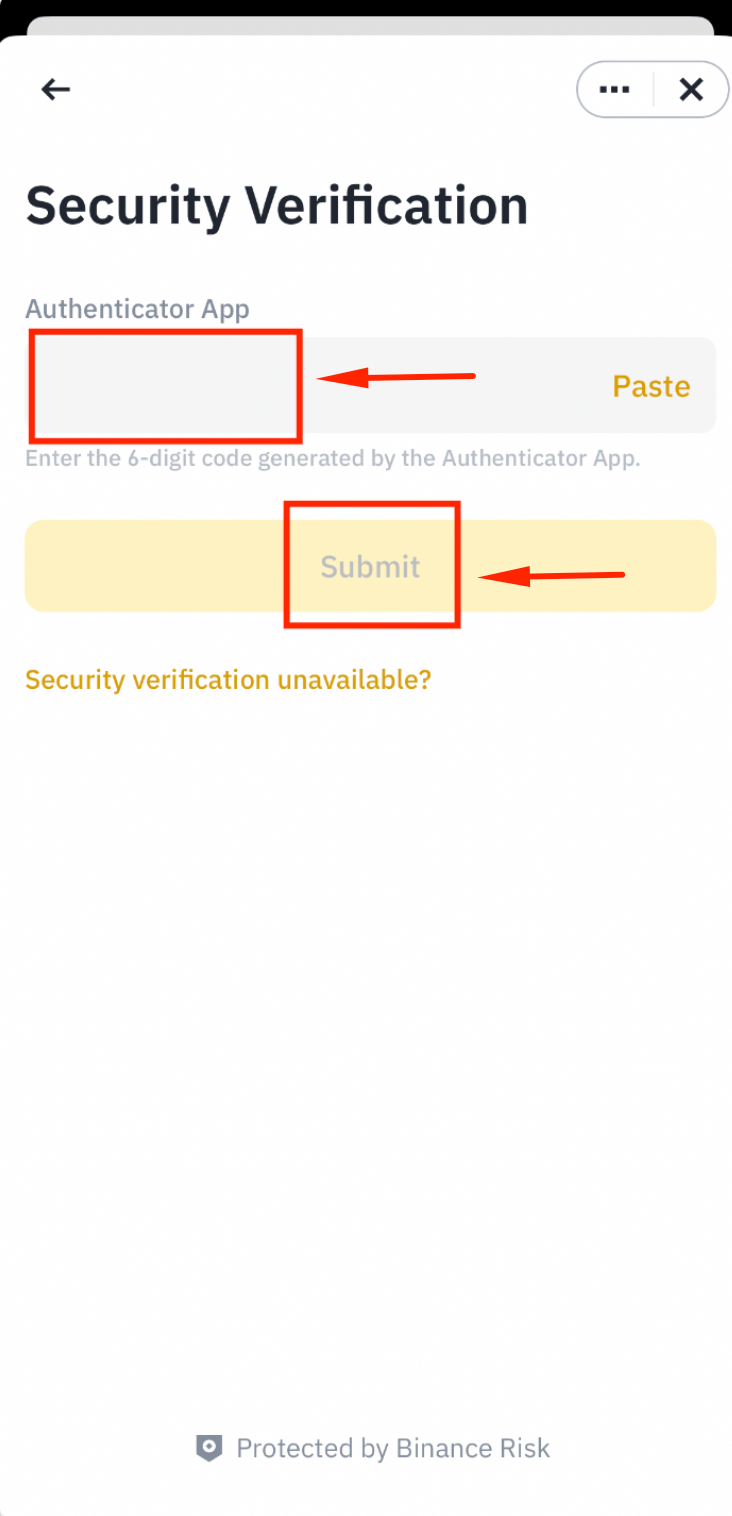
Step 8: Enter the 6-Digit Code
Enter the 6-digit code from Google Authenticator and tap [Submit].
Step 9: Verify via Email
Tap [Email] to receive a verification code.
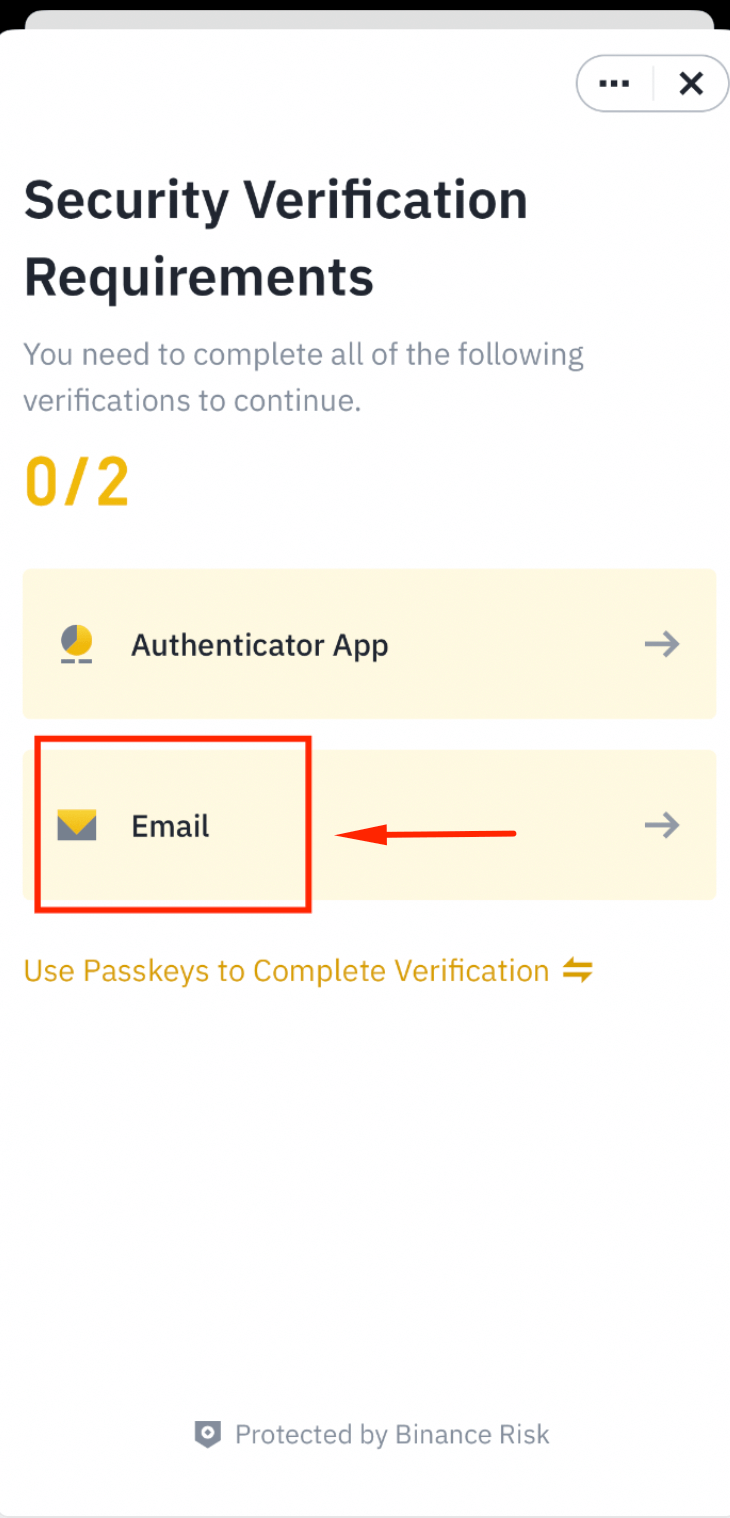
Step 10: Submit the Email Code
Enter the 6-digit code from your email and tap [Submit].

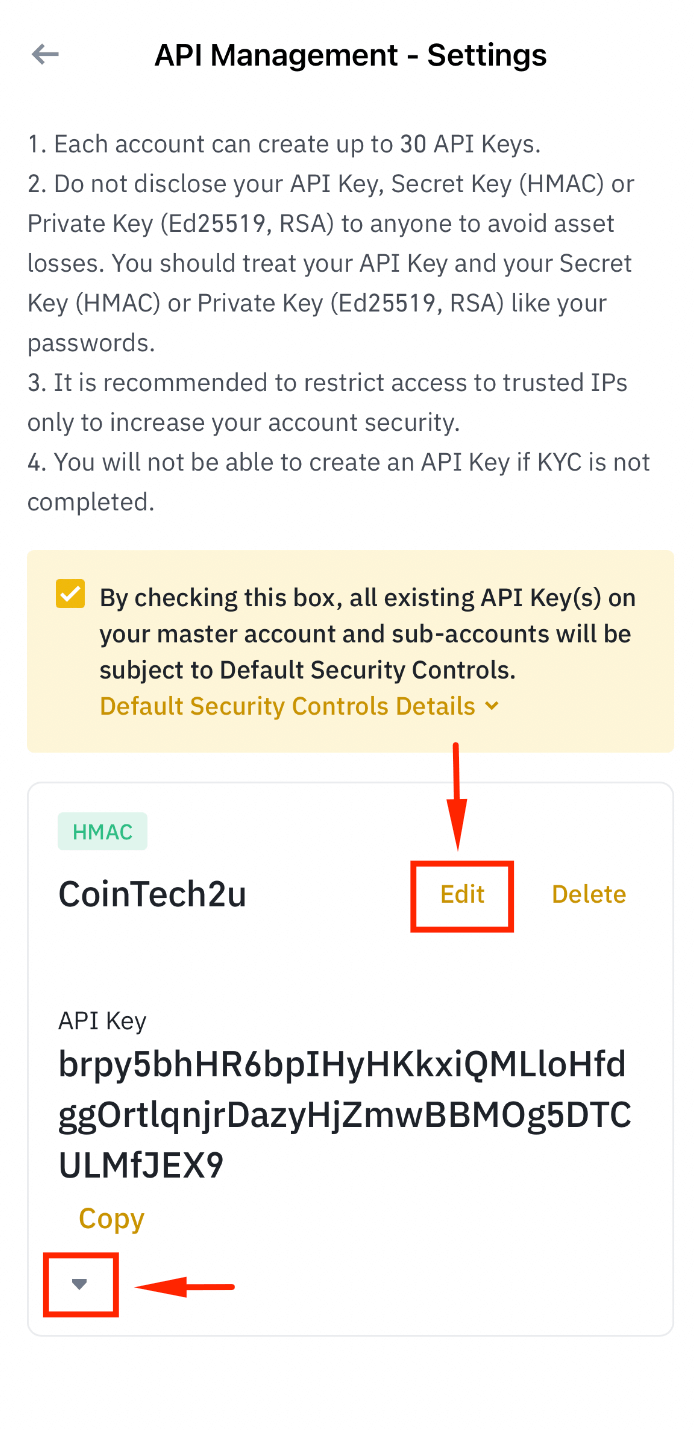
Step 11: Edit API Key Settings
Tap [Edit] and scroll down to view your API credentials.
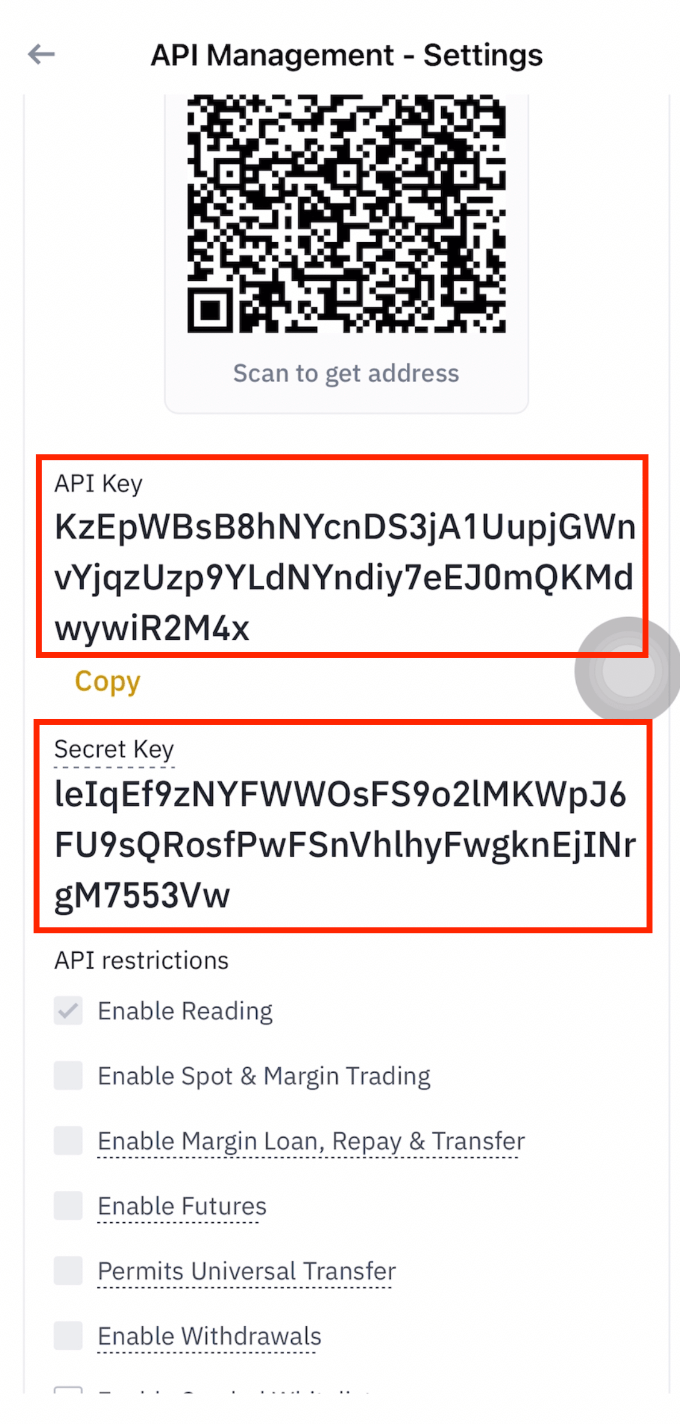
Step 12: Save Your API Key and Secret Key
Copy both the API Key and Secret Key, then save them securely on your phone. The Secret Key is only shown once -- do not lose it.
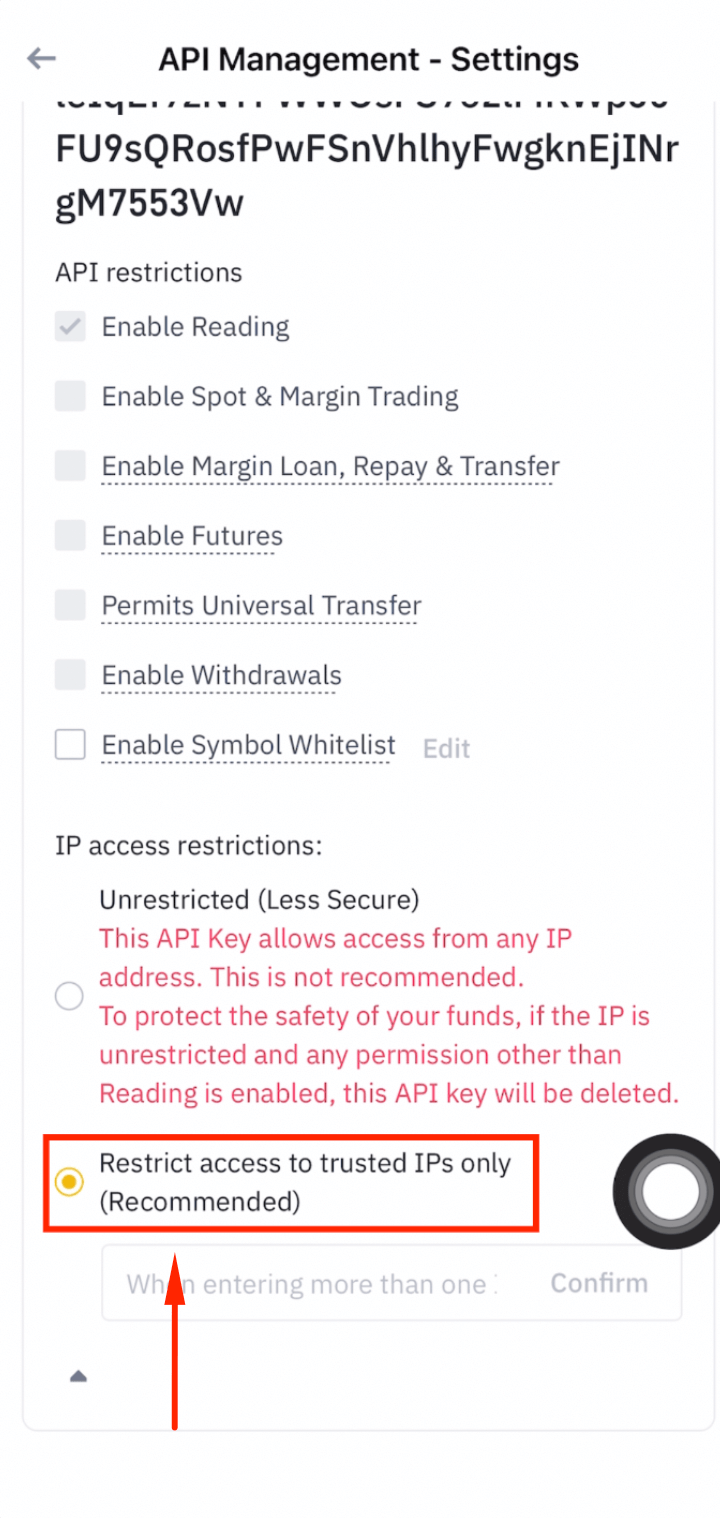
Step 13: Restrict Access to Trusted IPs Only
Select [Restrict access to trusted IPs only] for maximum security.
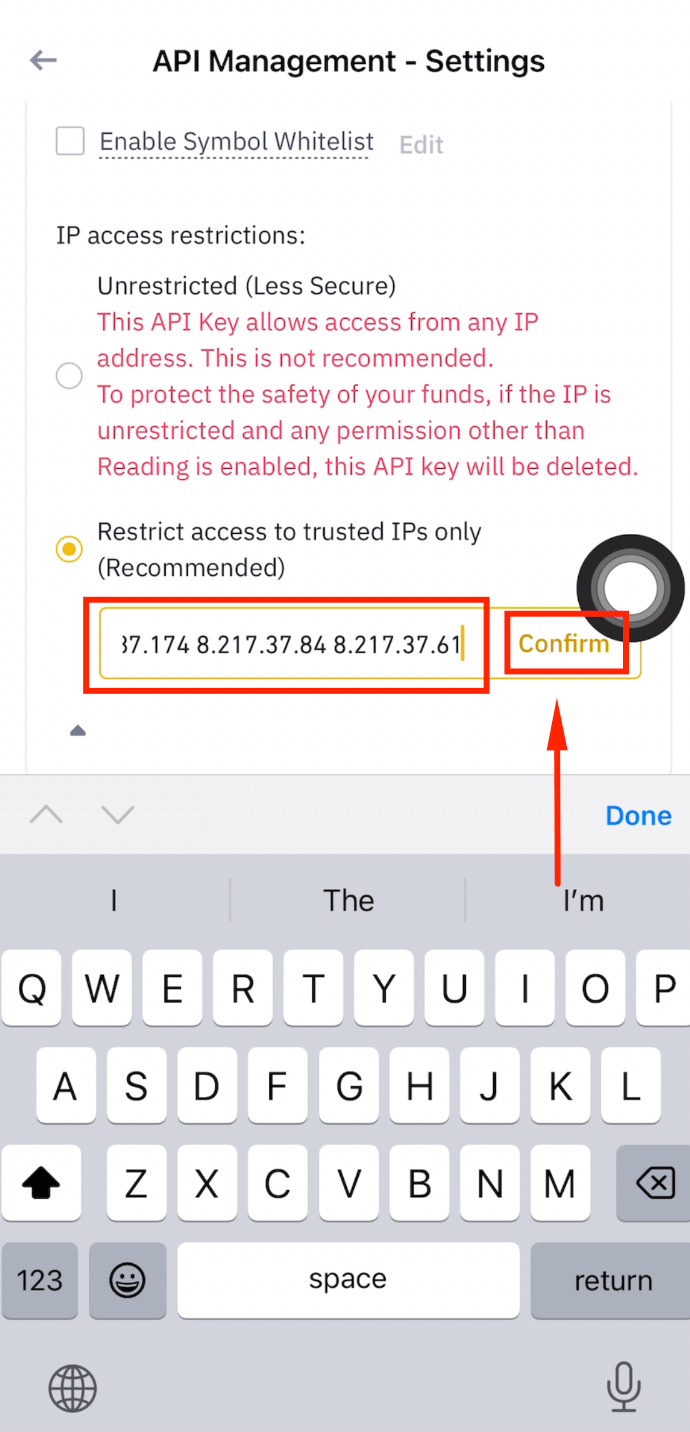
Step 14: Add 30 CoinTech2u IP Addresses
Copy and paste all 30 IP addresses below into the IP restriction field, then tap [Confirm].
8.218.22.136 47.242.145.94 8.218.5.187 8.210.116.248 8.218.7.196 47.242.32.173 8.218.7.70 8.218.27.161 8.218.19.105 8.218.8.63 47.243.114.177 8.218.242.247 8.210.205.22 47.243.192.250 8.218.40.50 8.210.168.108 47.243.31.166 8.218.182.2 47.242.236.1 8.217.22.126 47.242.156.40 8.218.189.122 8.218.67.118 8.218.208.125 8.218.29.171 8.217.31.46 8.217.50.18 47.243.87.174 8.217.37.84 8.217.37.61
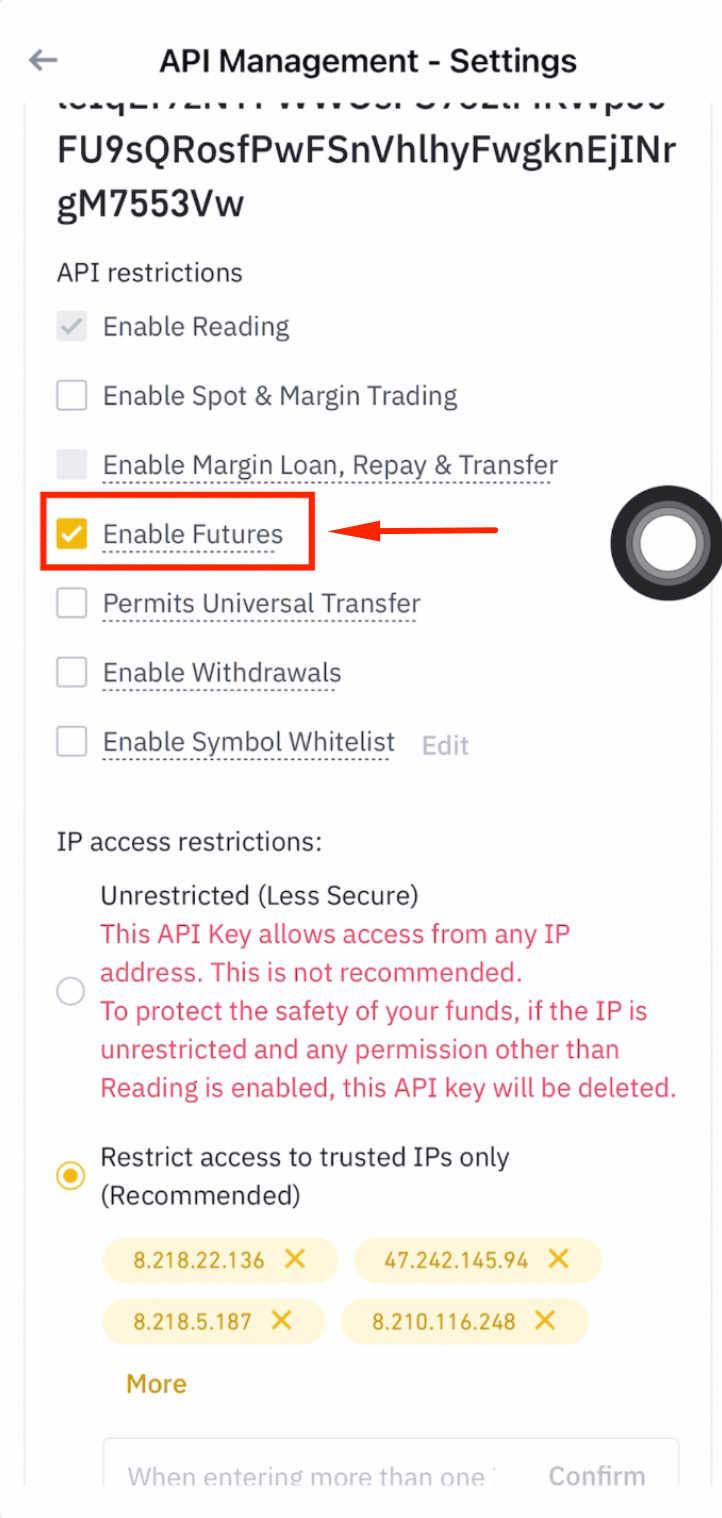
Step 15: Enable Futures Permission
Tick [Enable Futures] to grant futures trading permission to the API key.
Step 16: Save Your API Settings
Tap [Save] to finalize the API key configuration.
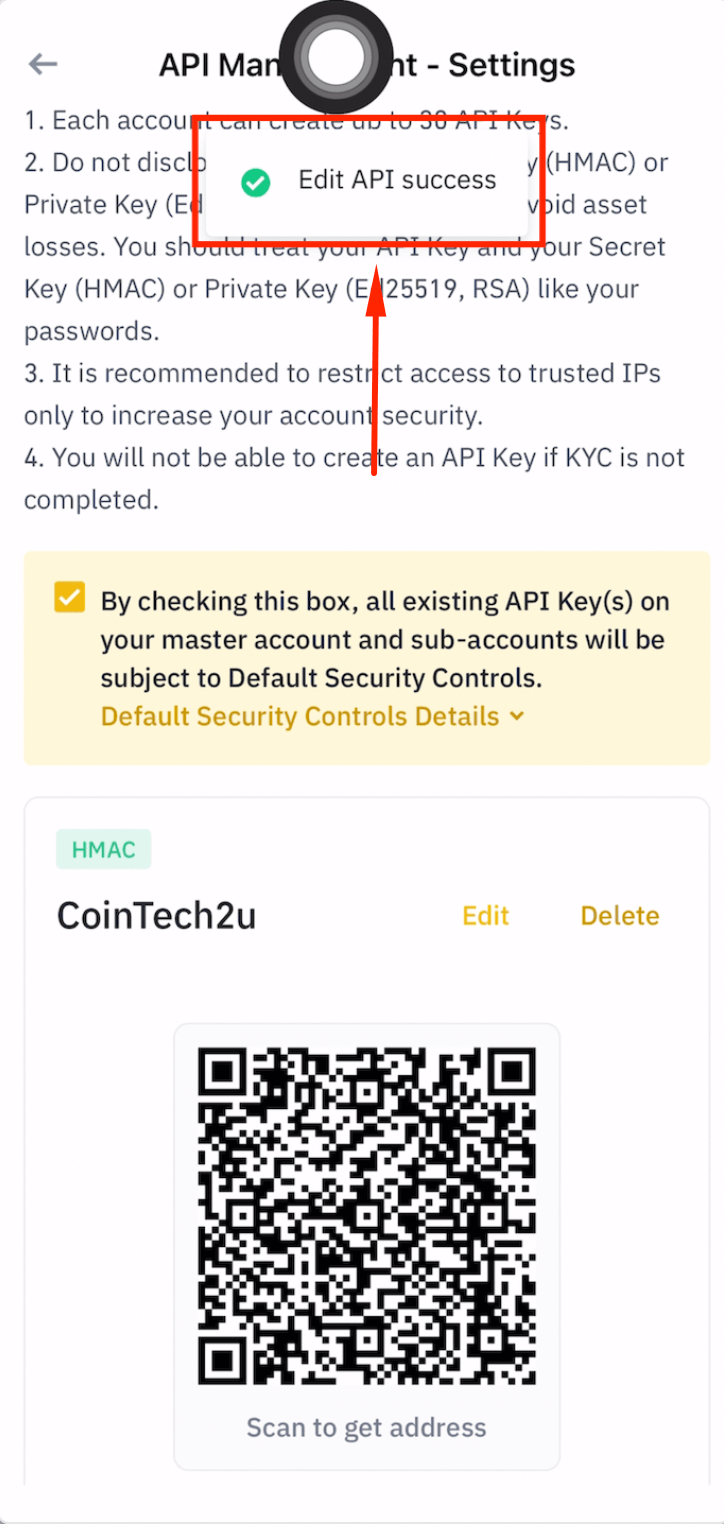
Step 17: API Key Created Successfully
Your Binance API key is now created with IP restrictions and Futures permissions enabled.
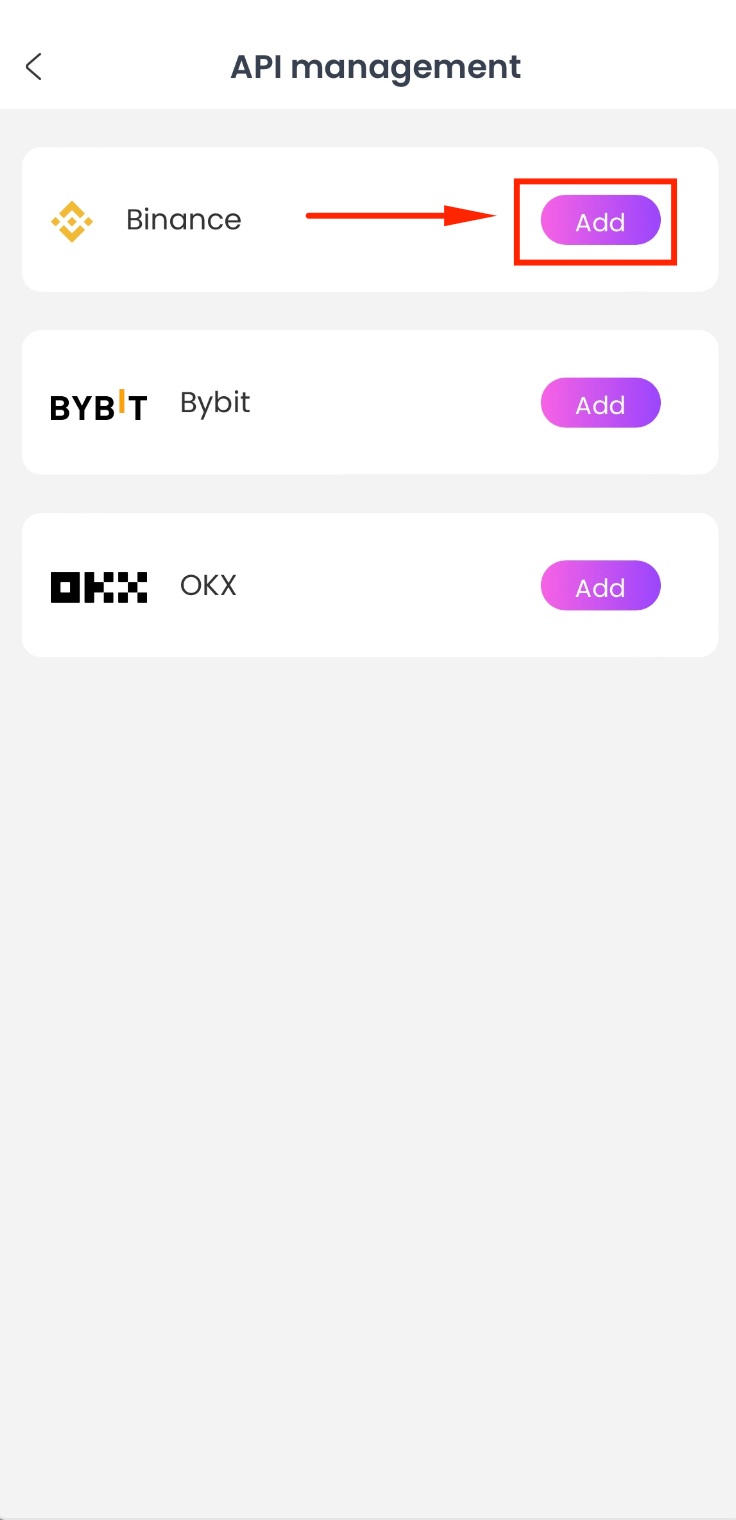
Bind Your API Key in CoinTech2u
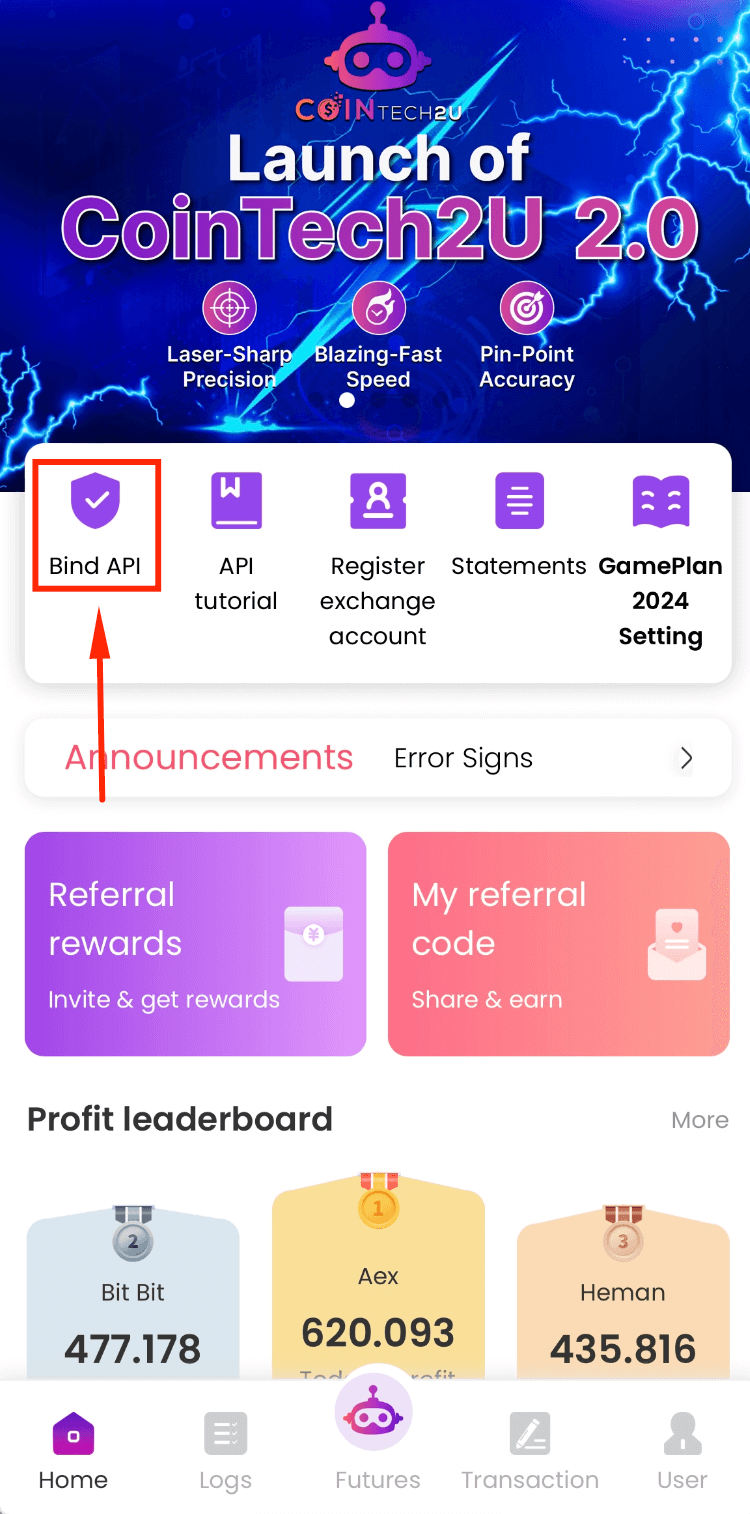
Step 1: Open CoinTech2u and Tap "Bind API"
Go to the CoinTech2u App homepage and tap [Bind API].
Step 2: Select Binance
Choose Binance from the exchange list and tap [Add].
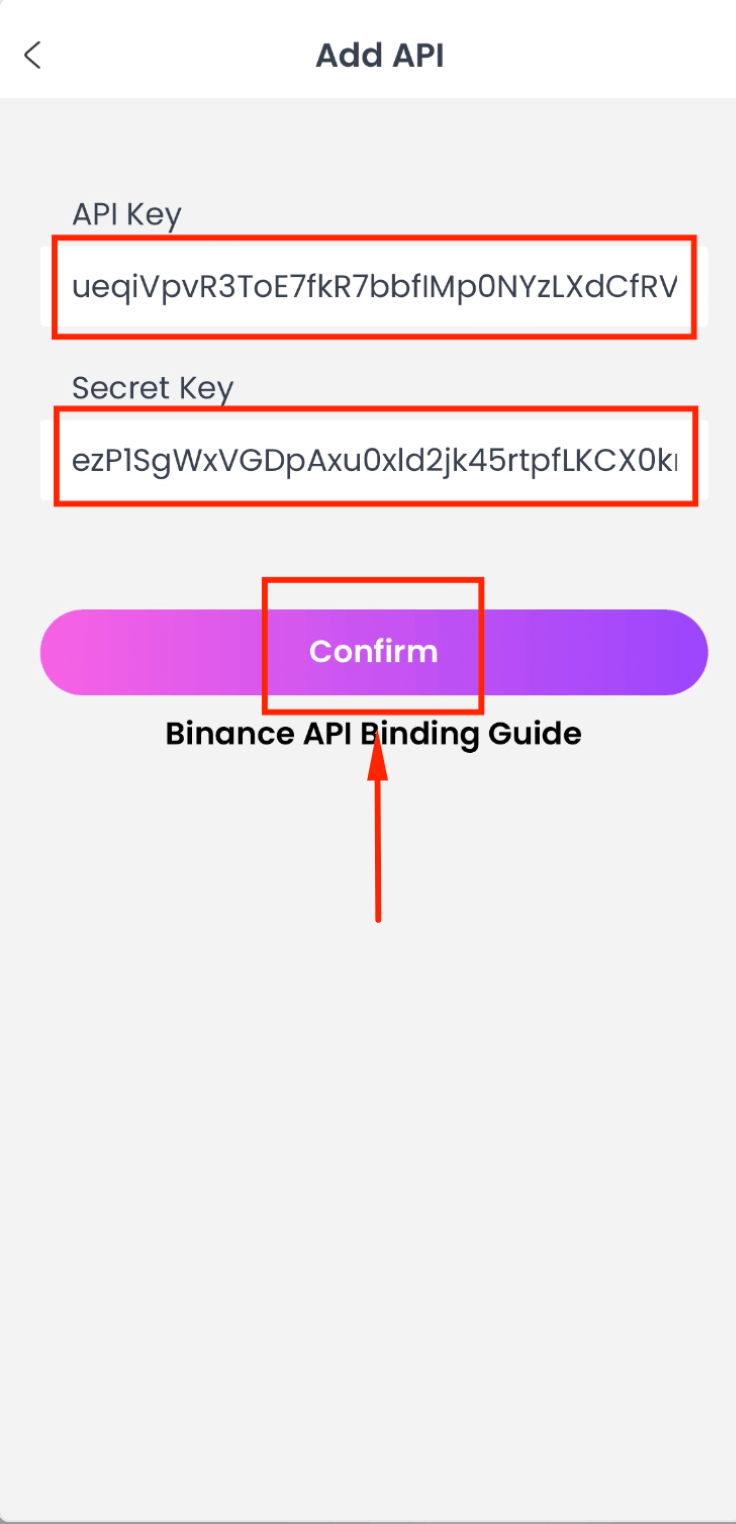
Step 3: Paste Your API Credentials
Paste your API Key and Secret Key into the respective fields, then tap [Confirm].
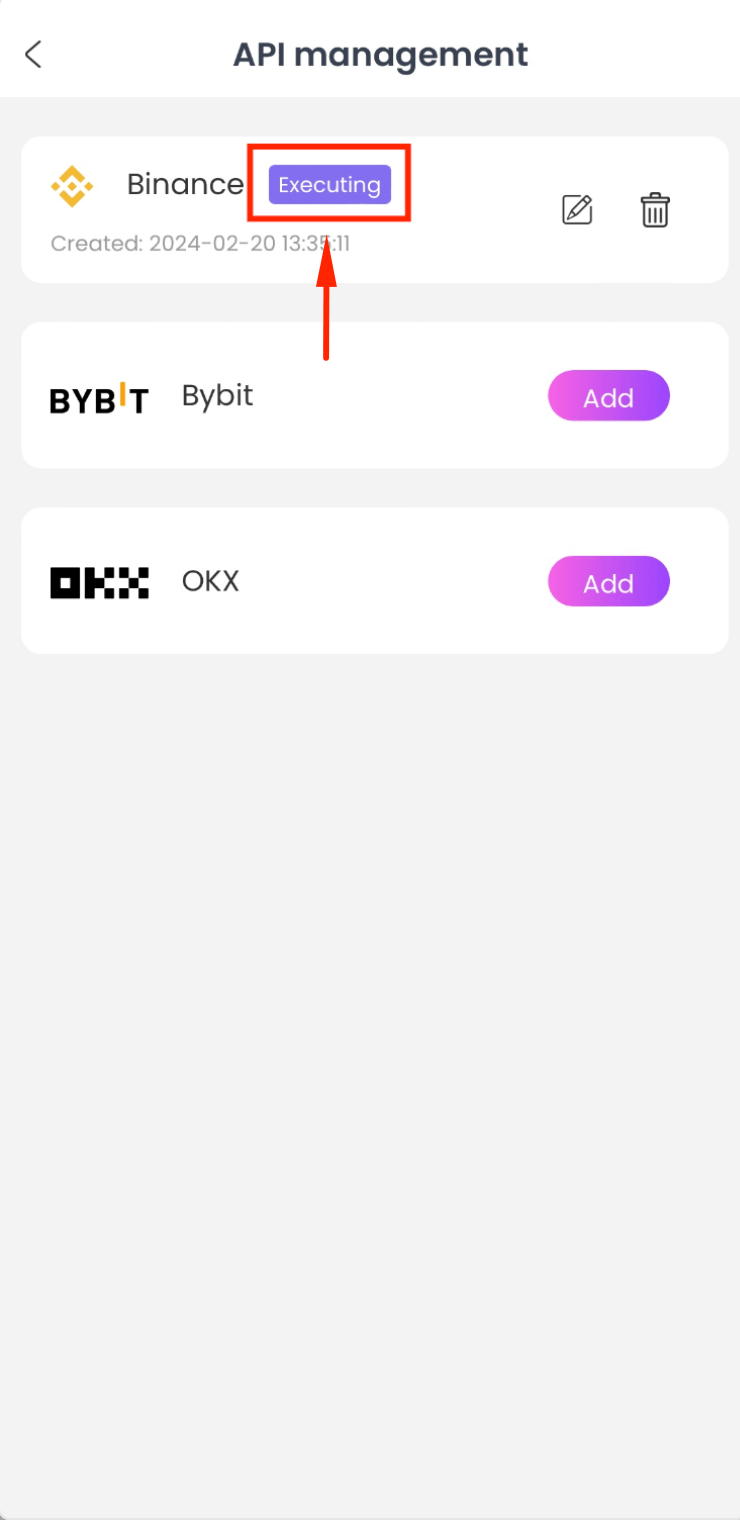
Step 4: API Bound Successfully
When it shows "Executing," your API is successfully bound. CoinTech2u can now execute trades on your Binance account.
Frequently Asked Questions
What is a Binance API key and why do I need one?
A Binance API key is a secure credential that allows CoinTech2u to interact with your Binance account. It enables the AI trading bot to place and manage trades on your behalf without giving it access to withdraw funds. You need an API key to connect CoinTech2u to your Binance account for automated trading.
Why do I need to restrict my API key to specific IP addresses?
Restricting your API key to CoinTech2u's 30 trusted IP addresses is a critical security measure. It ensures only CoinTech2u's servers can use your API key to execute trades. Even if someone obtained your credentials, they could not use them from an unauthorized IP address.
Is it safe to share my API key with CoinTech2u?
Yes, it is safe. The API key only has trading permissions -- it cannot withdraw or transfer your funds. Combined with IP restrictions and 2FA protection, your Binance account remains fully secure. Your funds always stay in your own Binance wallet.
What is Hedge Mode and why should I enable it?
Hedge Mode allows you to hold both long and short positions simultaneously on the same trading pair. CoinTech2u's AI bot uses this to manage risk more effectively by hedging positions in volatile markets. Without Hedge Mode, the bot cannot execute its full range of trading strategies.
What's Next?
Your API is now bound. If you want to trade with multiple accounts, learn how to create Binance sub-accounts next.
Next: Create Sub-AccountsReady to Start Automated Trading?
Register CoinTech2u for free, bind your Binance API, and let the AI trade for you 24/7.
Register CoinTech2u Free