Create Sub-Accounts on Binance
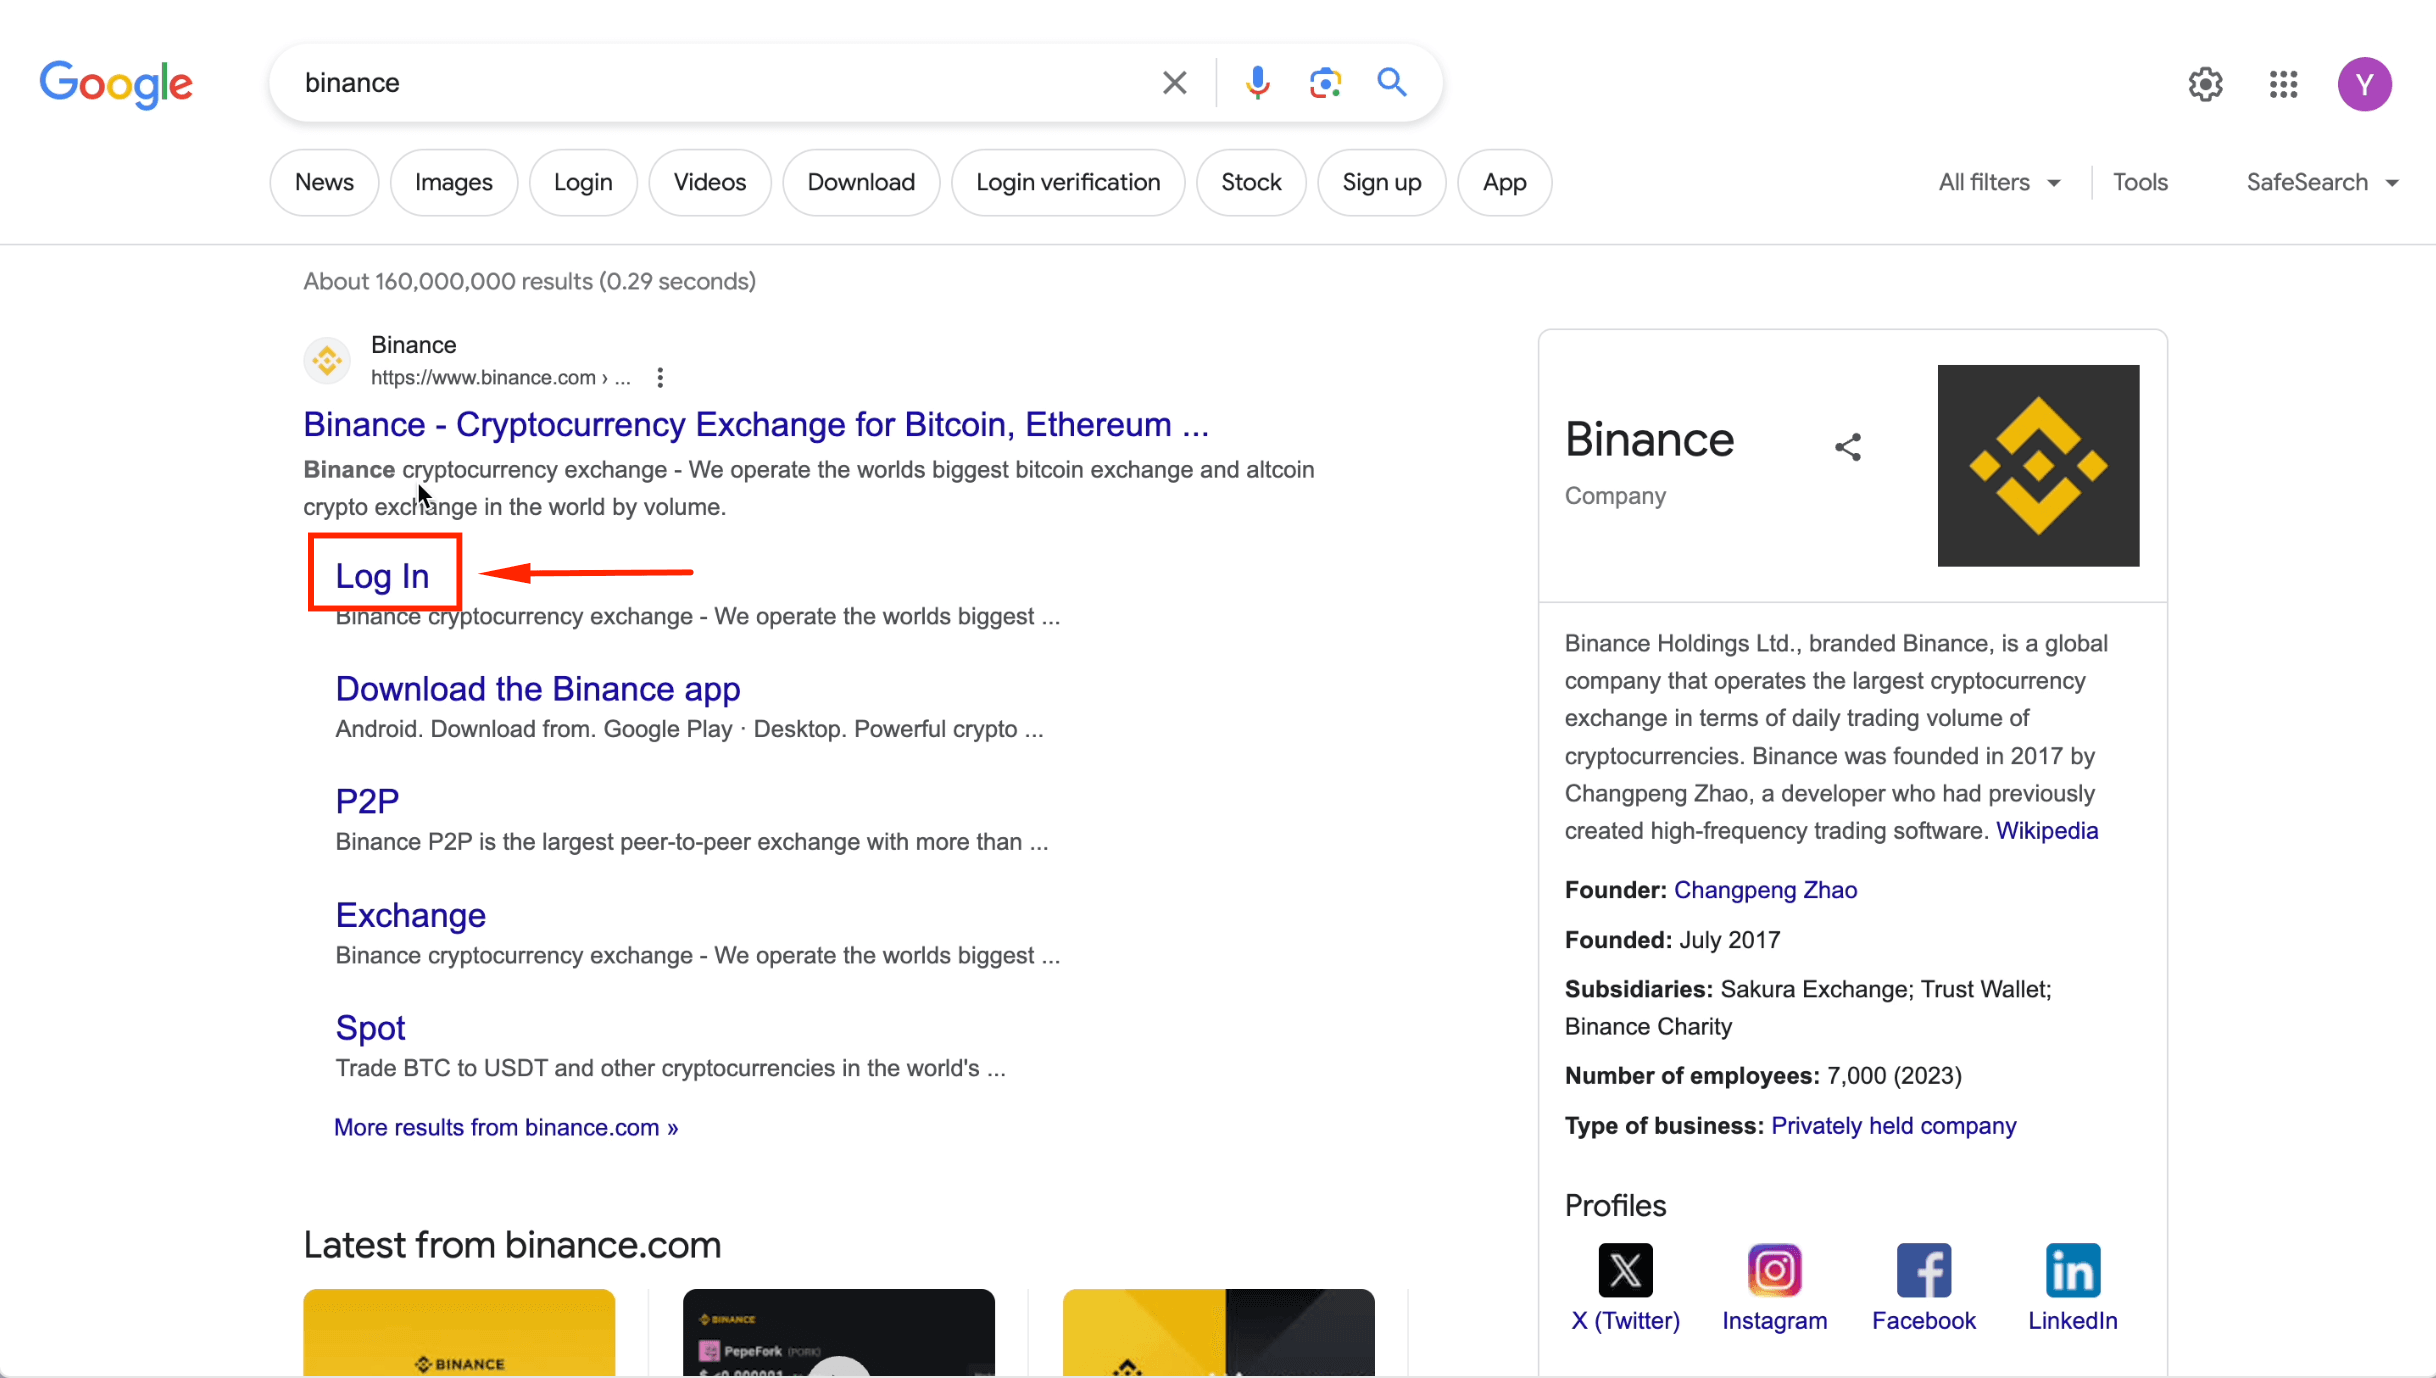
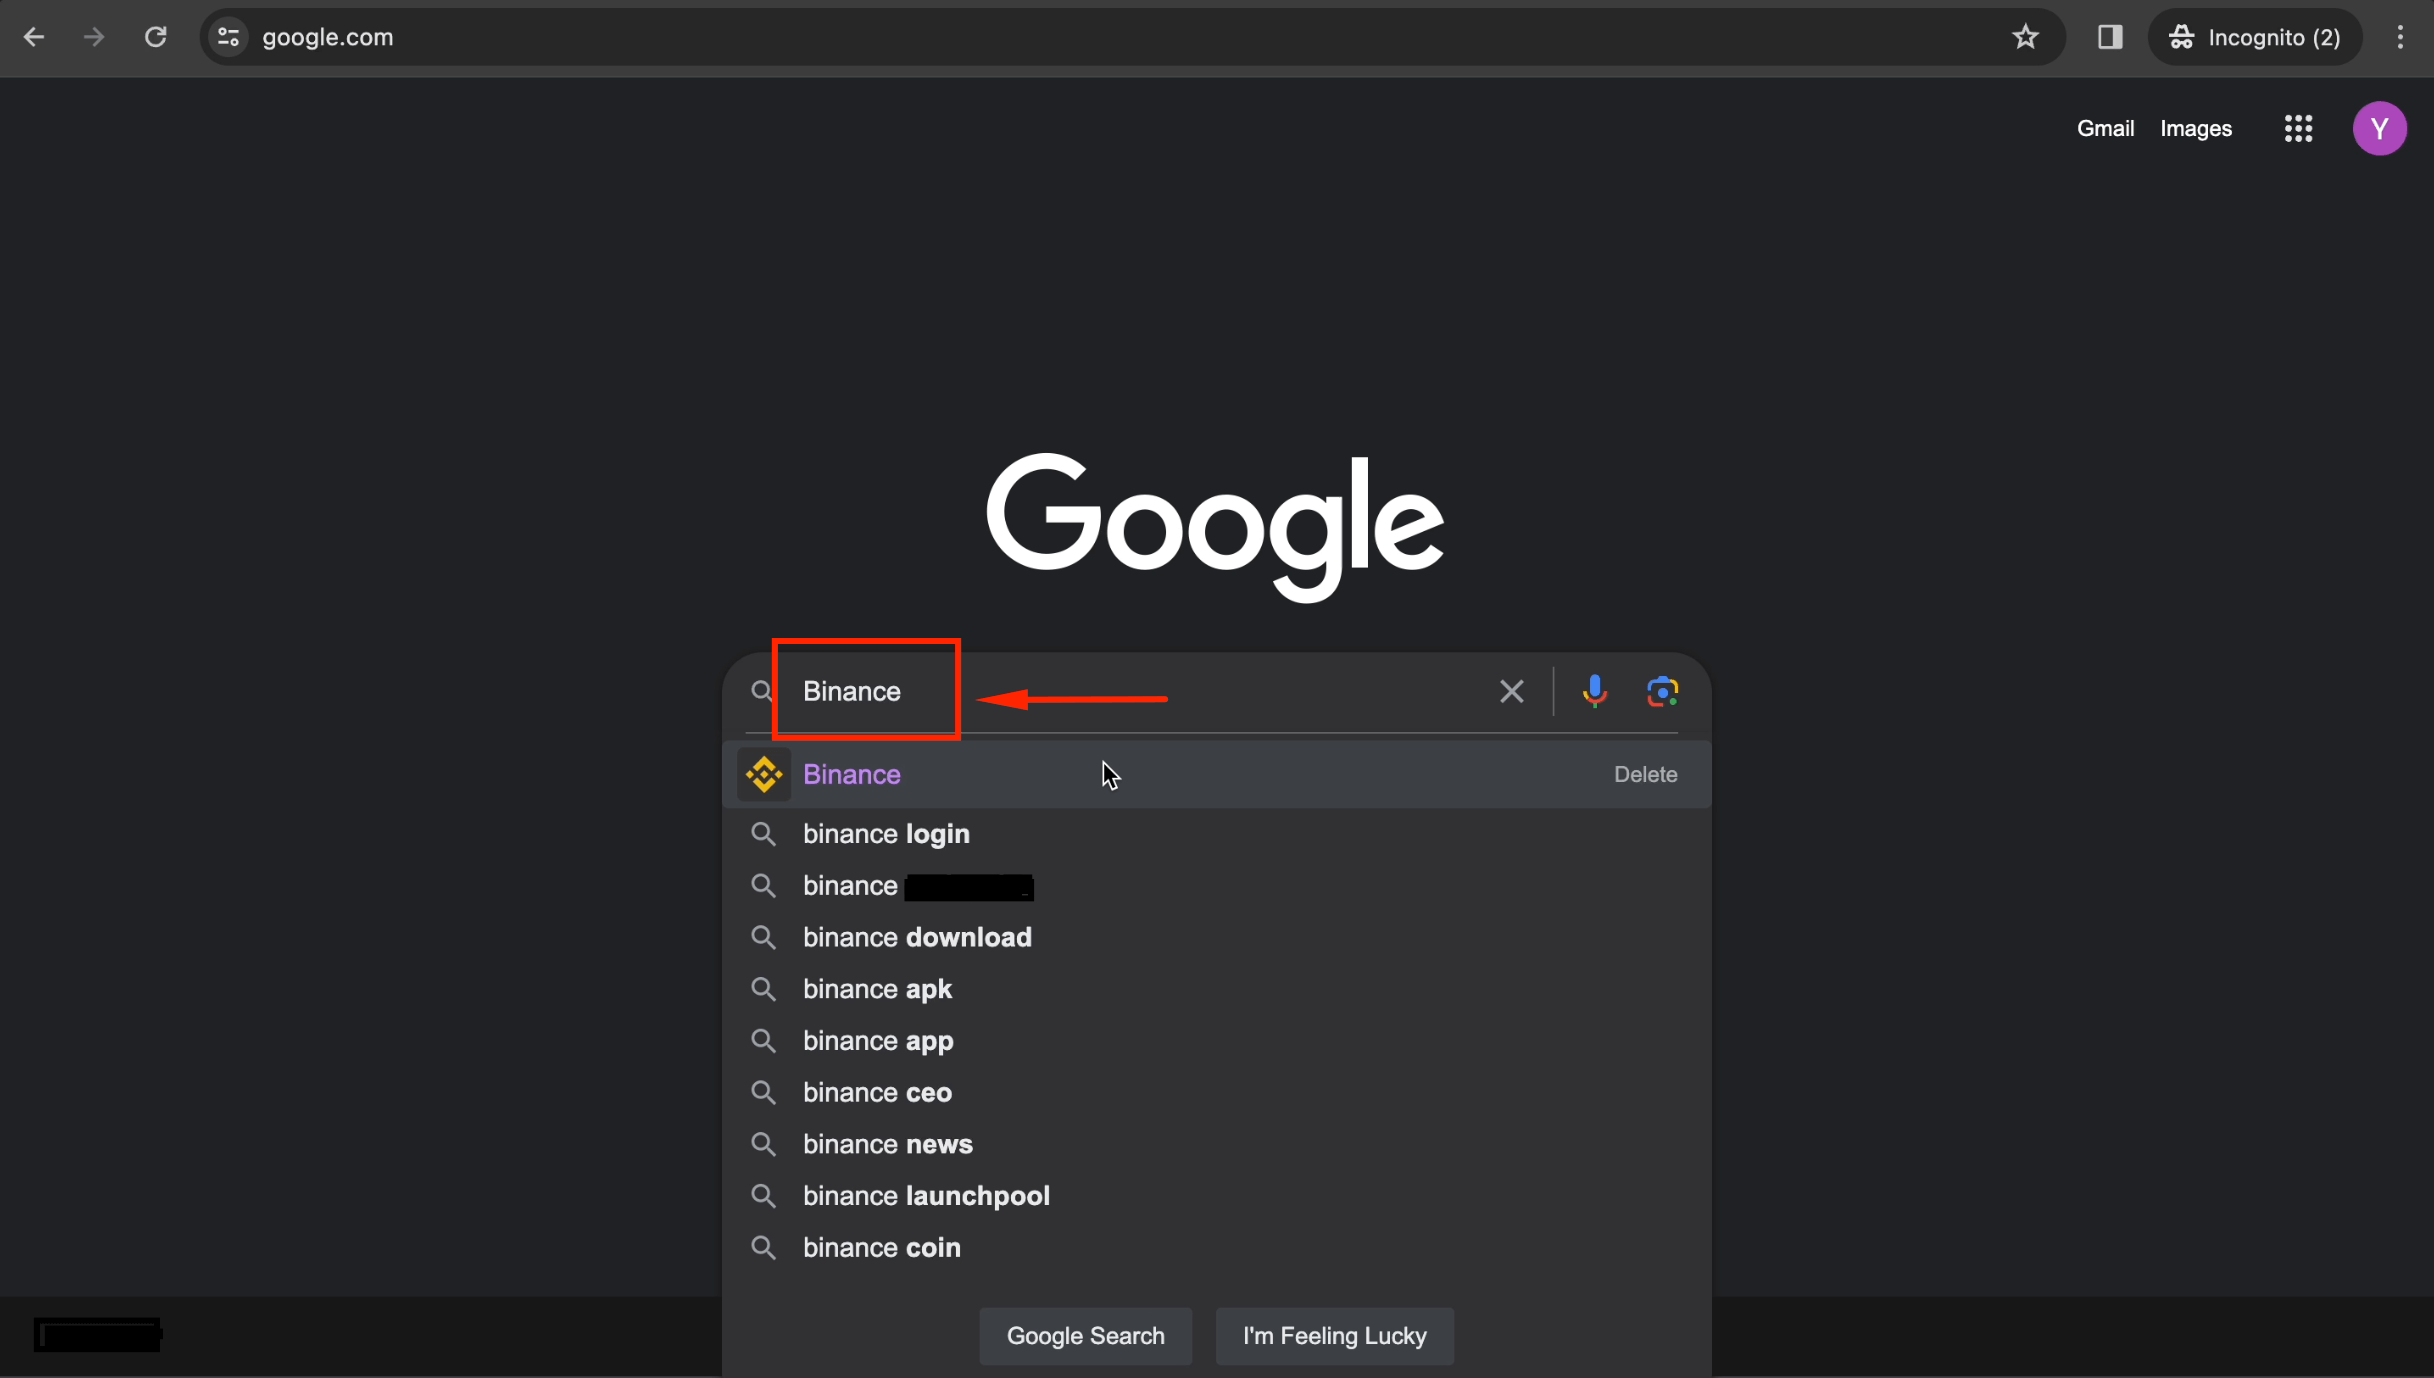
Step 1: Visit binance.me on Desktop
Open your desktop browser and go to binance.me.

Step 2: Log In to Your Main Account
Click [Log in] and enter your email, password, and verification codes.
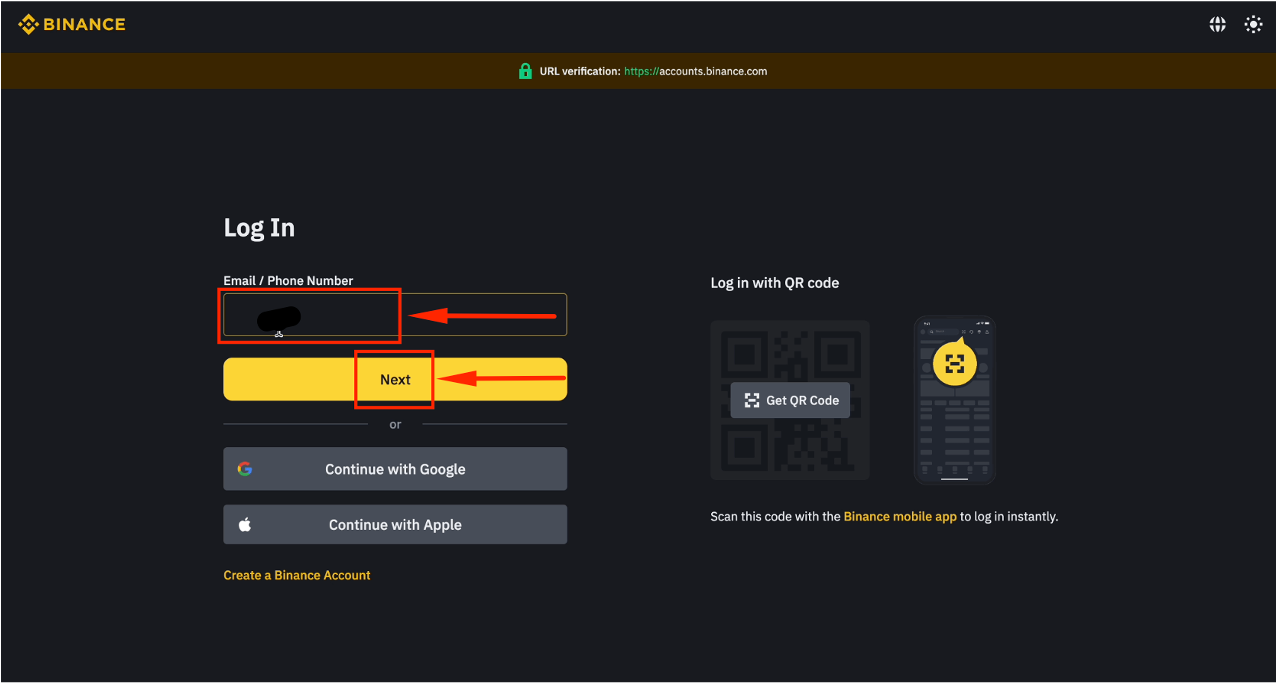
Step 3: Enter Your Email
Fill in your email and click [Next].
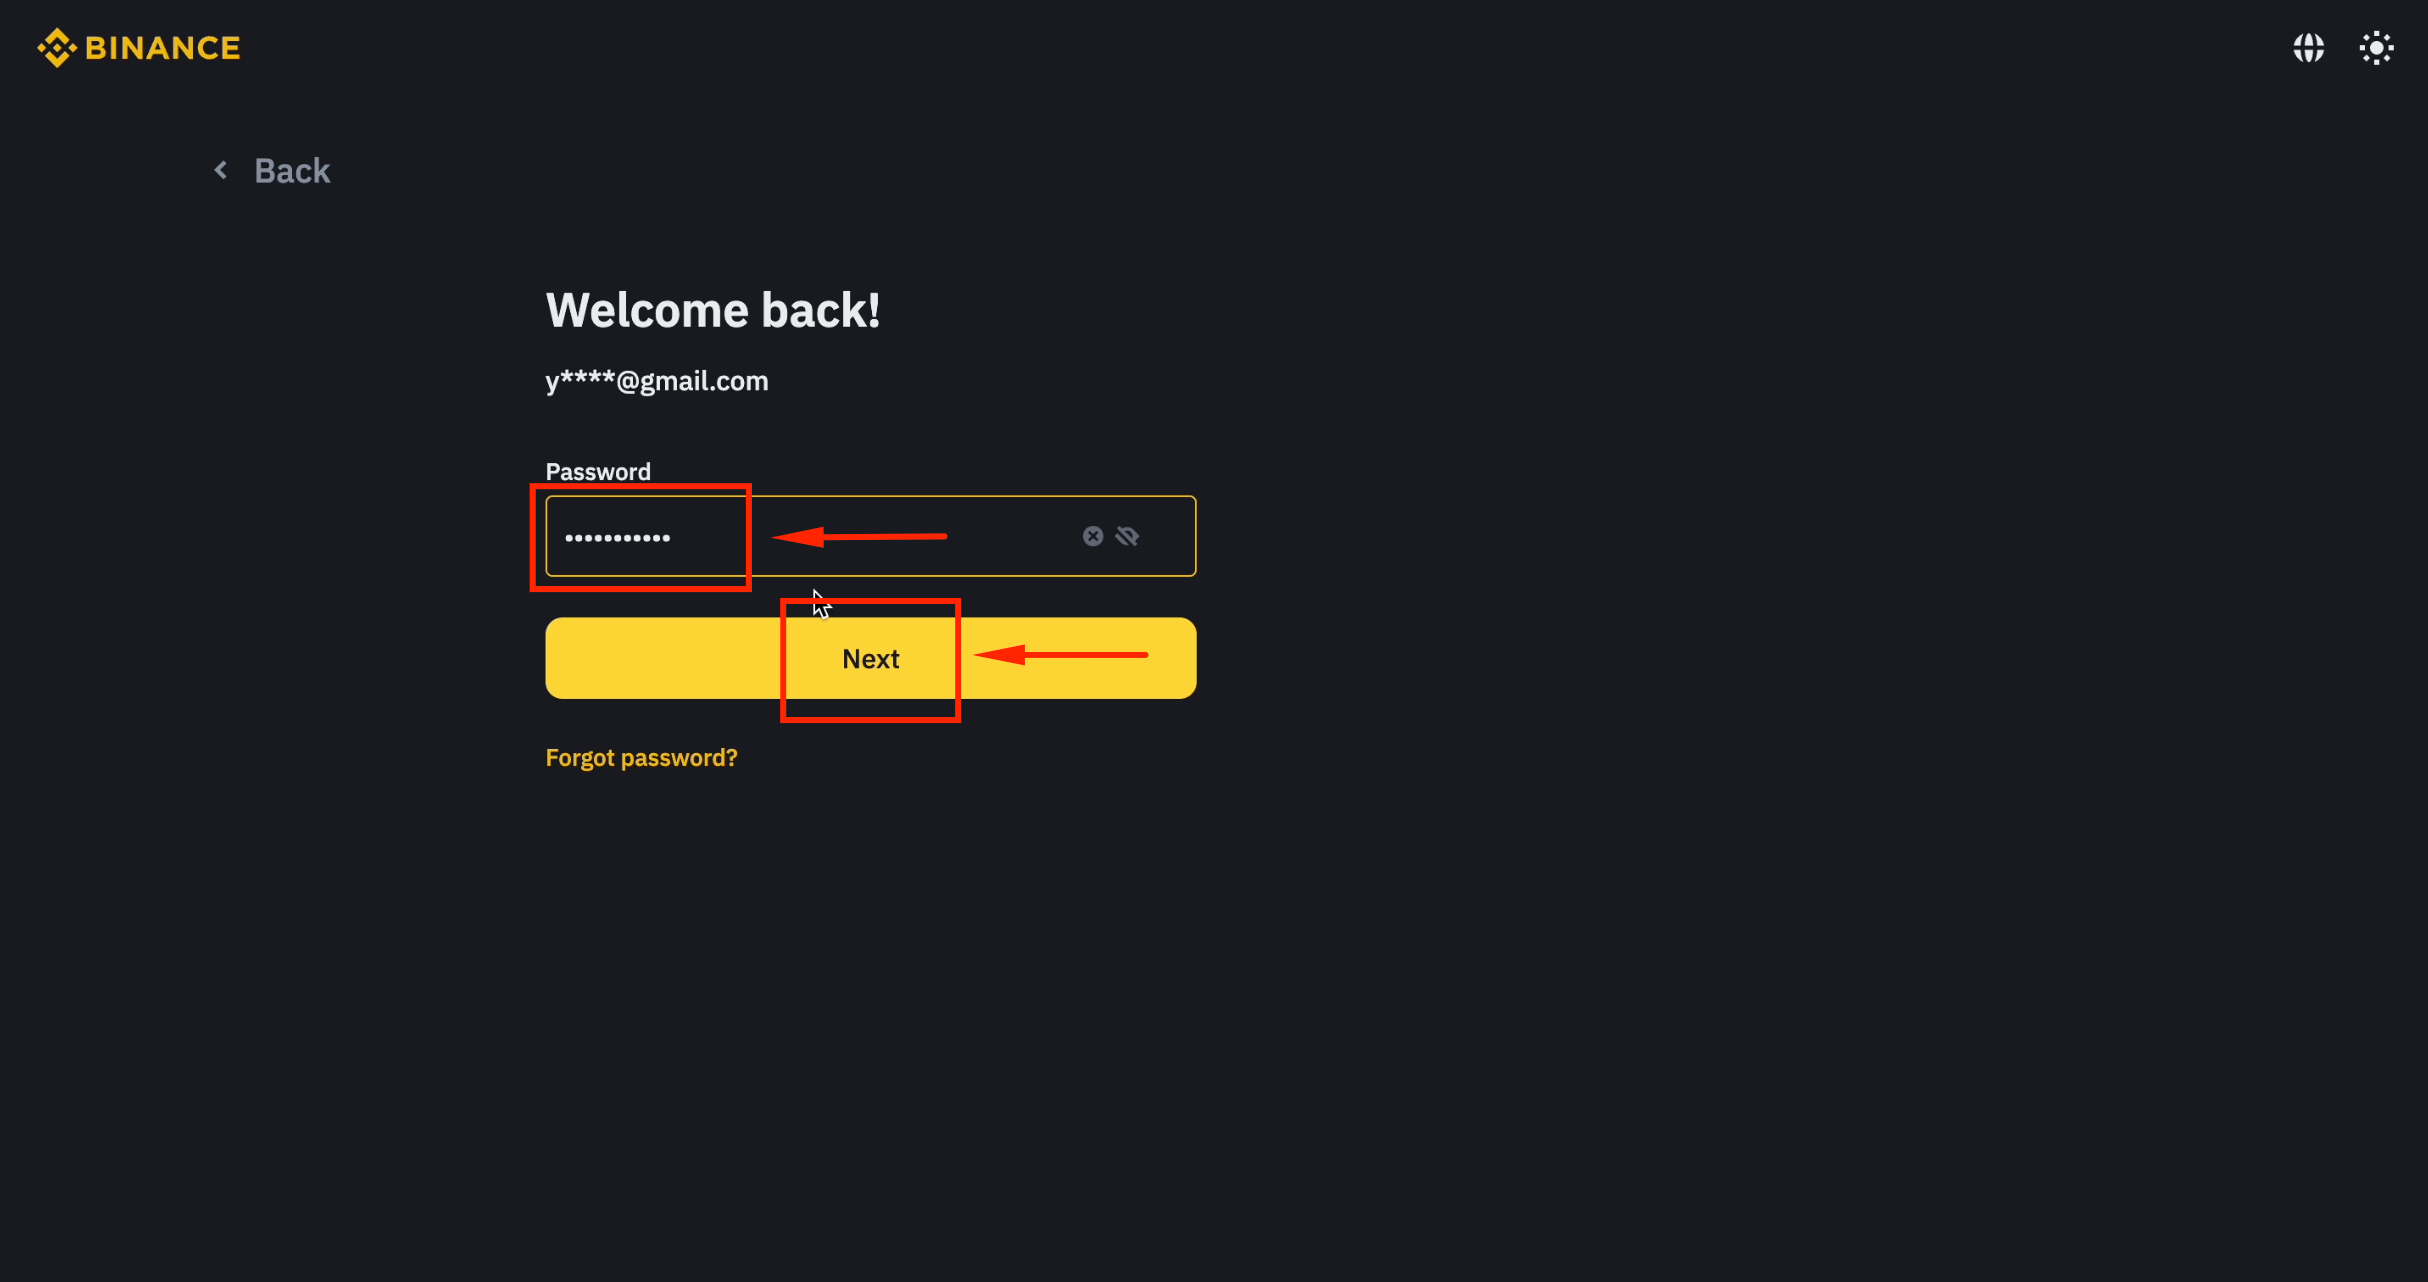
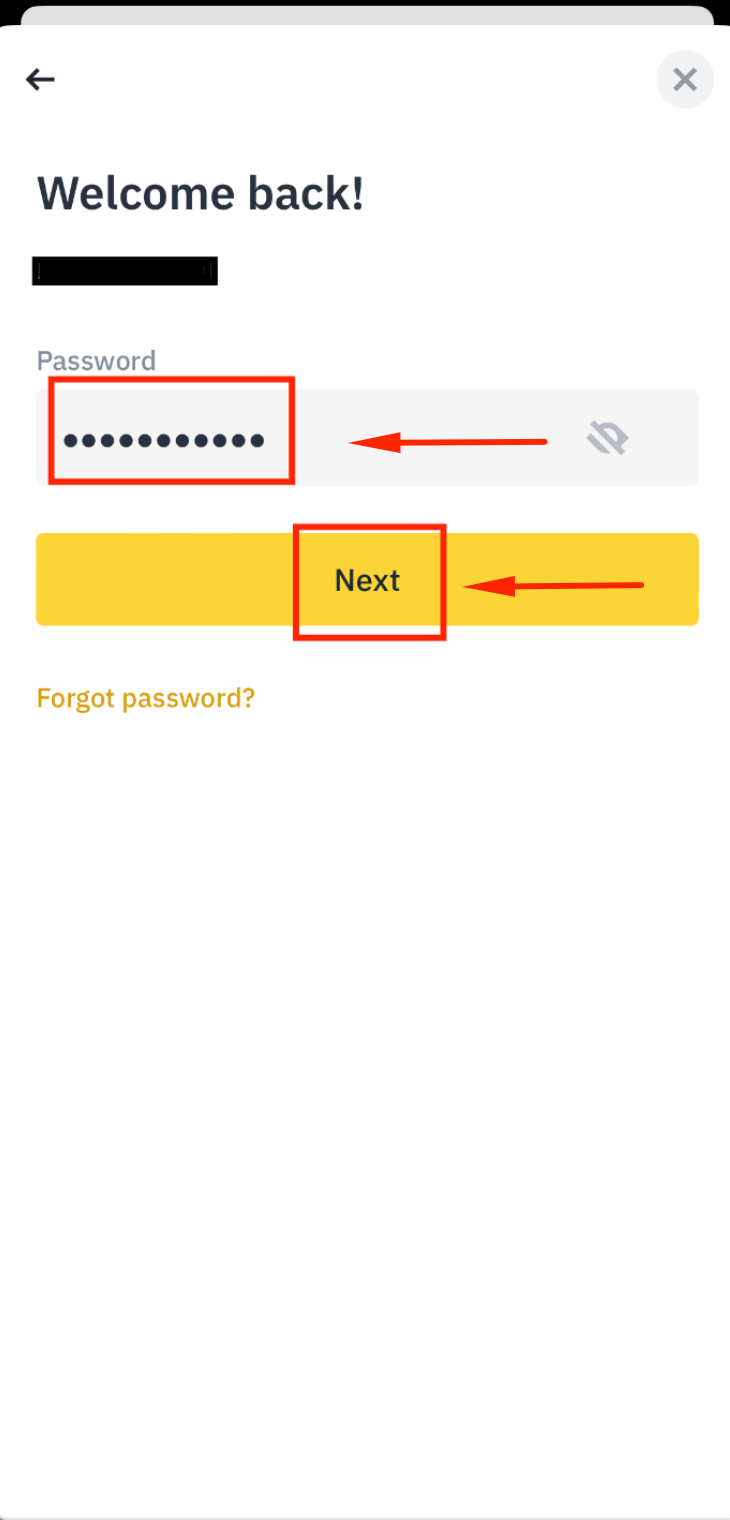
Step 4: Enter Your Password
Fill in your password and click [Next].
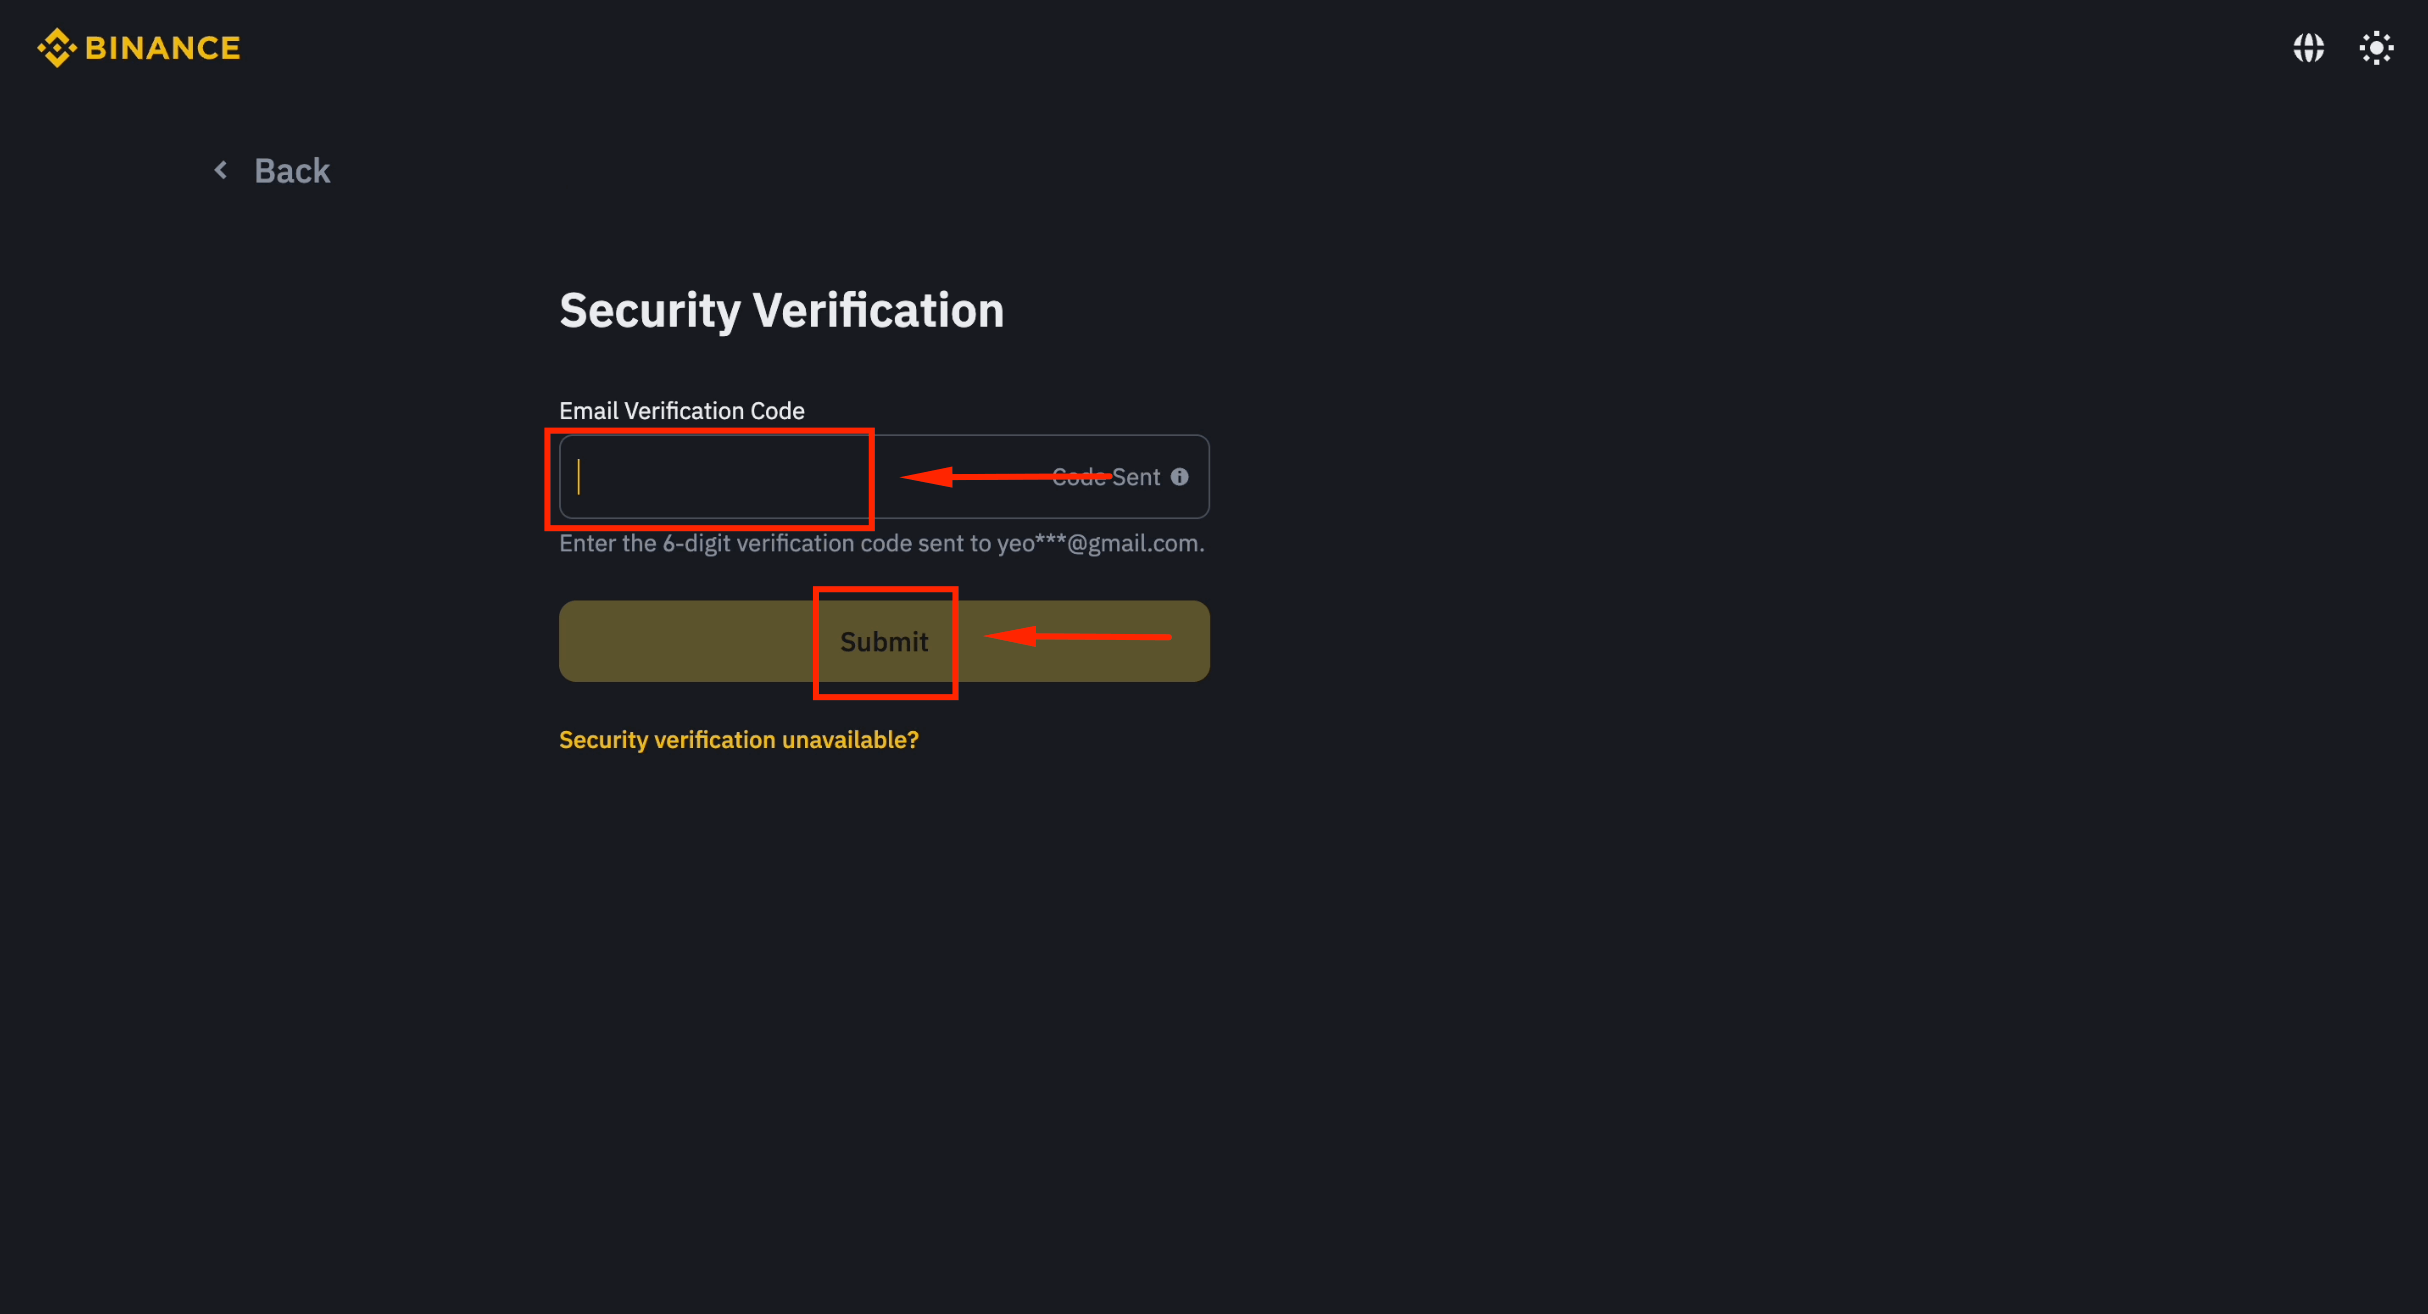
Step 5: Submit Email Verification Code
Enter the 6-digit code from your email and click [Next].

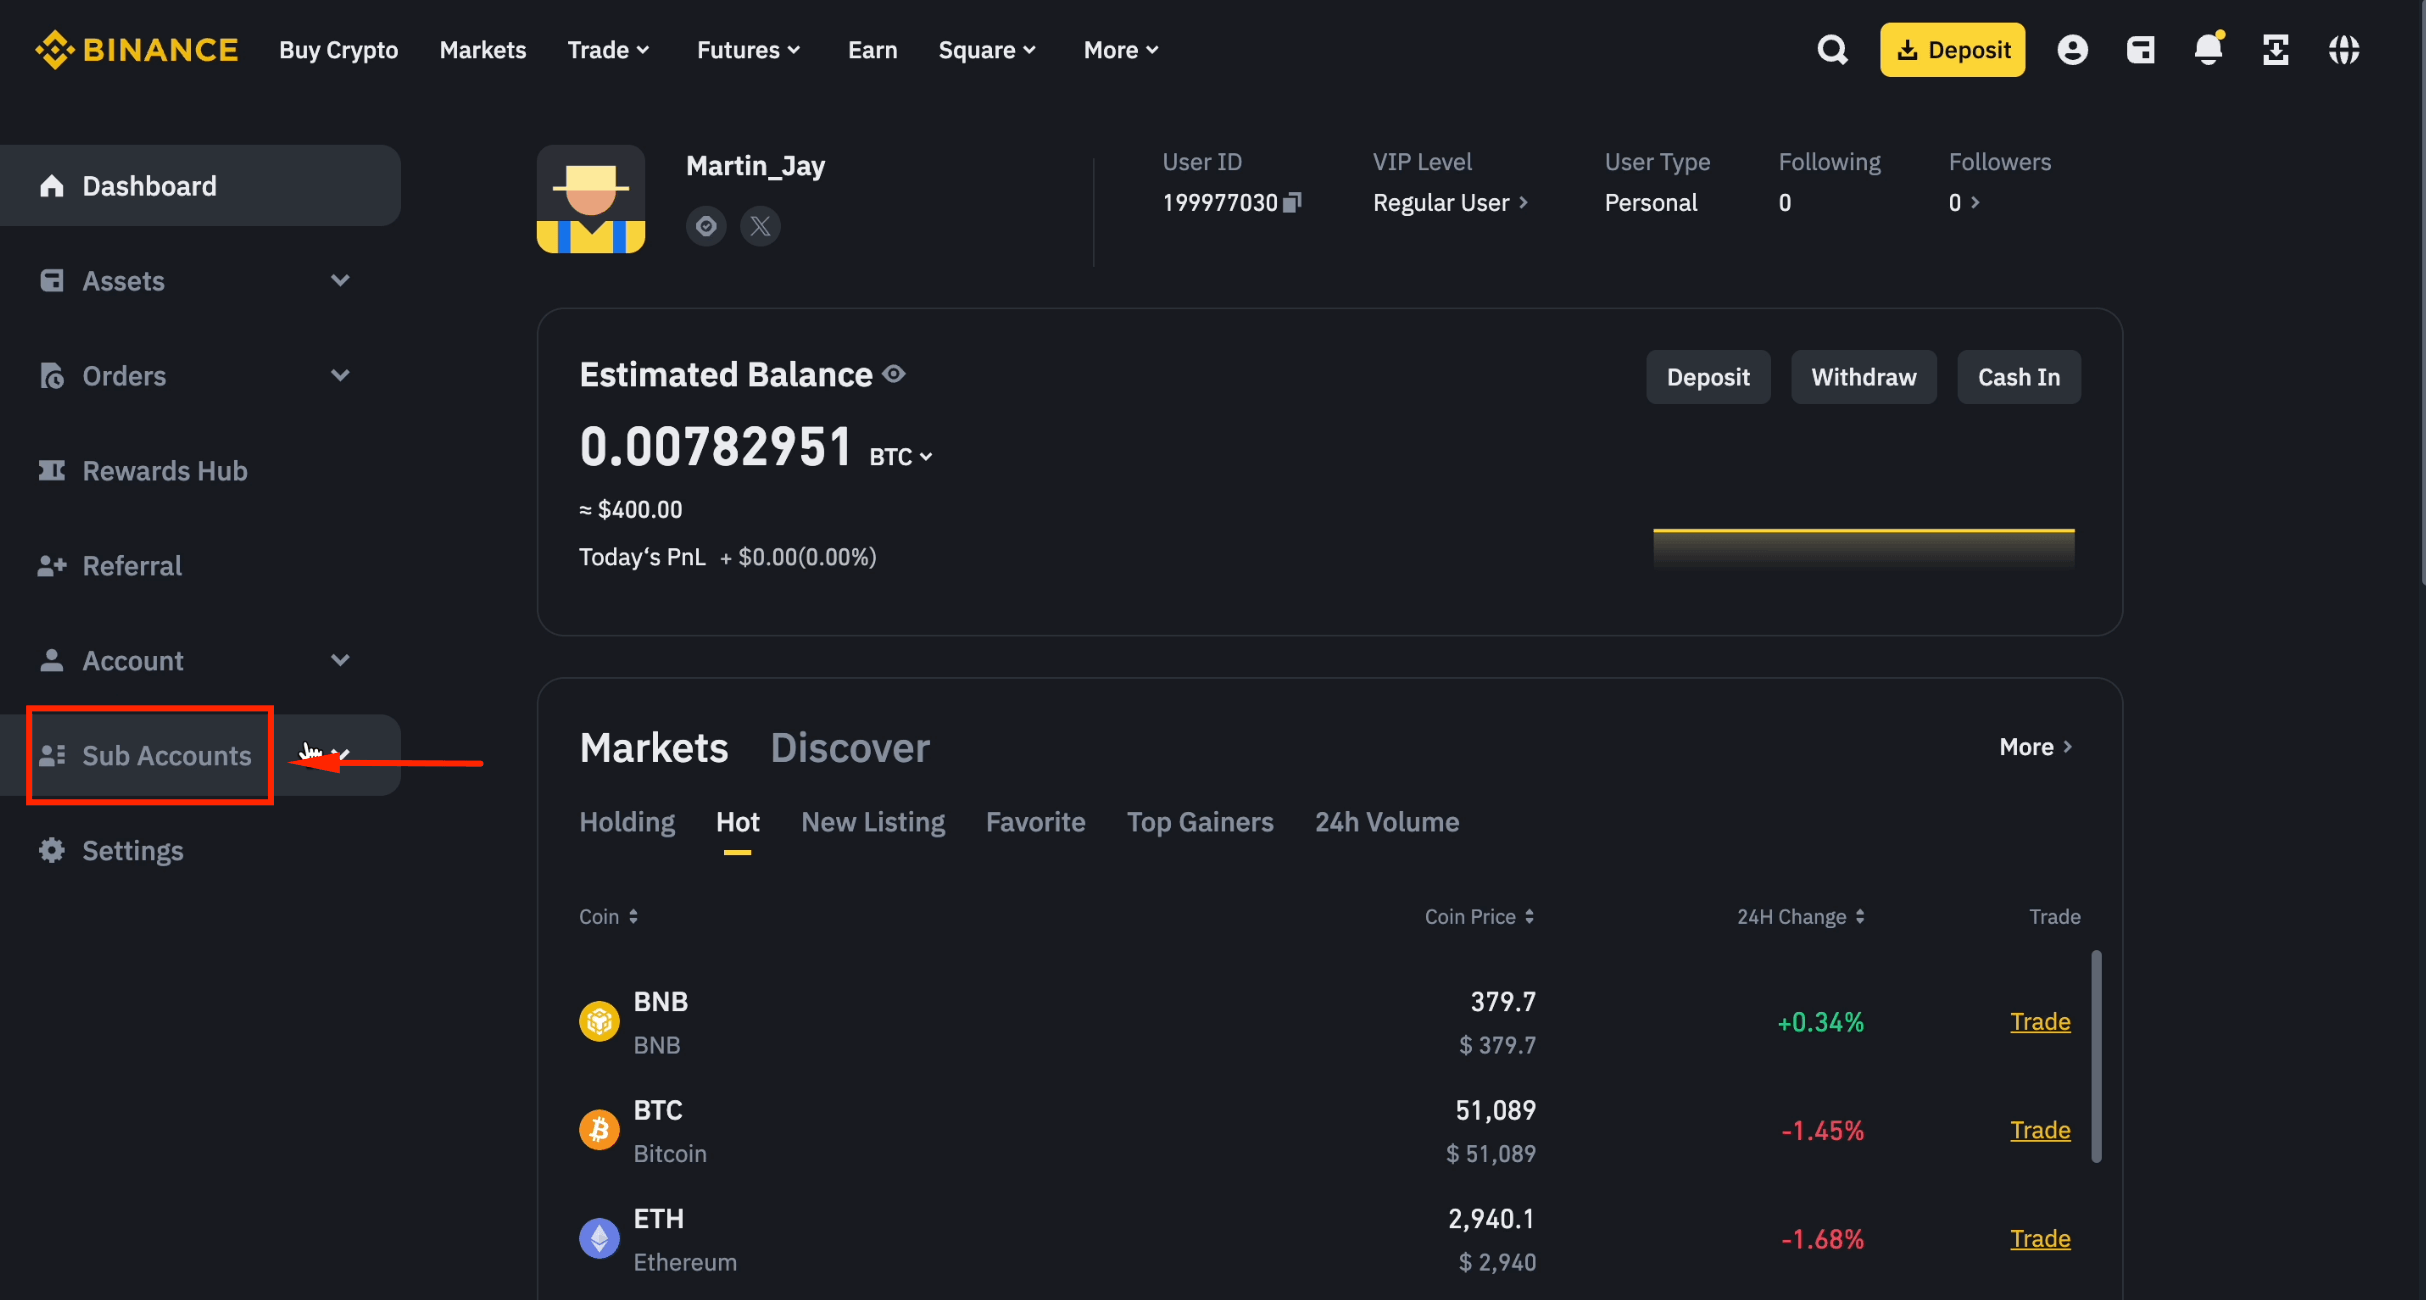
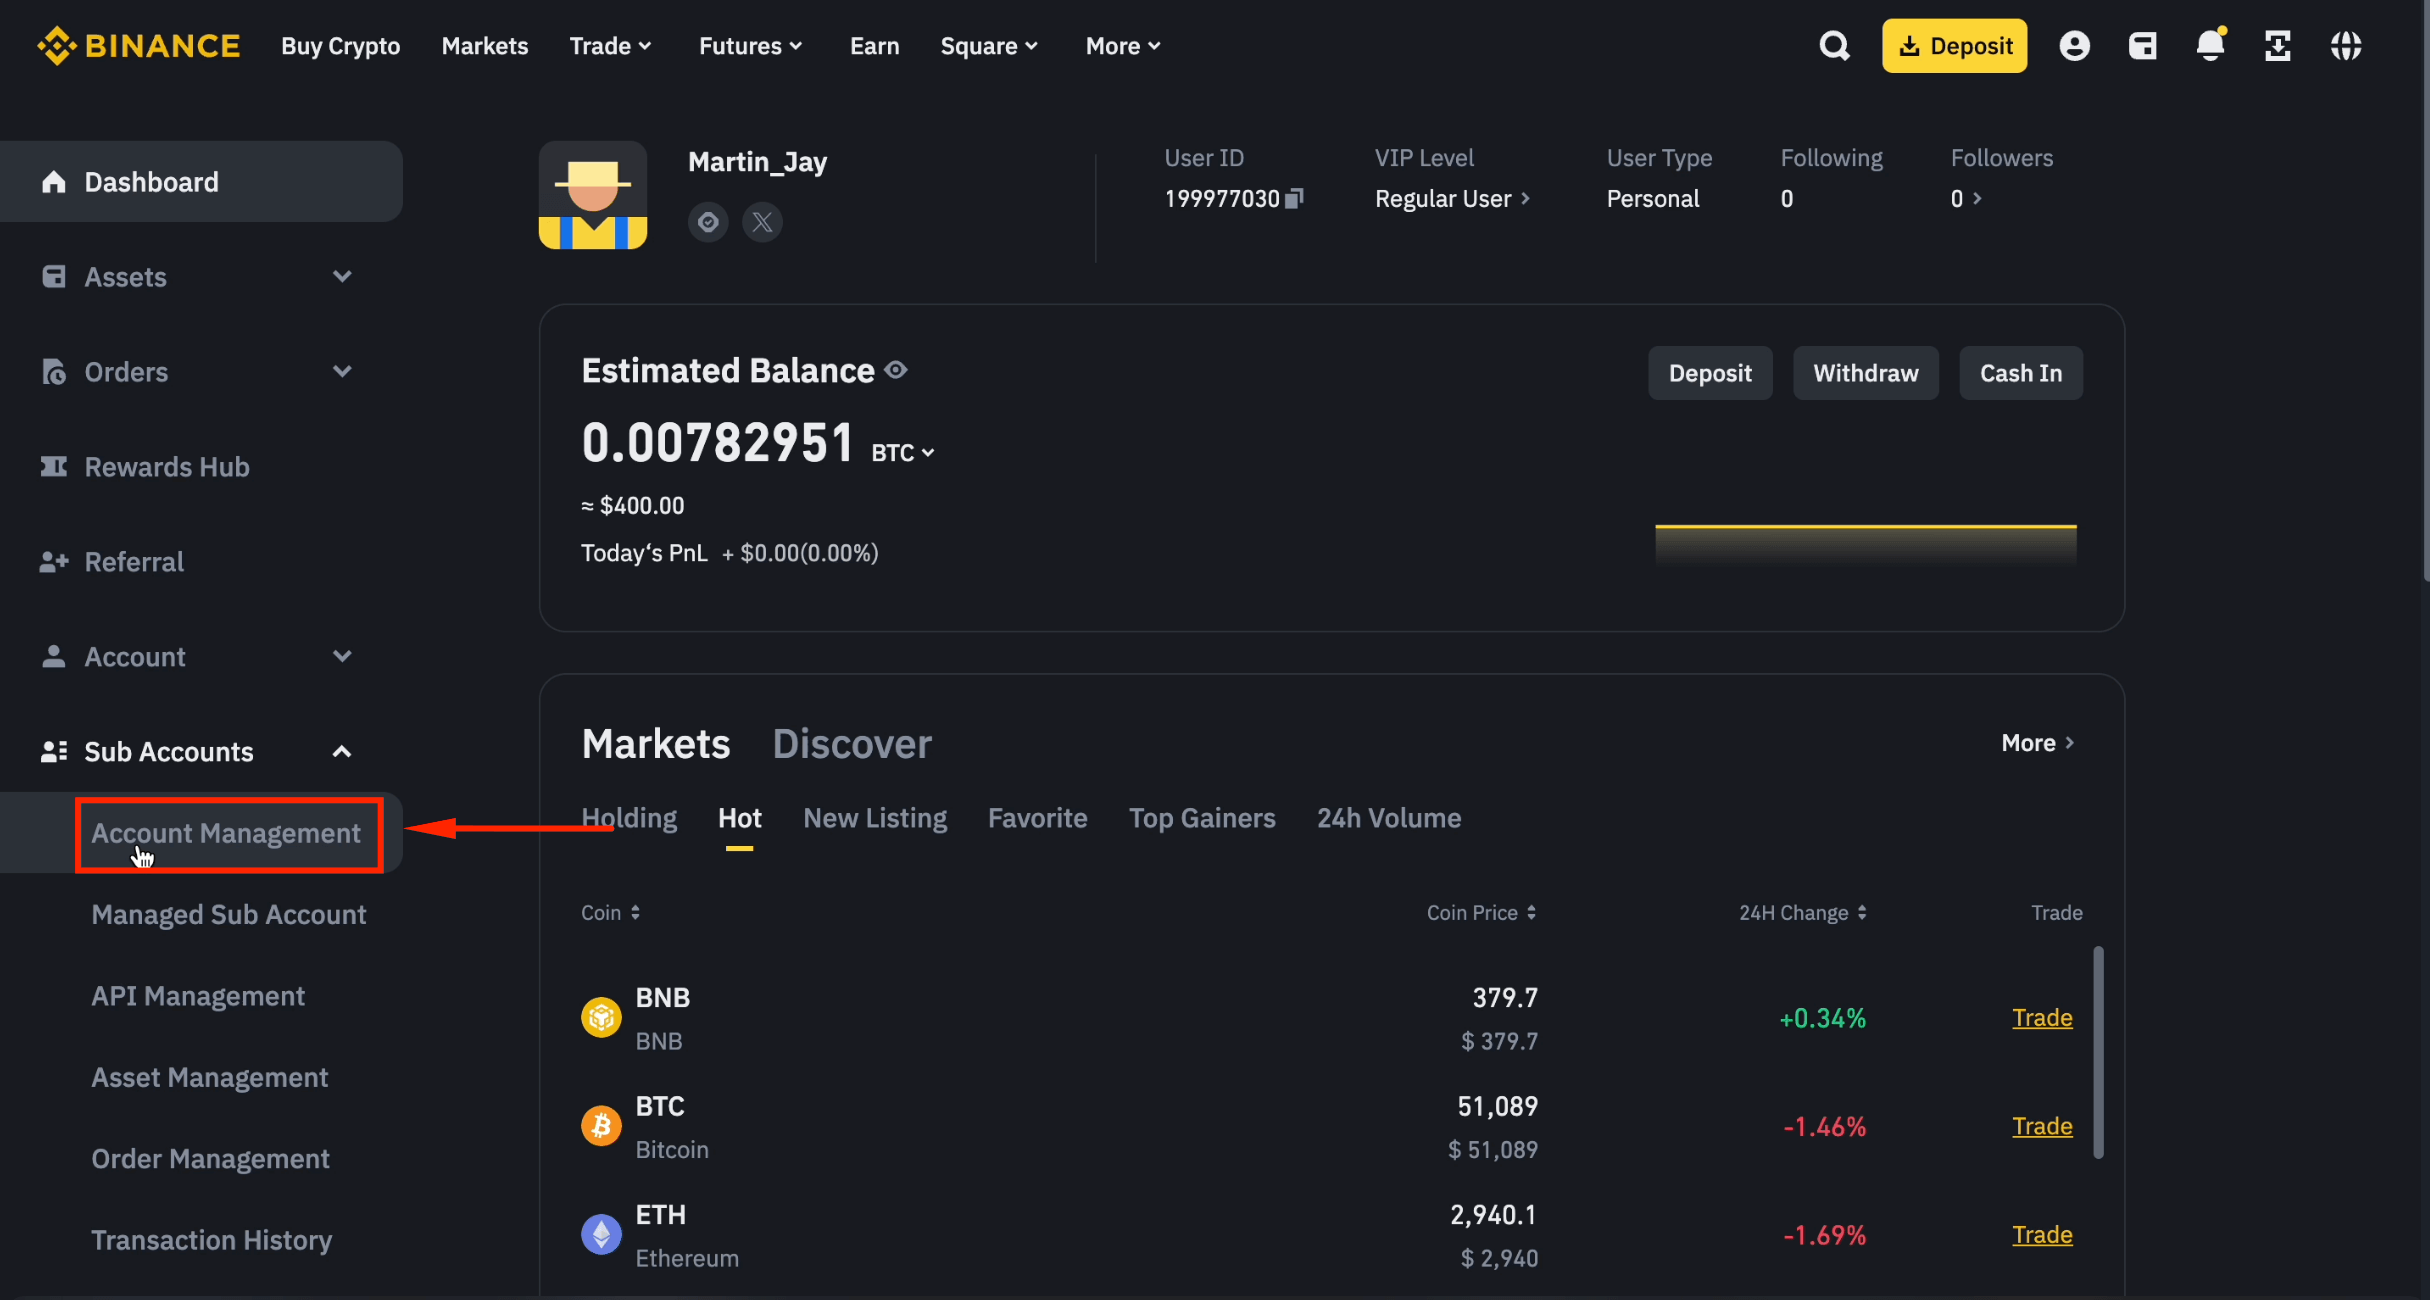
Step 6: Navigate to Sub Accounts
Click [Sub Accounts] from the account menu.
Step 7: Open Account Management
Click [Account Management].
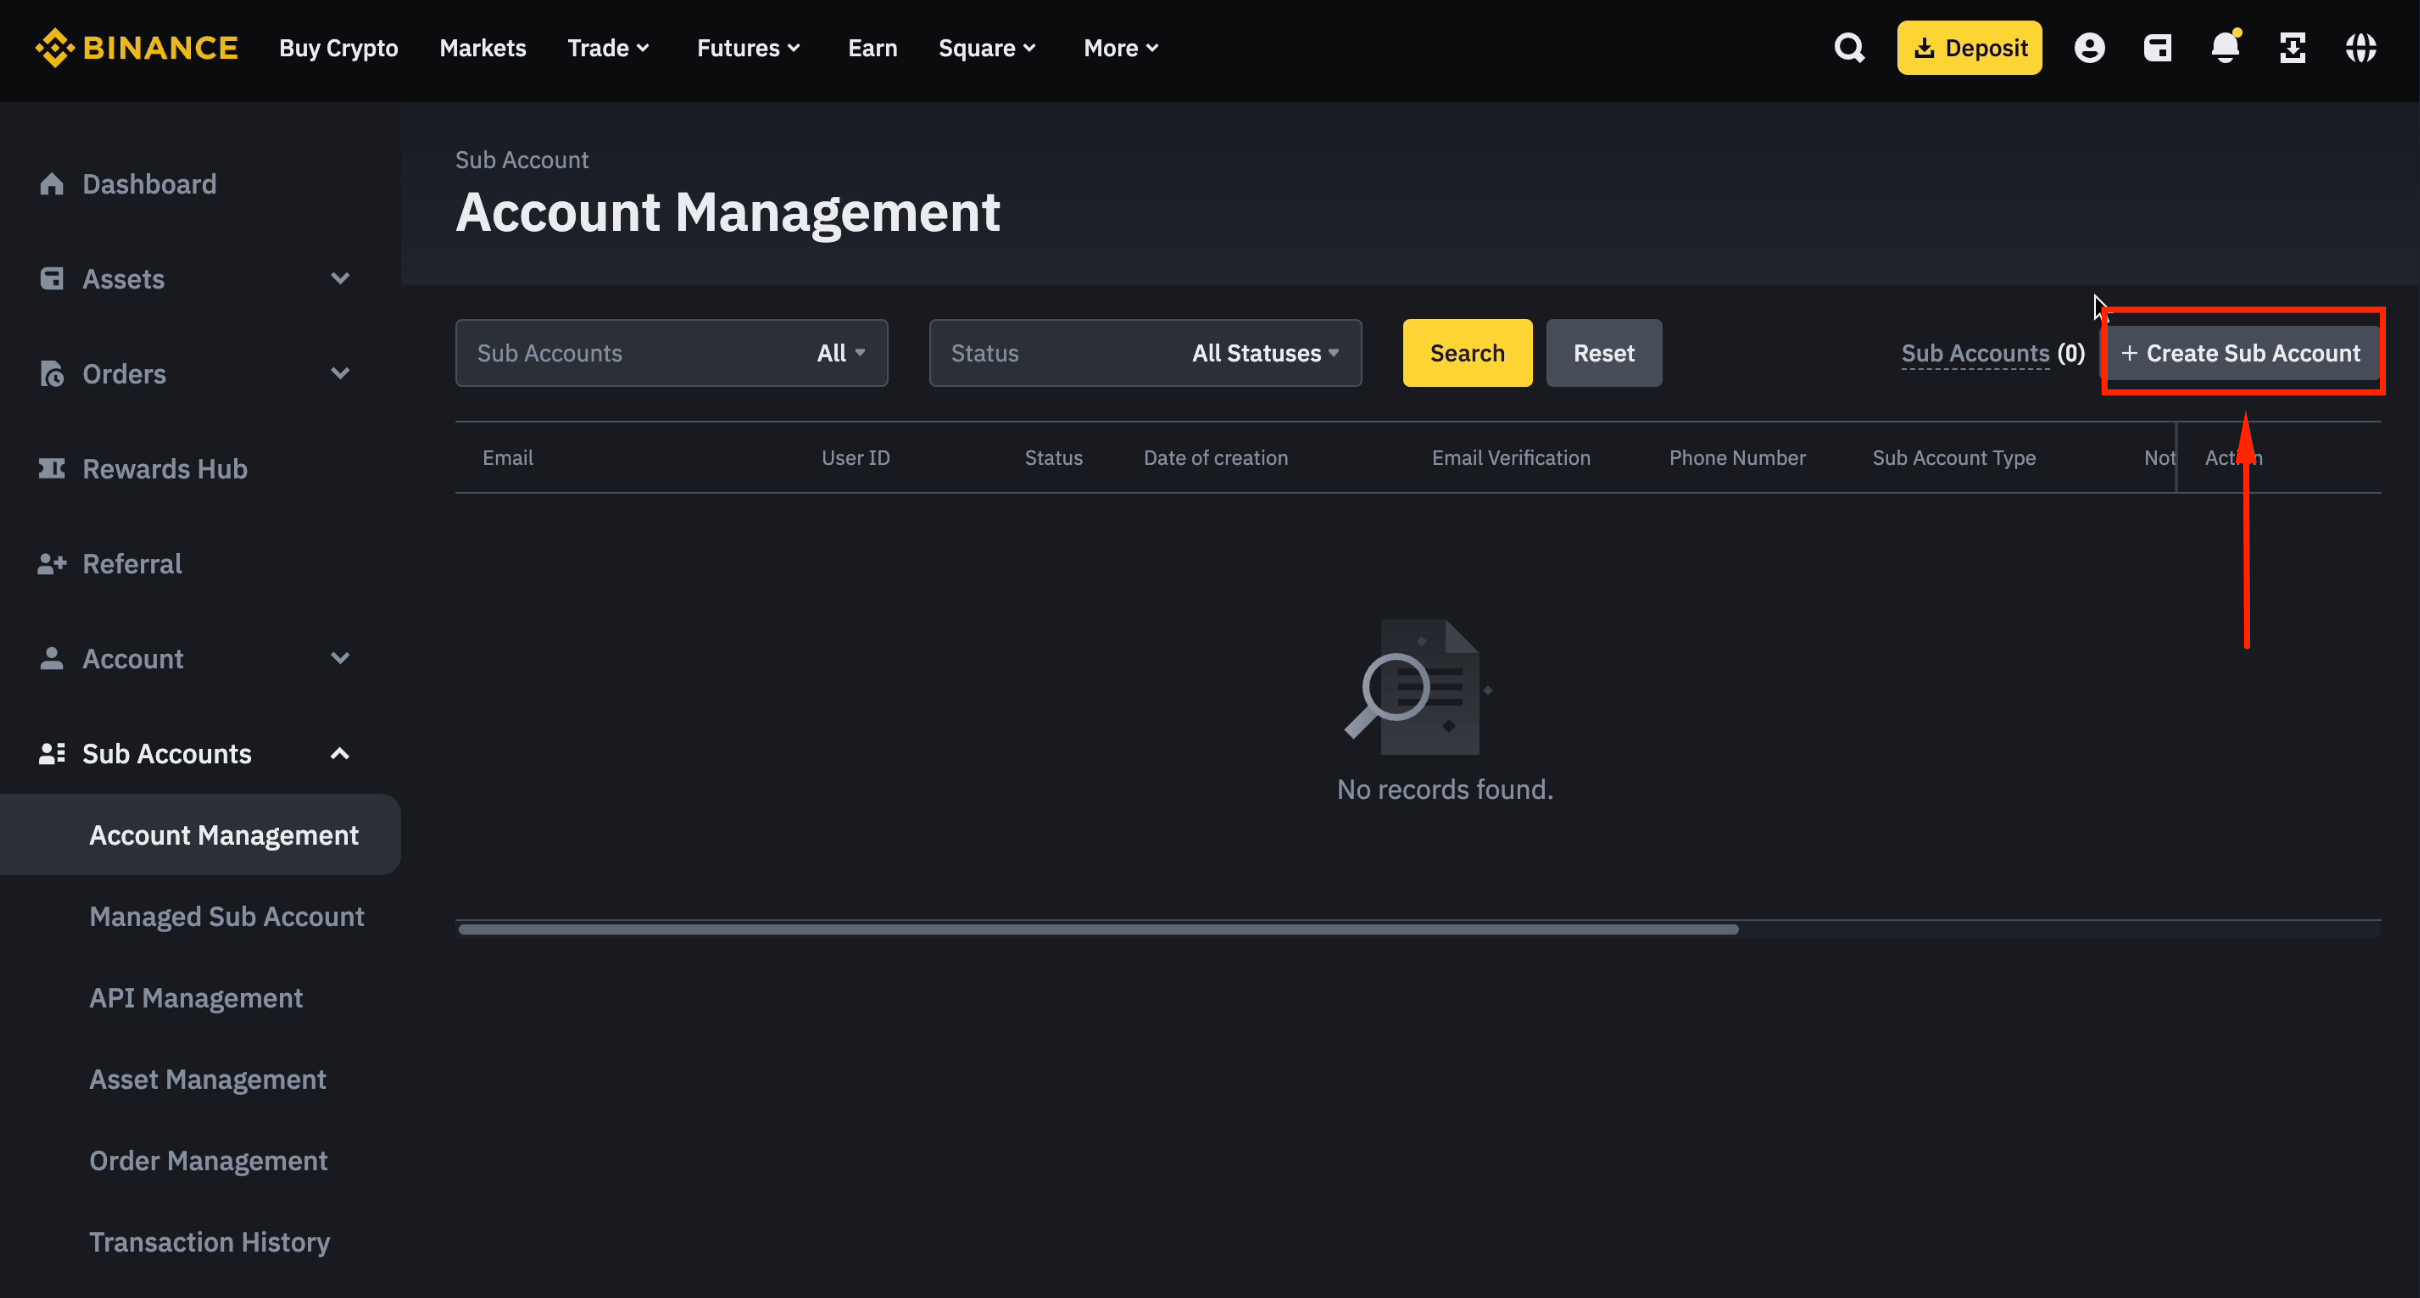
Step 8: Create a New Sub-Account
Click [Create Sub Account].
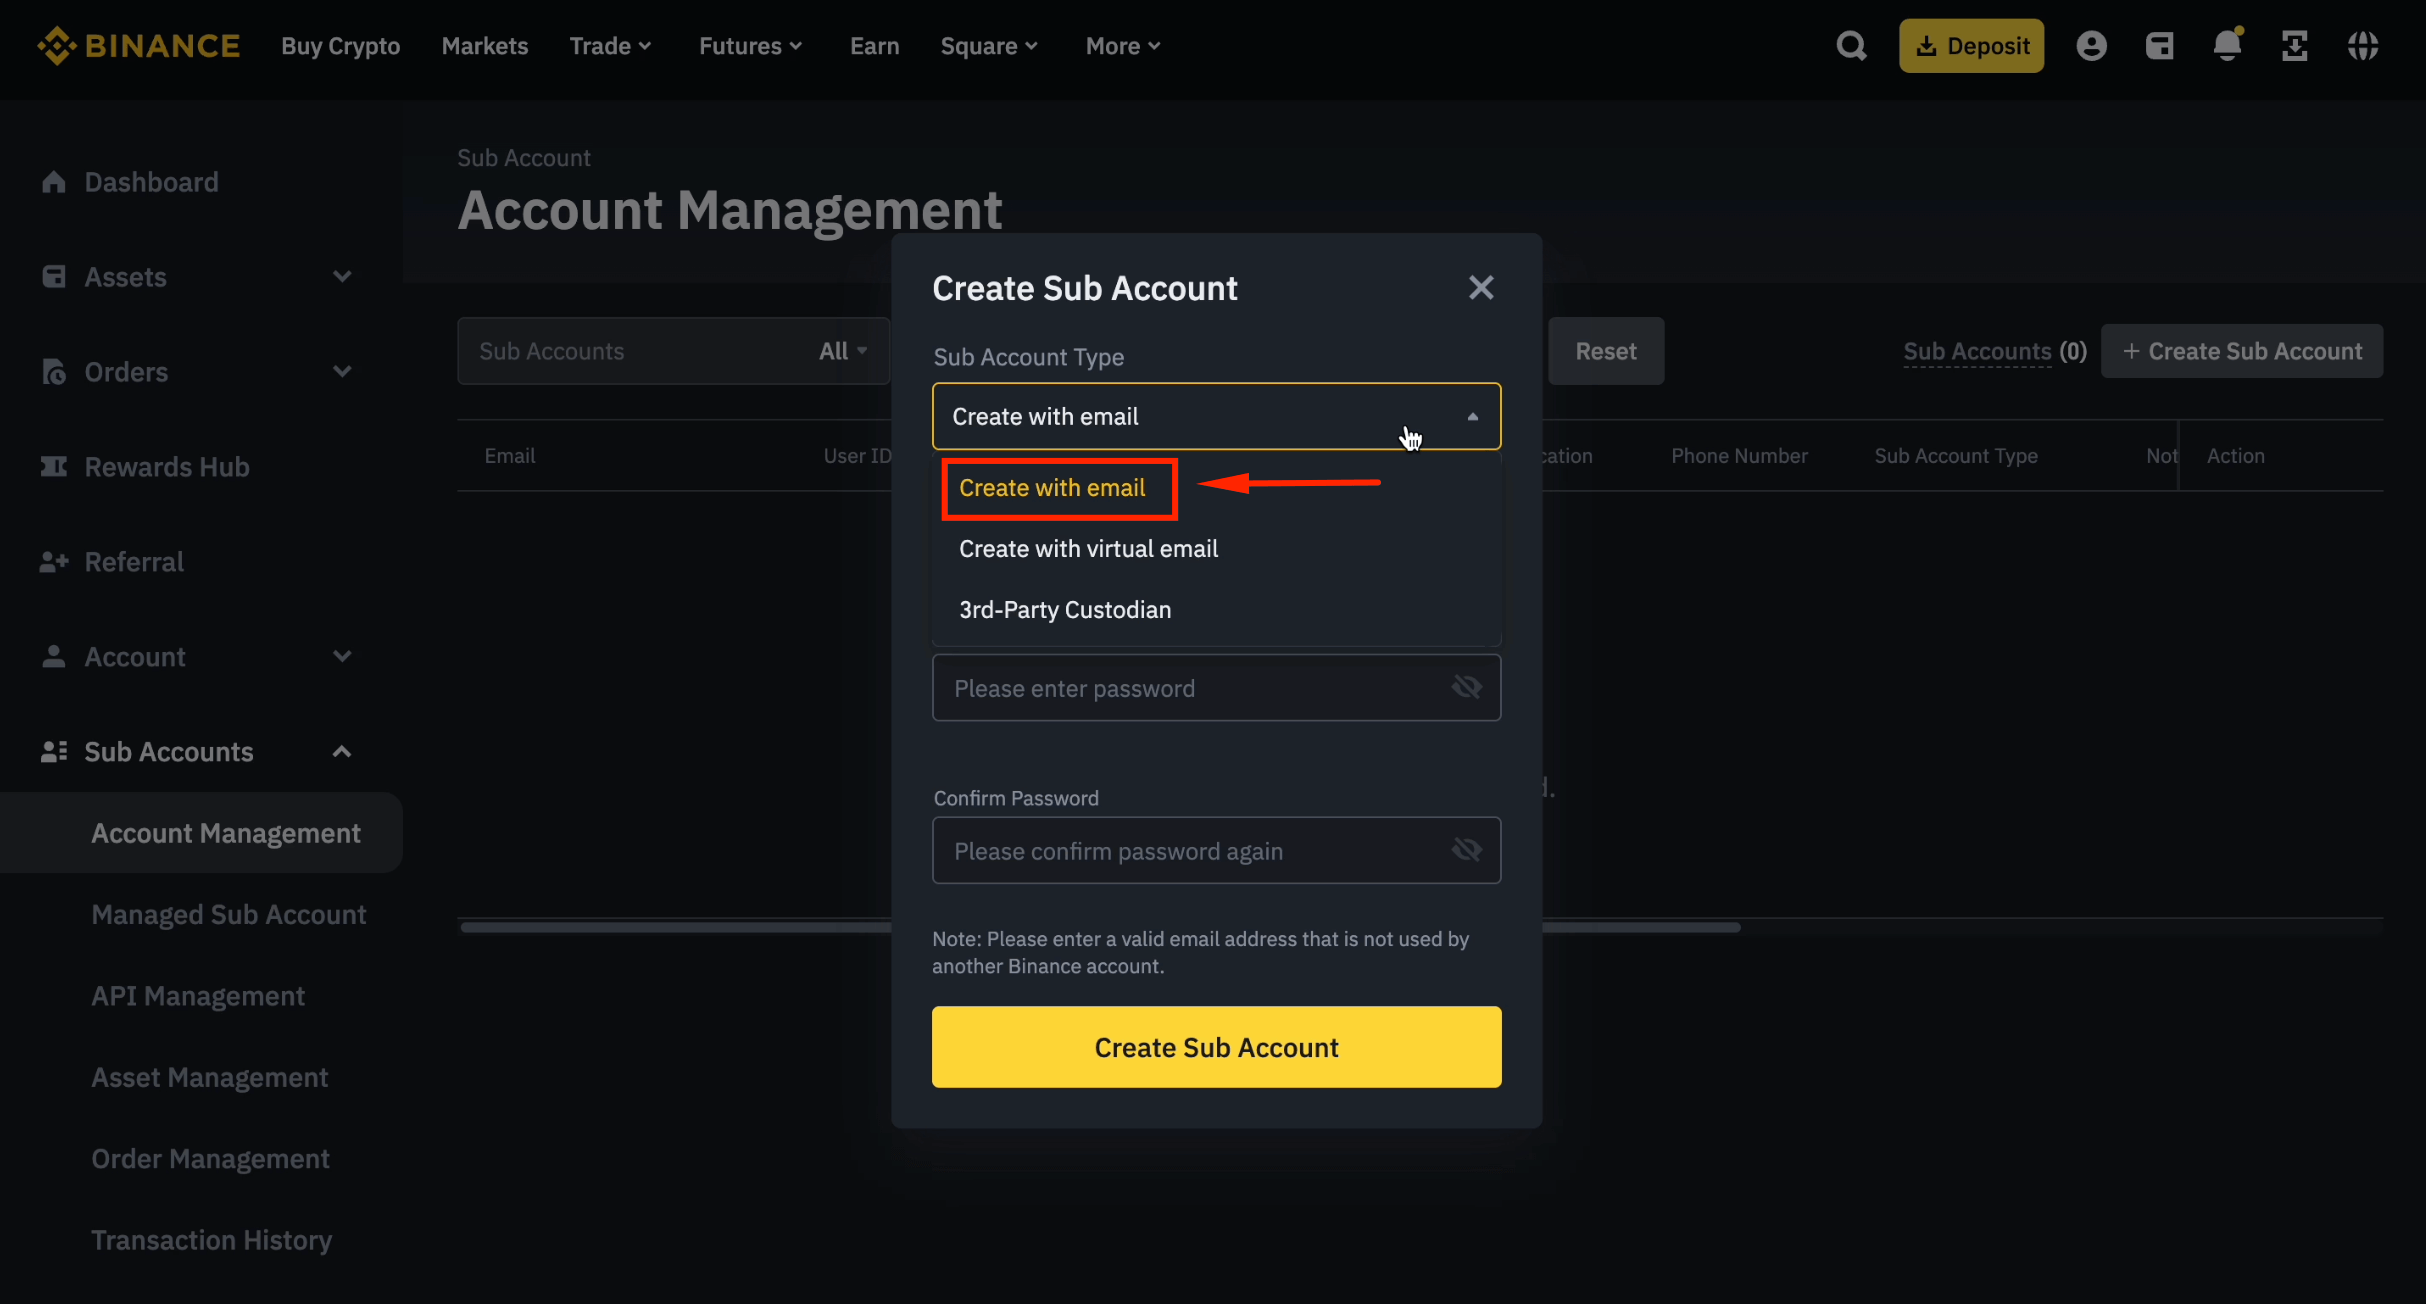
Step 9: Choose "Create with Email"
Select [Create with email].
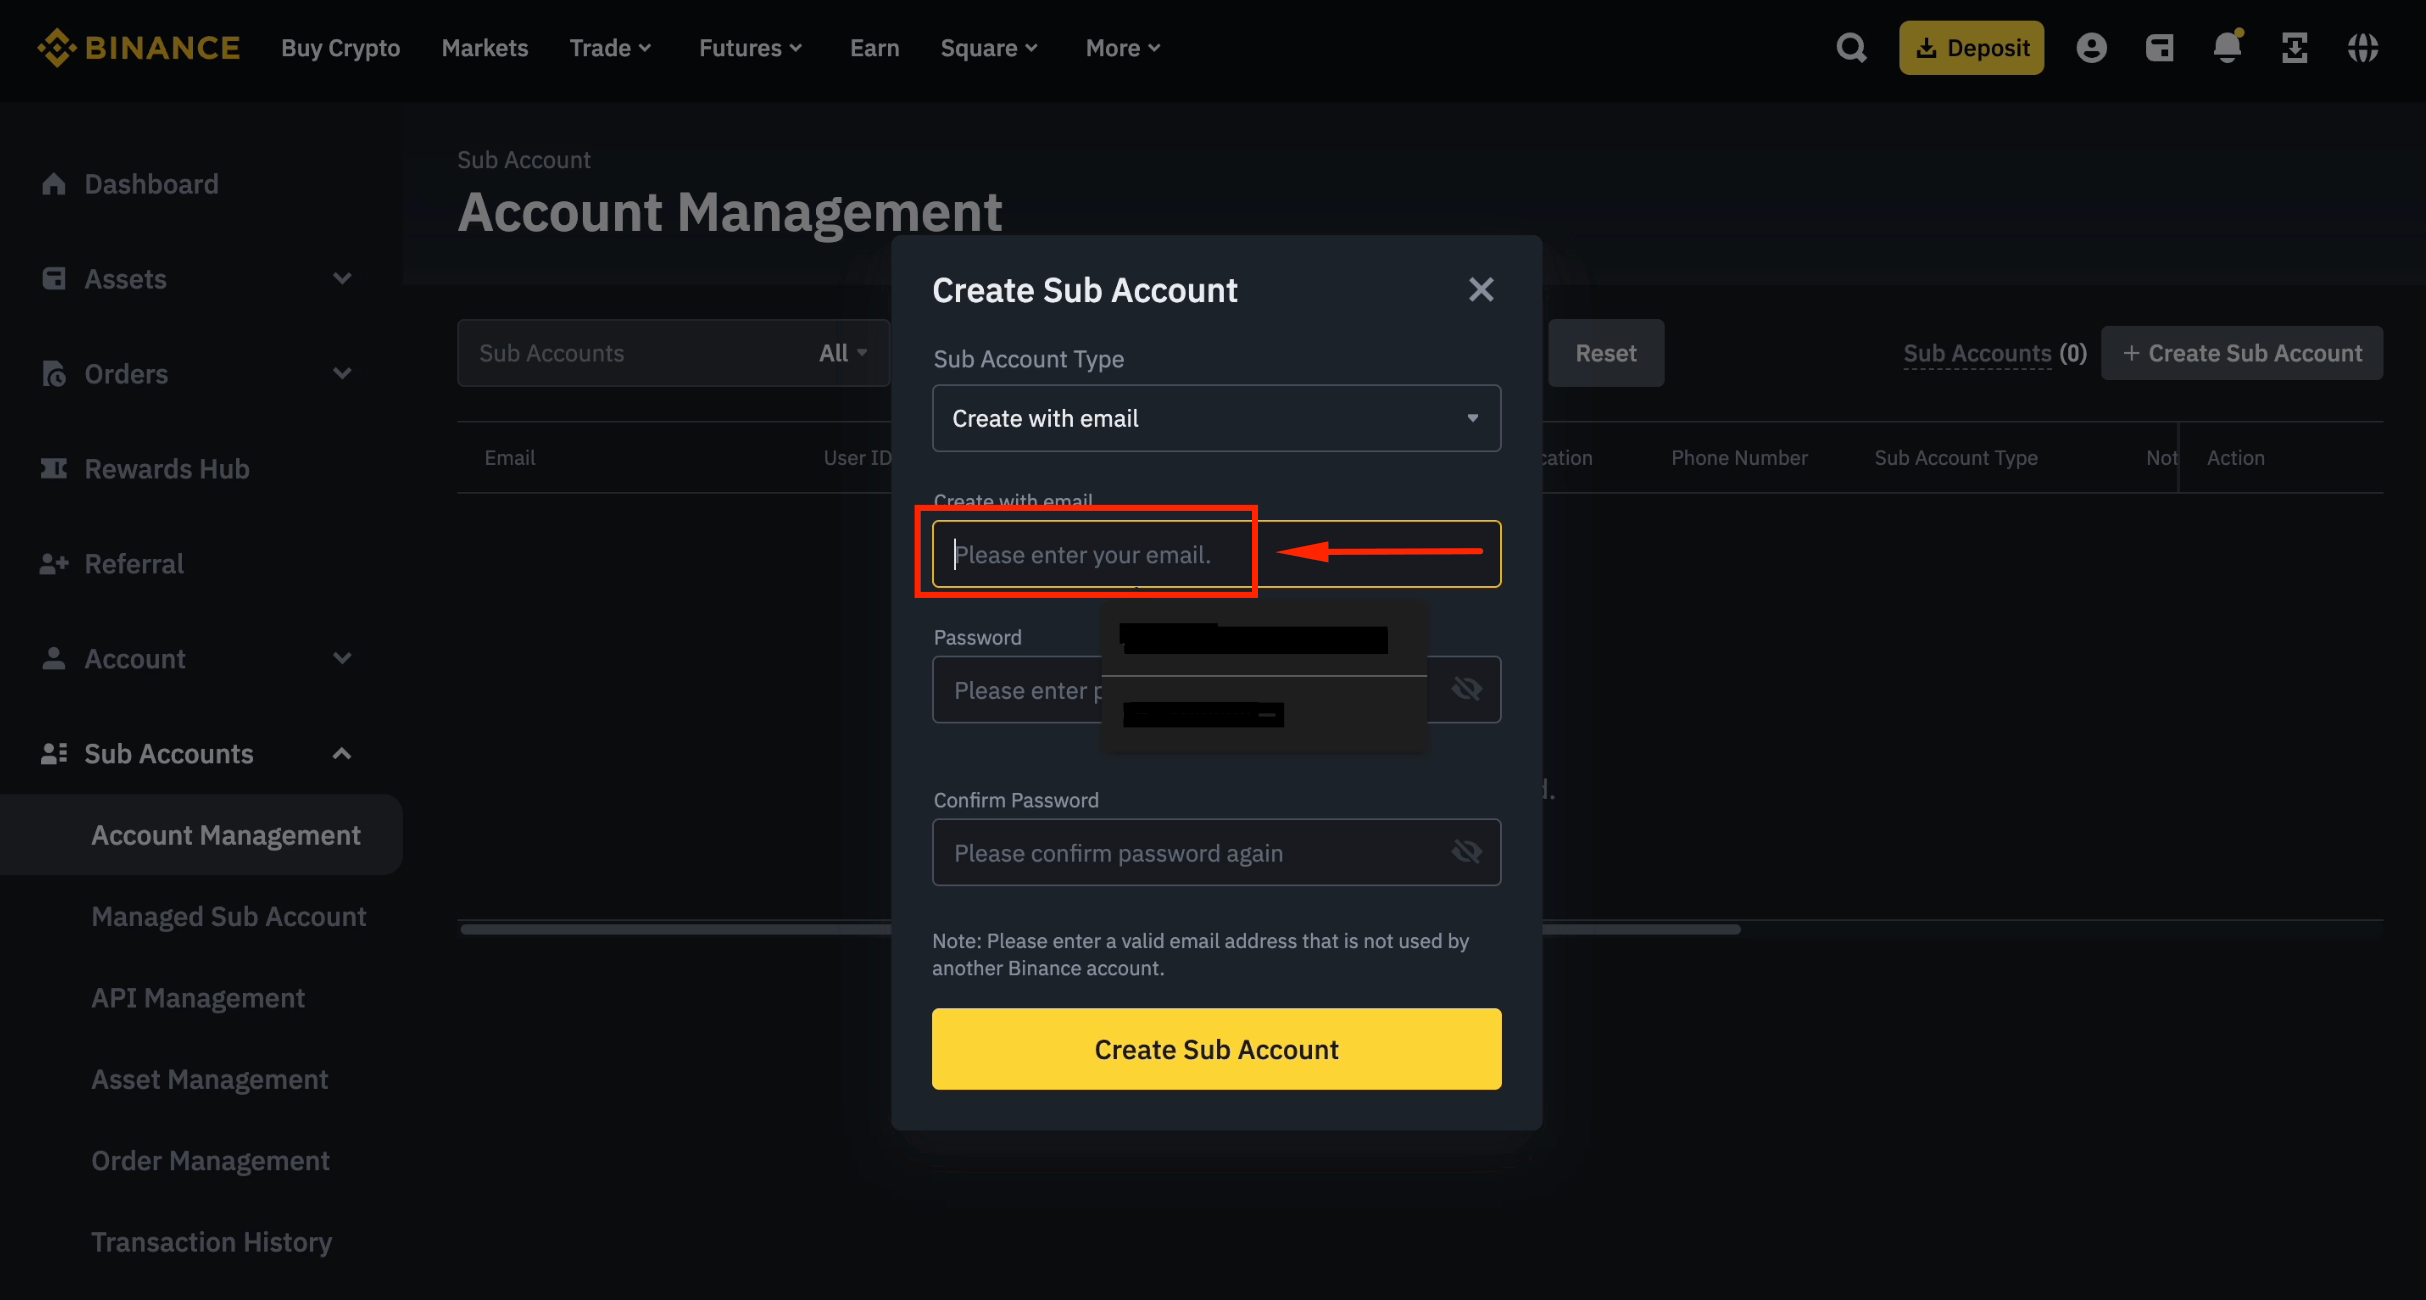
Step 10: Enter a New Email Address
Type a new email address for this sub-account. Each sub-account requires a unique email.
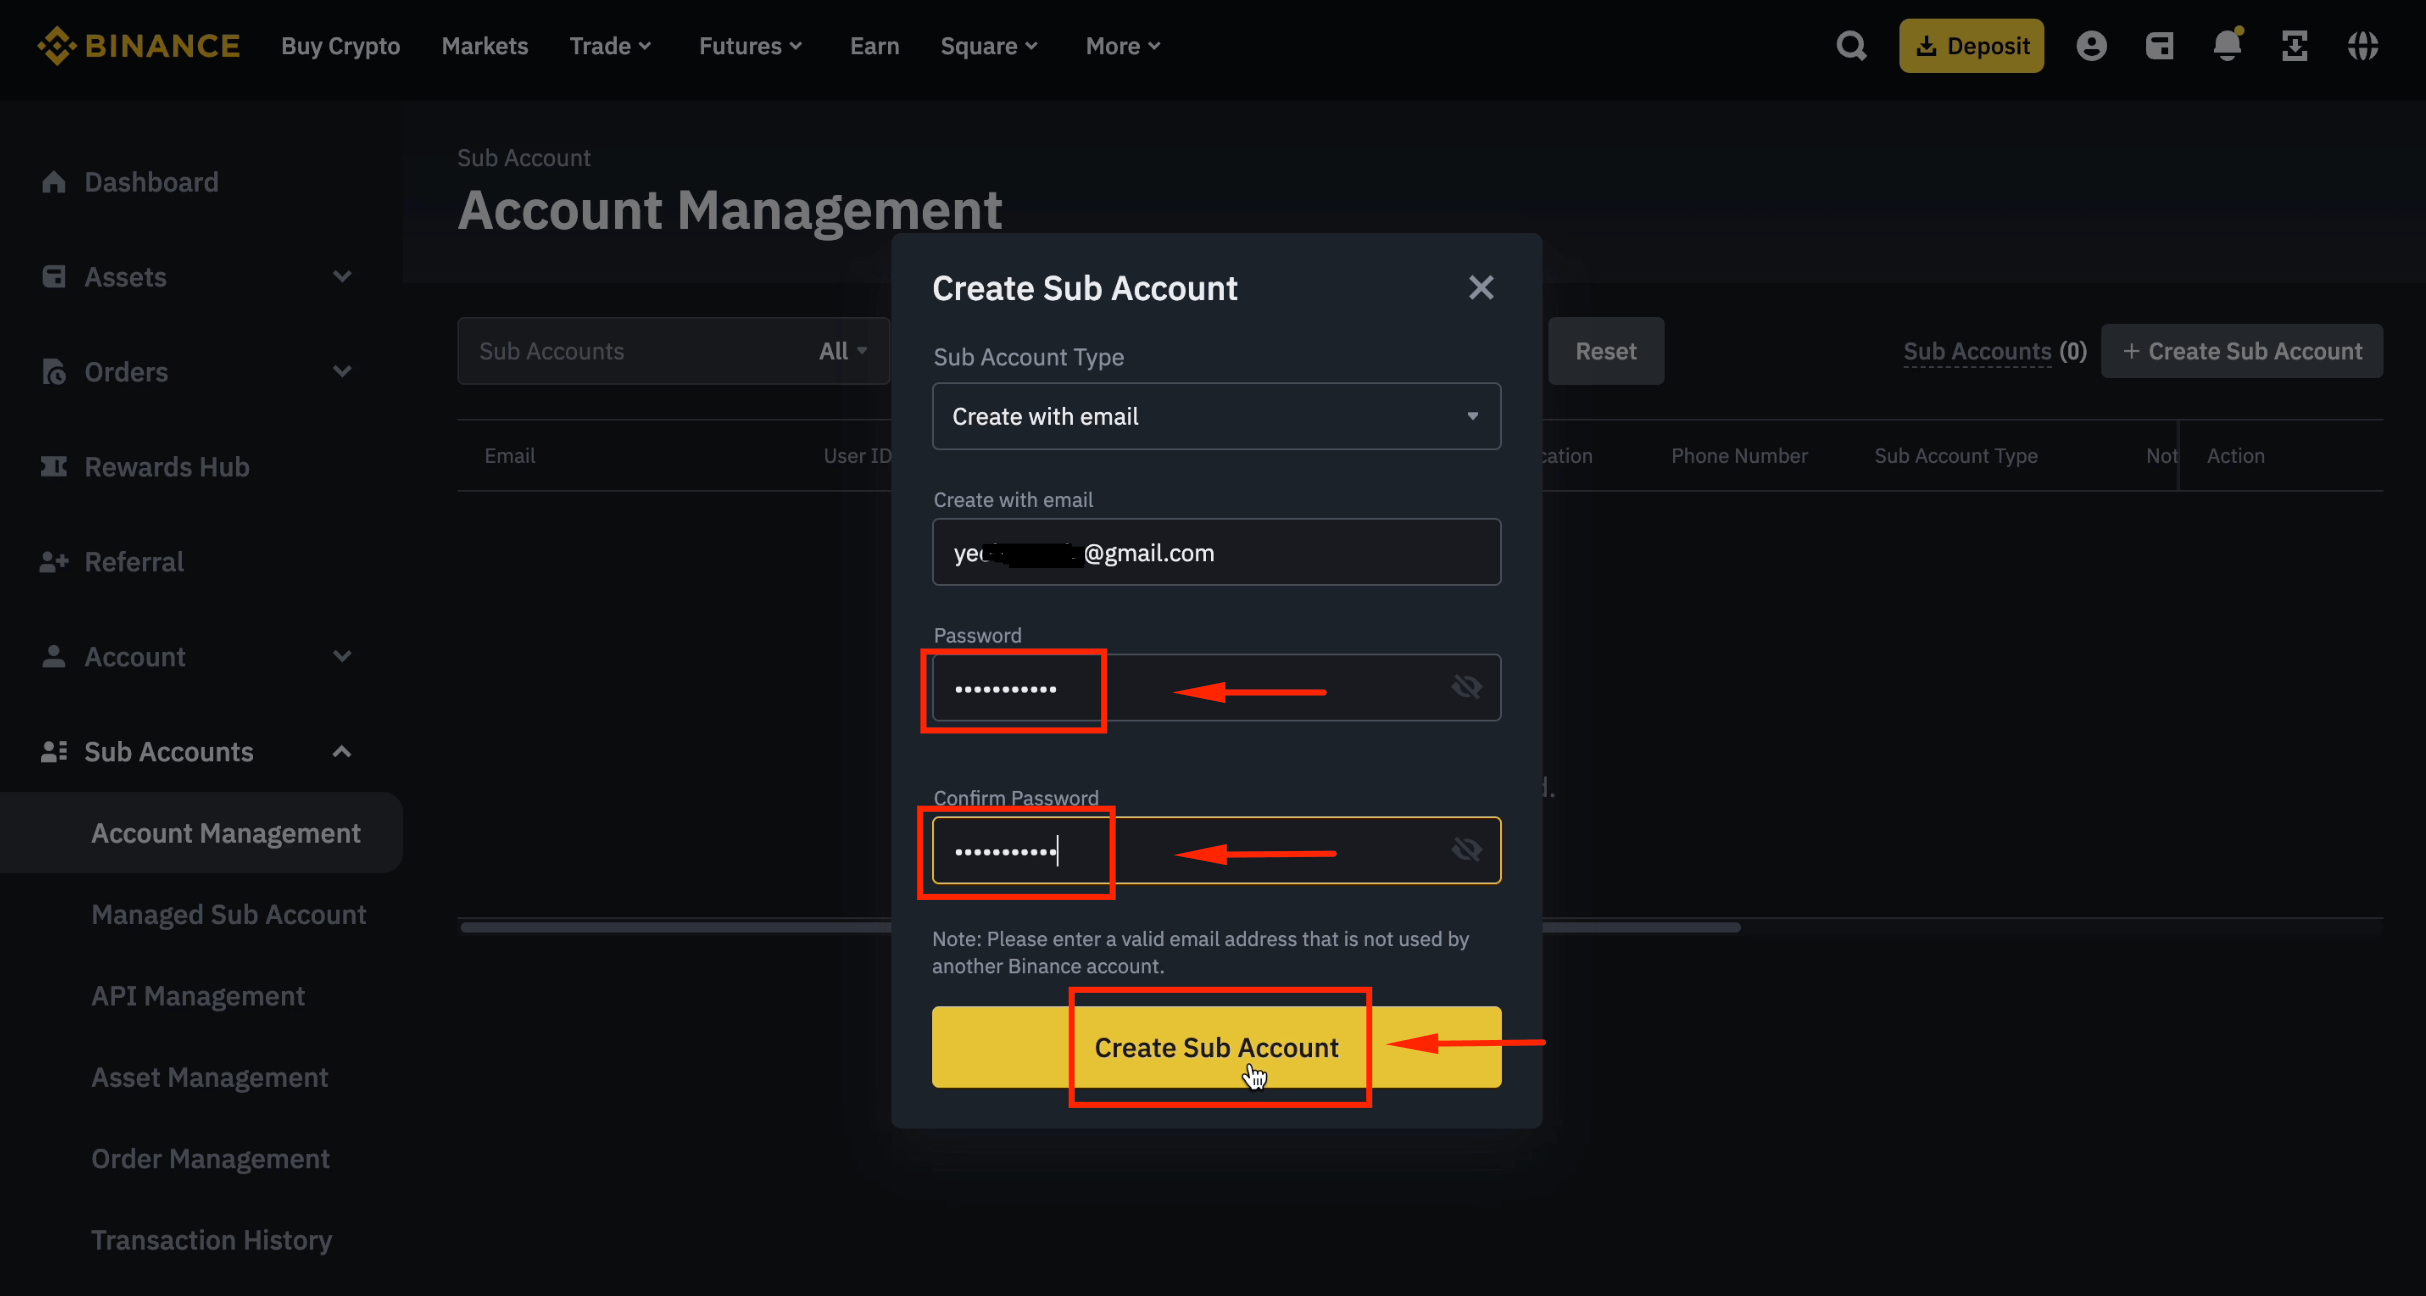
Step 11: Set the Sub-Account Password
Create a password, confirm it, and click [Create Sub Account].
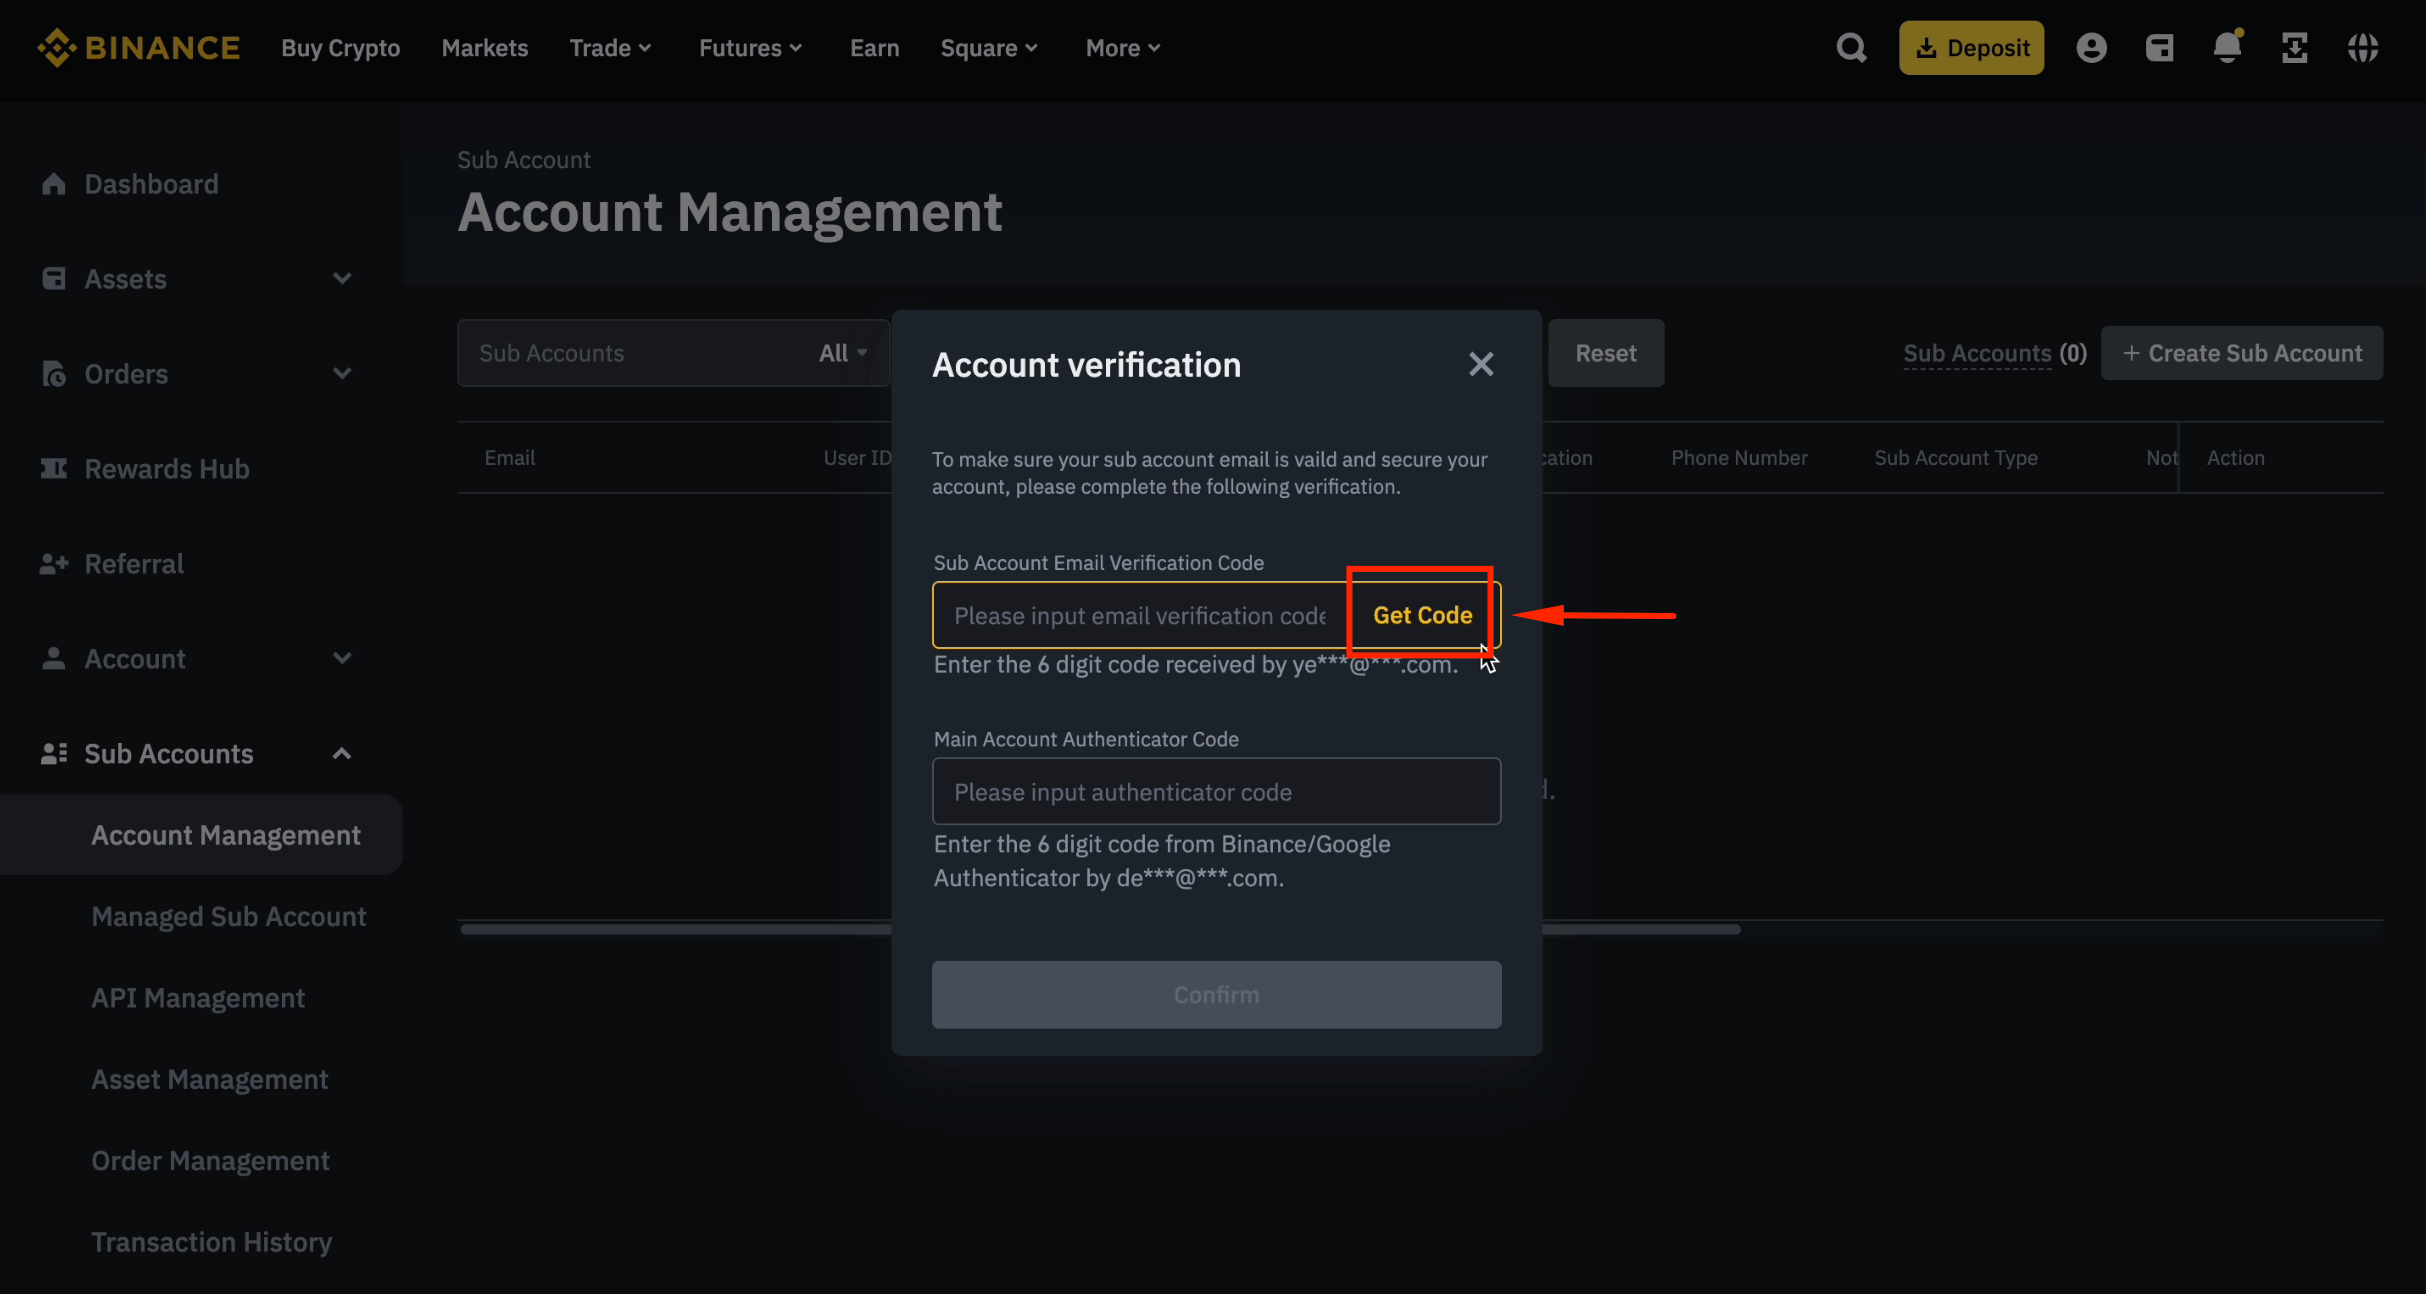
Step 12: Verify the New Email
Click [Get Code], then enter the 6-digit code sent to the new sub-account email.
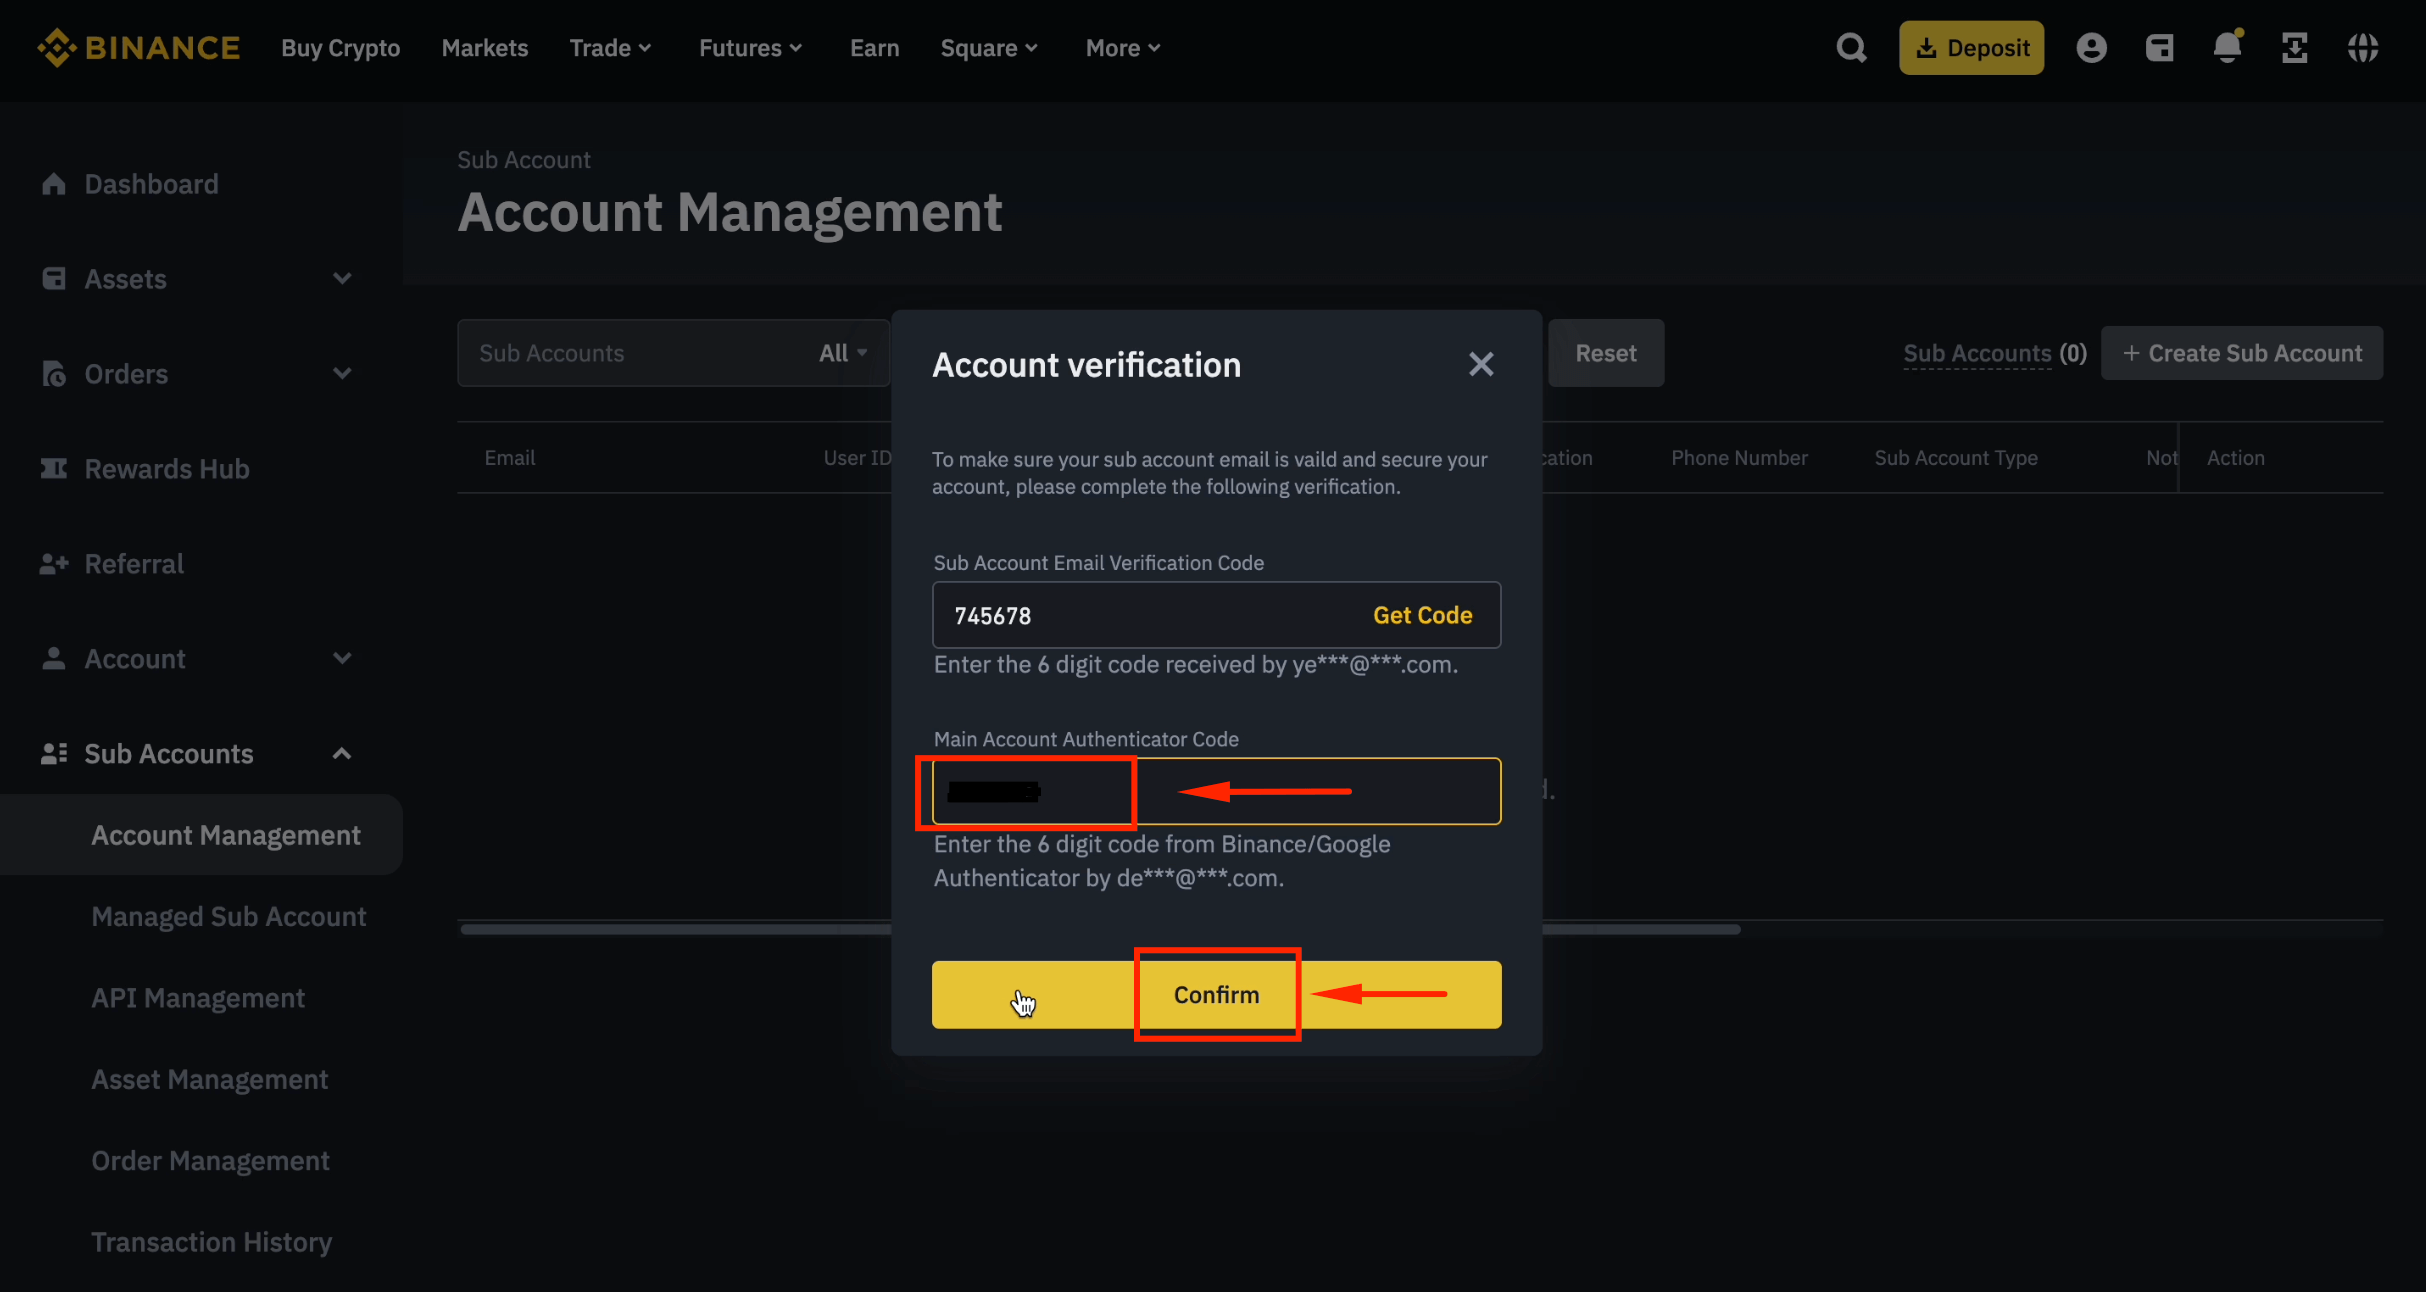
Step 13: Enter Google Authenticator Code
Enter the 6-digit code from your Google Authenticator app.
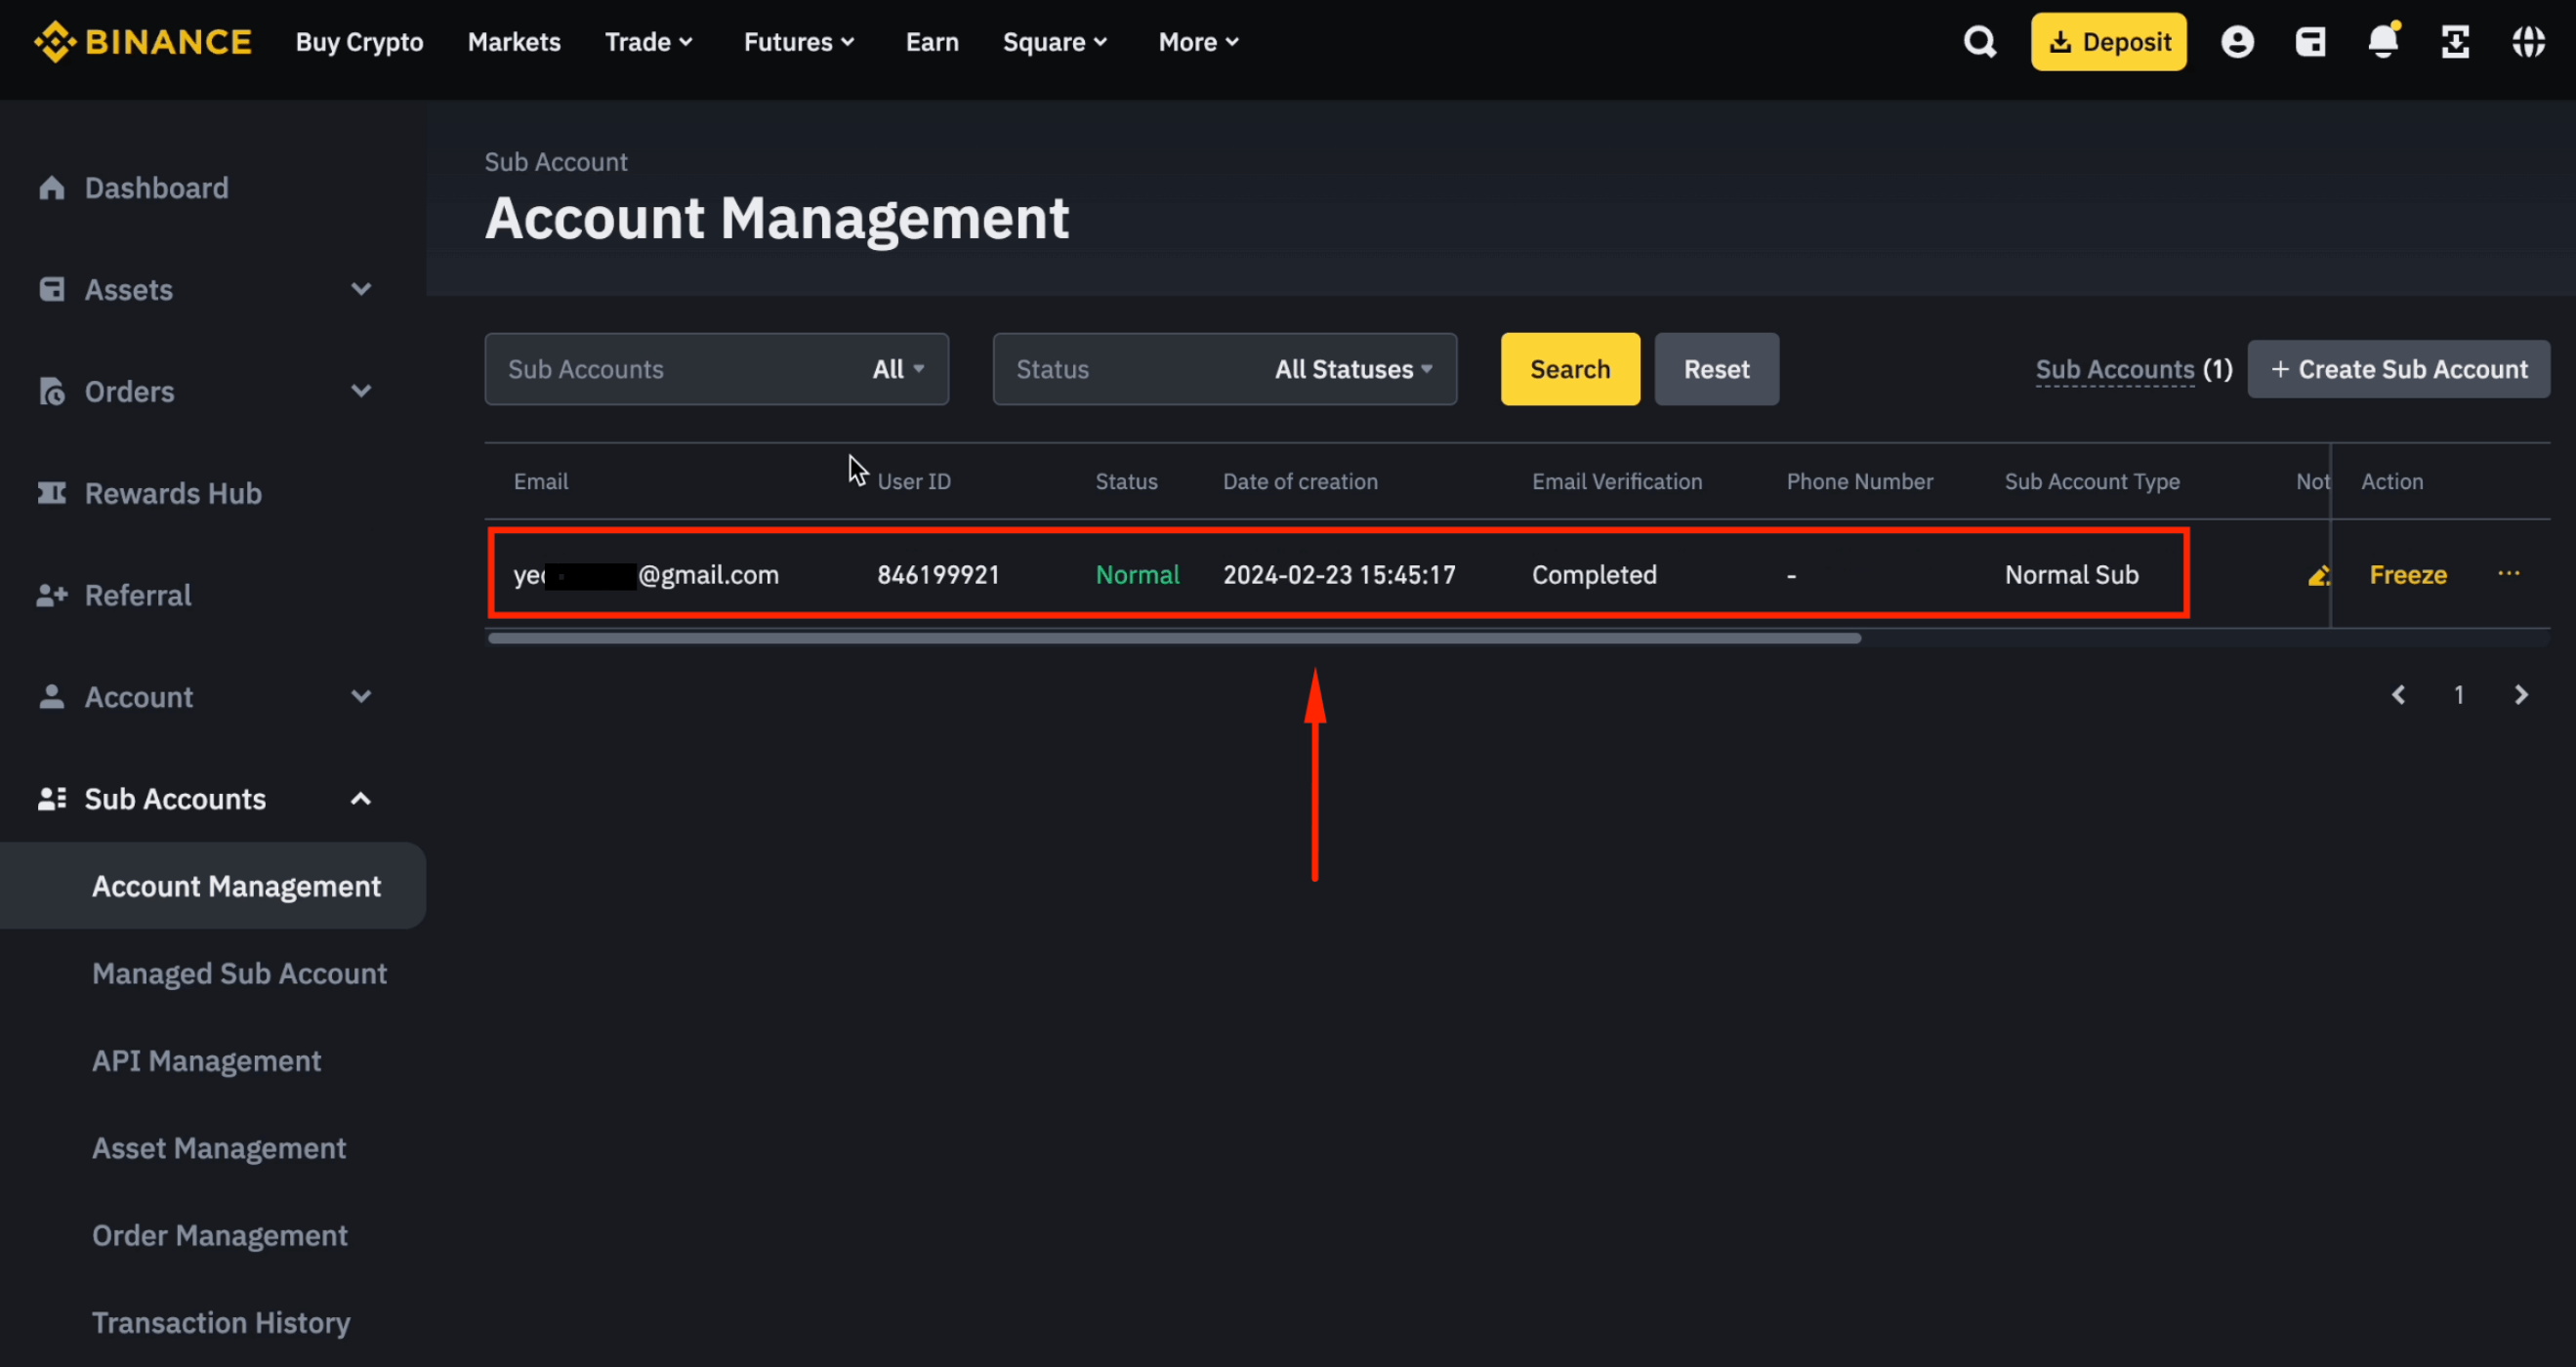
Step 14: Sub-Account Created
Your sub-account has been created successfully.
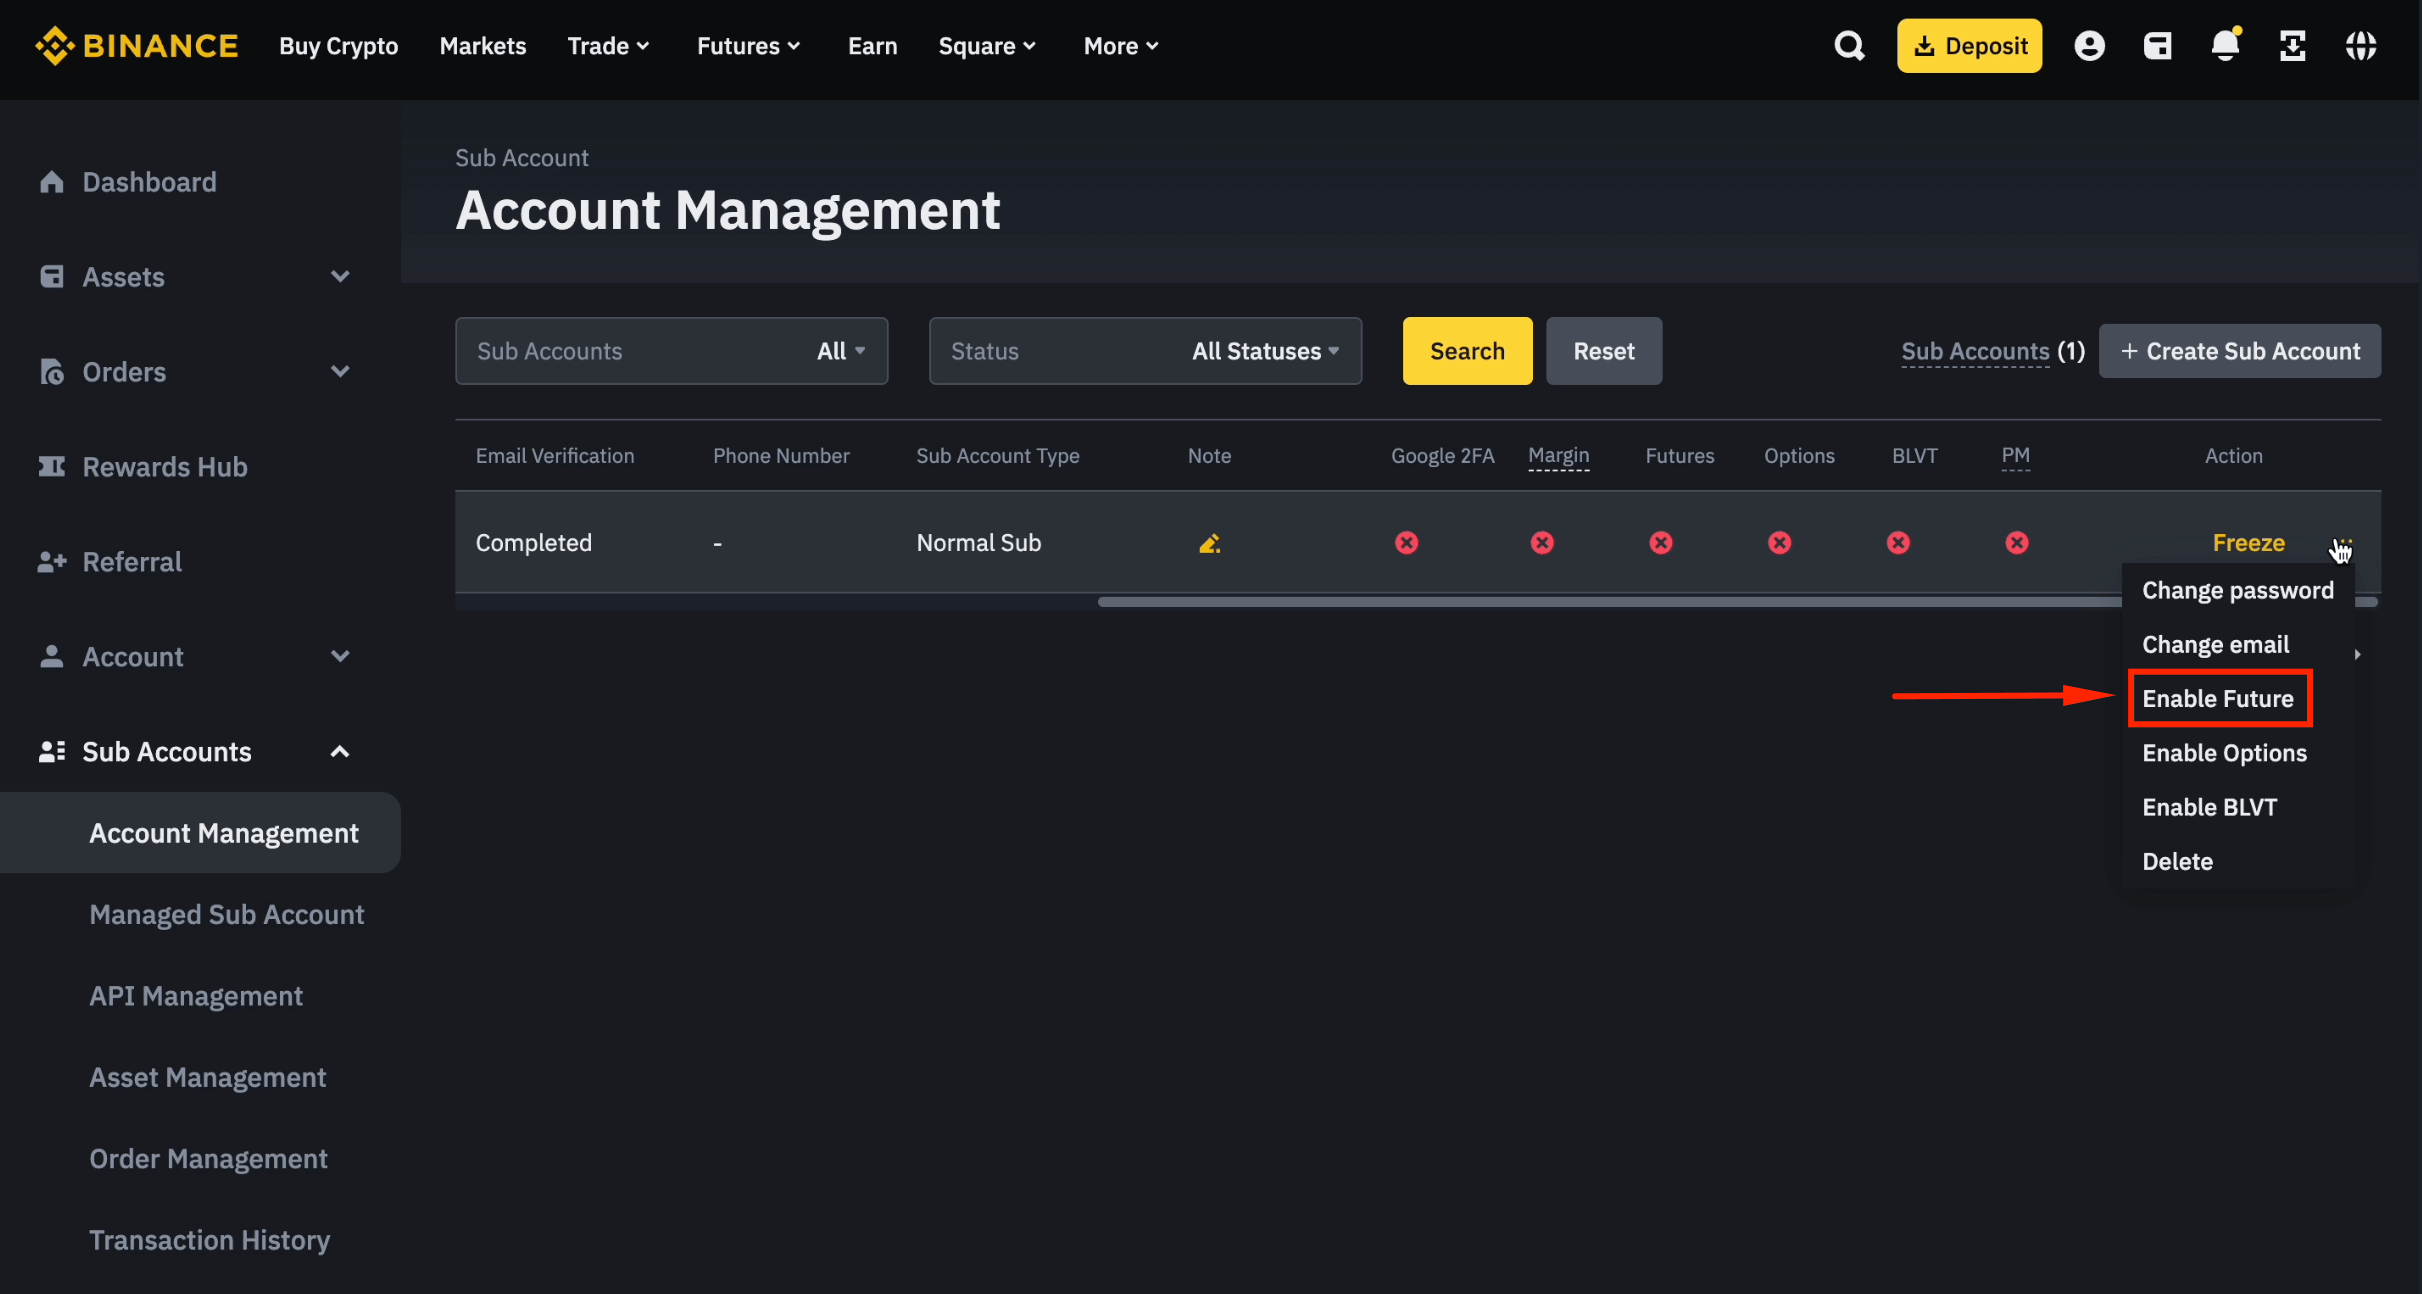
Step 15: Enable Futures for the Sub-Account
Click [...] next to the sub-account and select [Enable Futures].
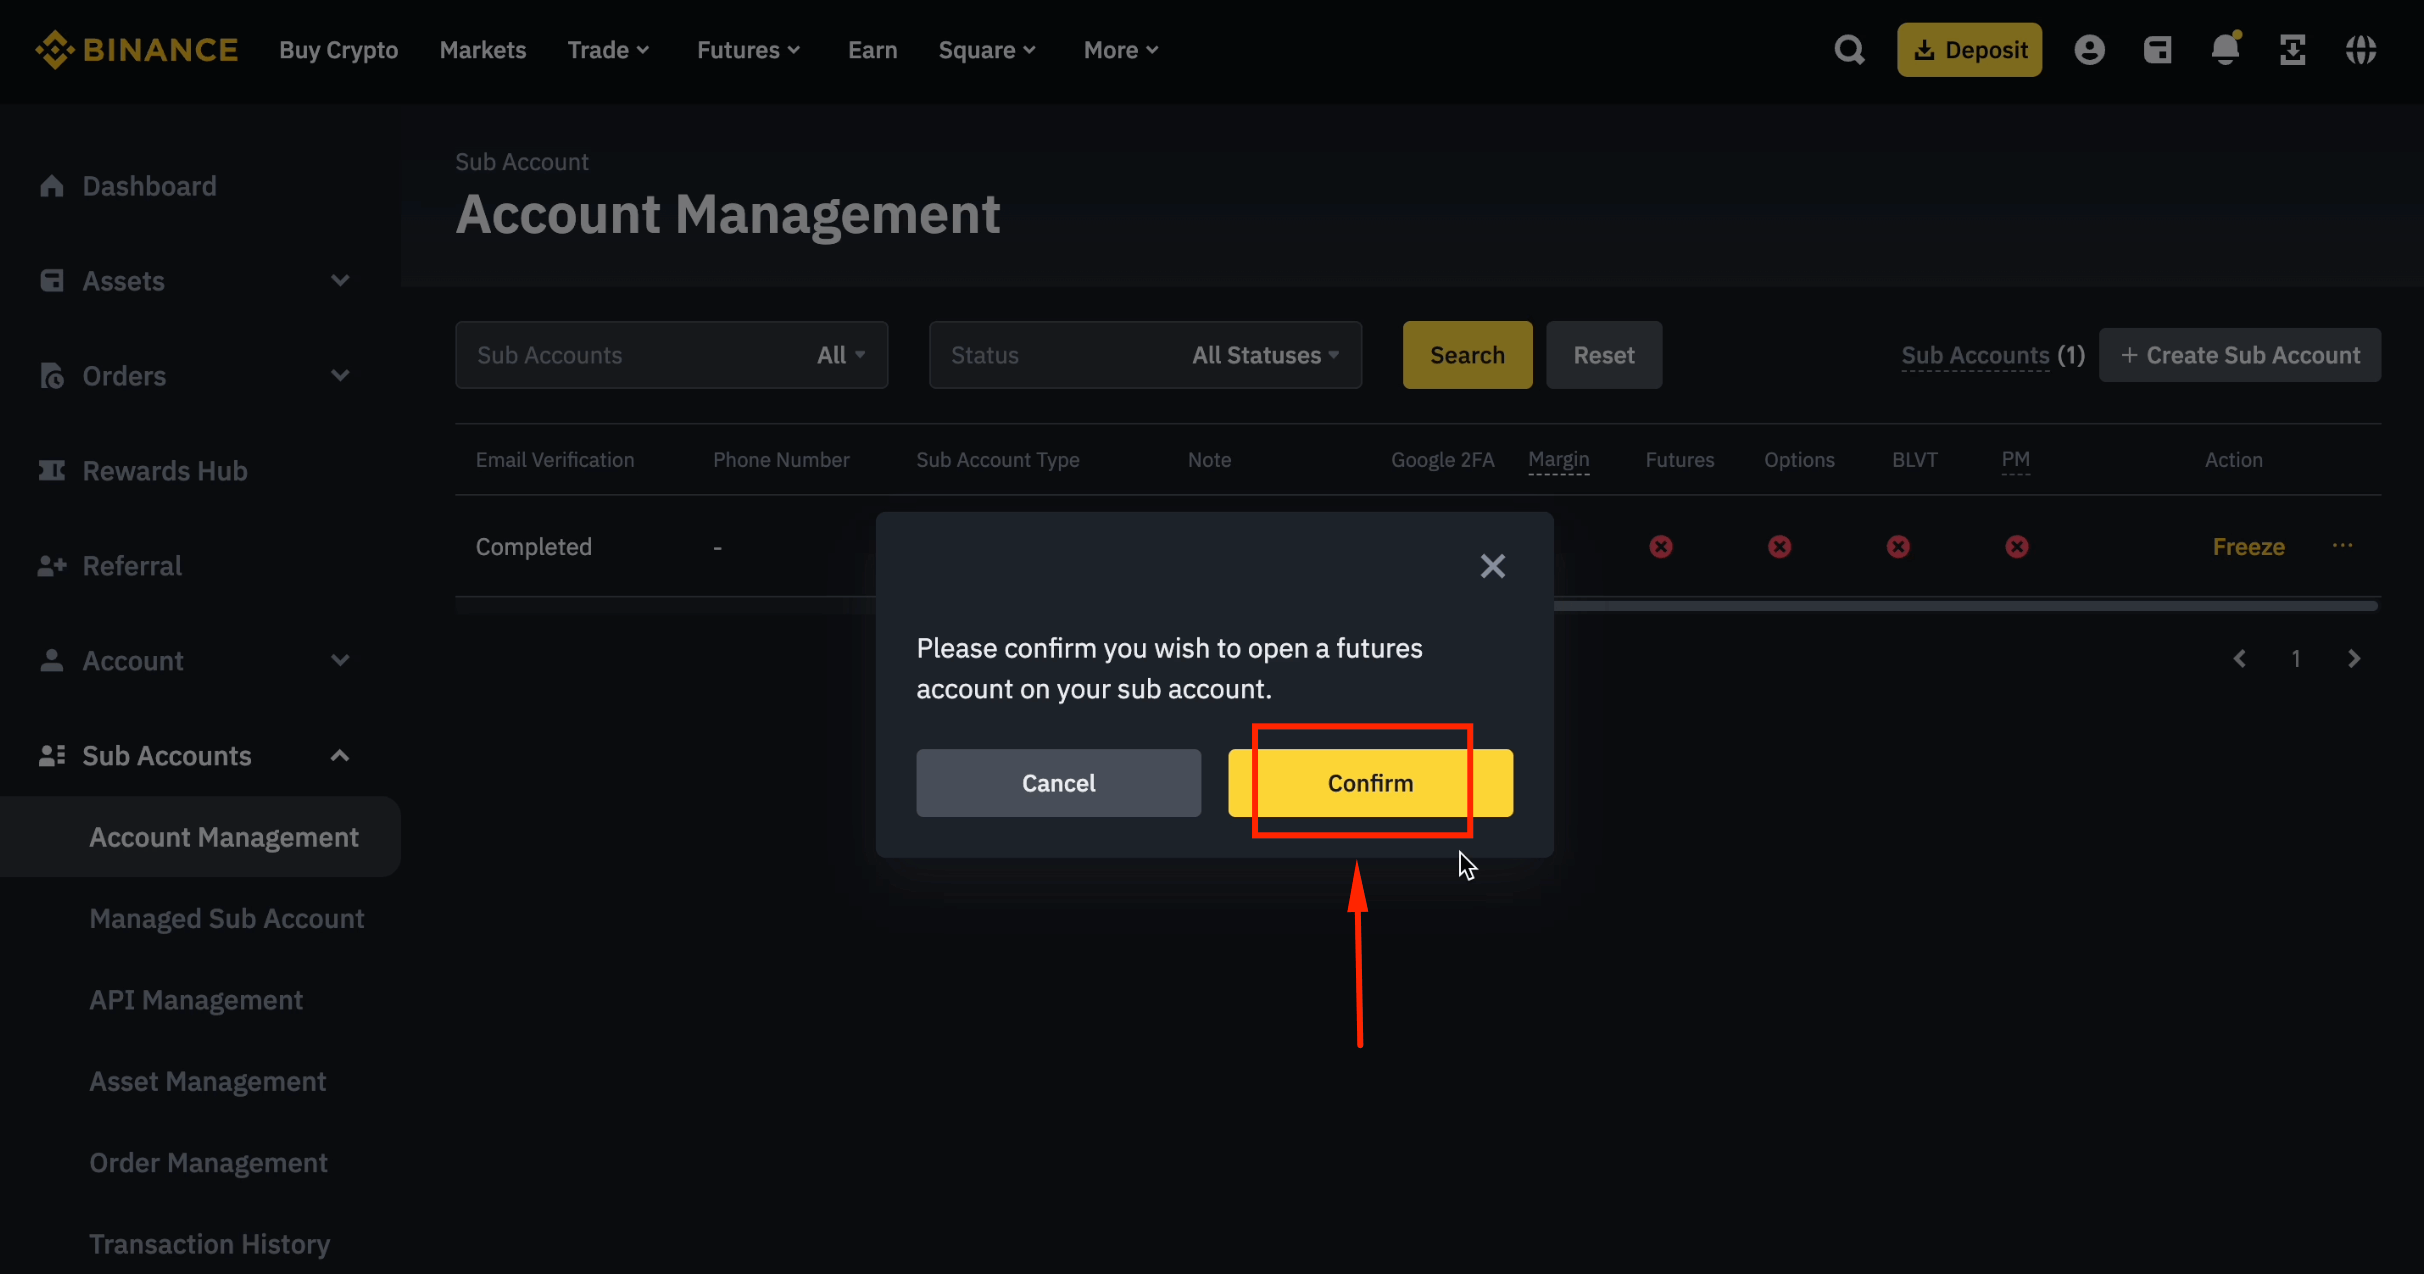
Step 16: Confirm Futures Activation
Click [Confirm] to enable futures trading on the sub-account.
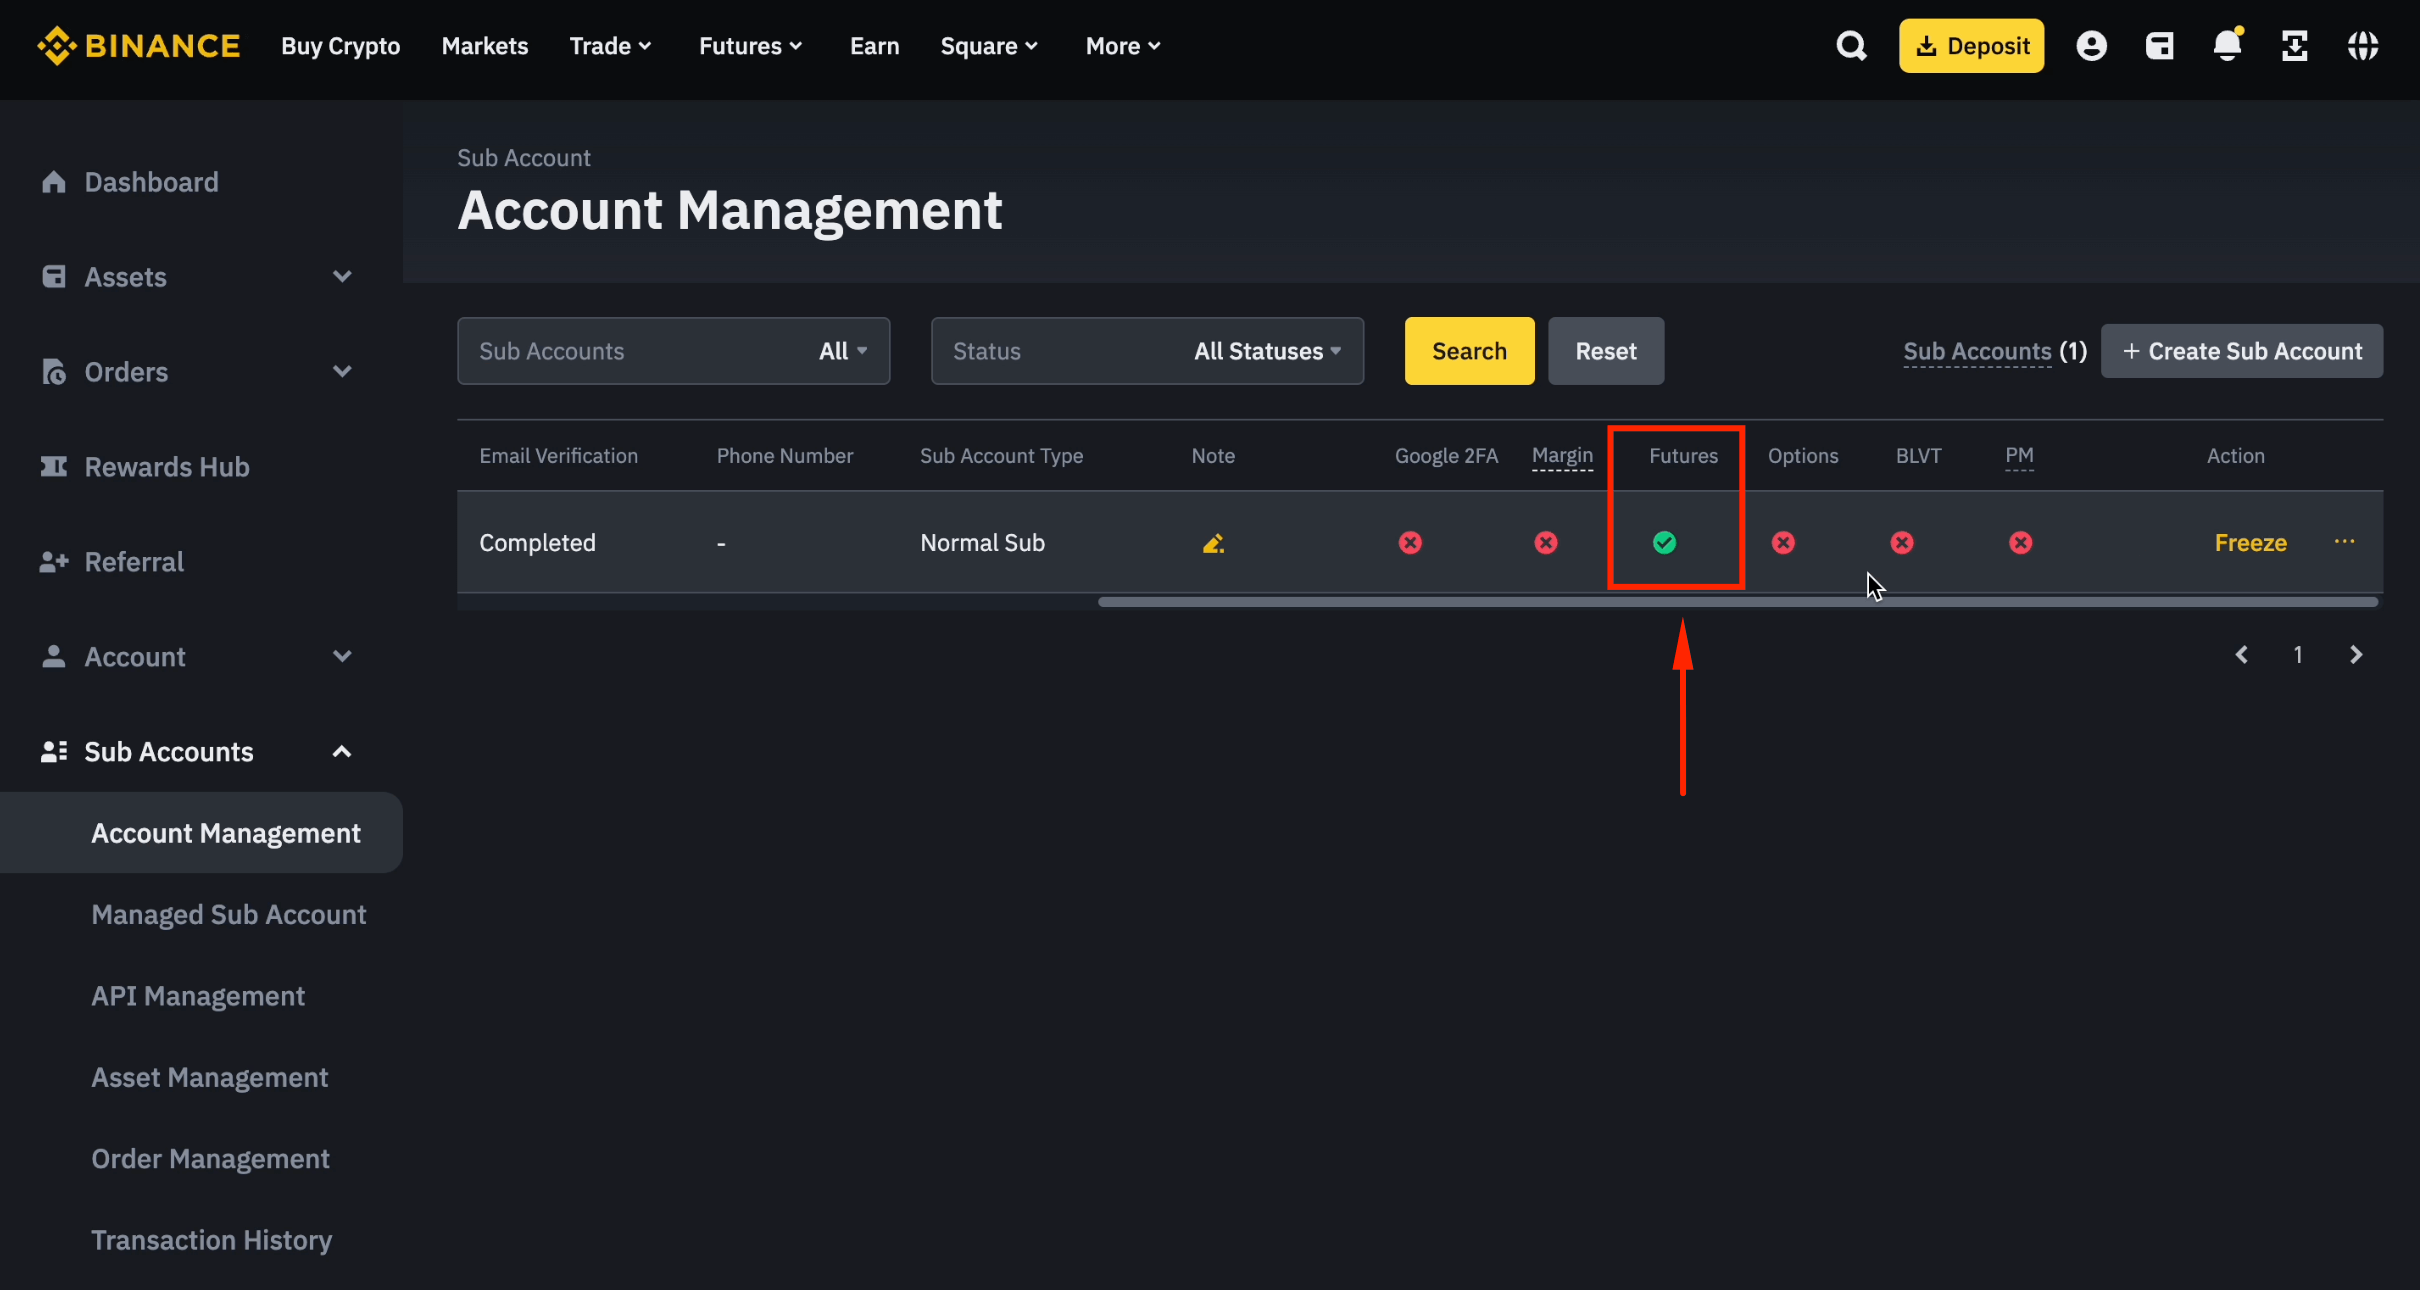
Step 17: Futures Enabled
Futures trading is now enabled on your sub-account.
Log In to Your Sub-Account
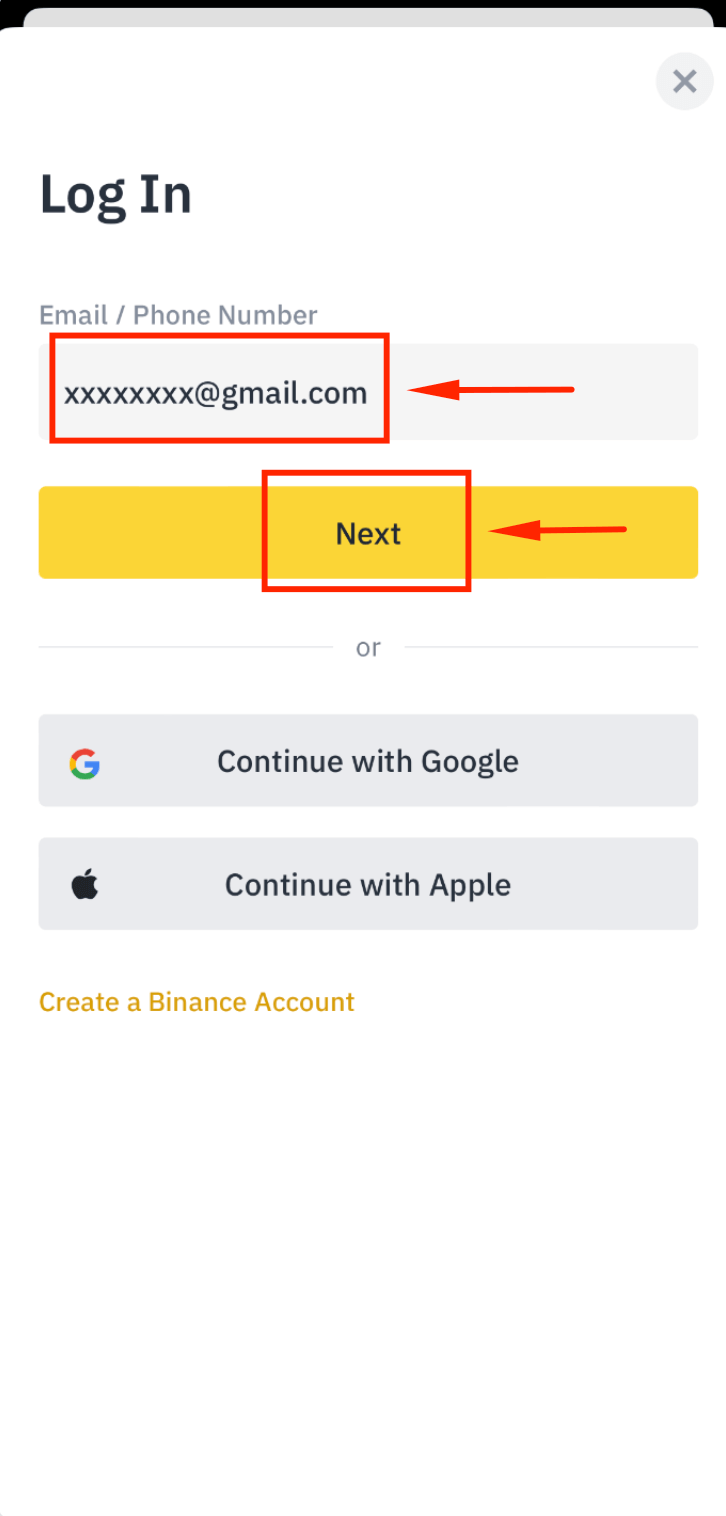
Step 1: Enter Sub-Account Email
Open the Binance App, enter your sub-account email, and tap [Next].
Step 2: Enter Sub-Account Password
Type the sub-account password and tap [Next].
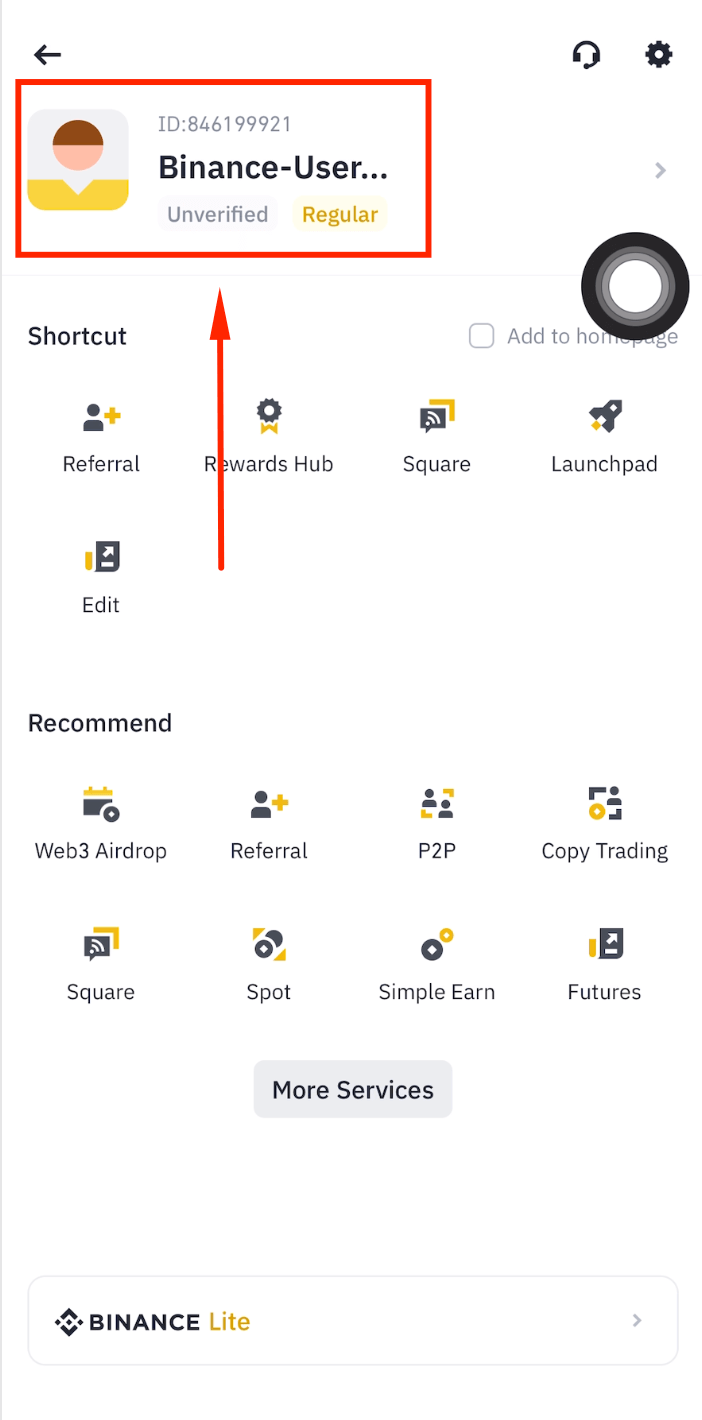
Step 3: Logged In Successfully
You are now logged in to your Binance sub-account.
Transfer Funds to Sub-Account
Step 1: Visit binance.me on Desktop
Open your desktop browser and go to binance.me.
Step 2: Log In to Your Main Account
Click [Log in] and enter your main account credentials and verification codes.

Step 3: Enter Your Email
Fill in your main account email and click [Next].
Step 4: Enter Your Password
Fill in your password and click [Next].

Step 5: Submit Email Code
Enter the 6-digit code from your email and click [Submit].
Step 6: Go to Sub Accounts
Click [Sub Accounts].

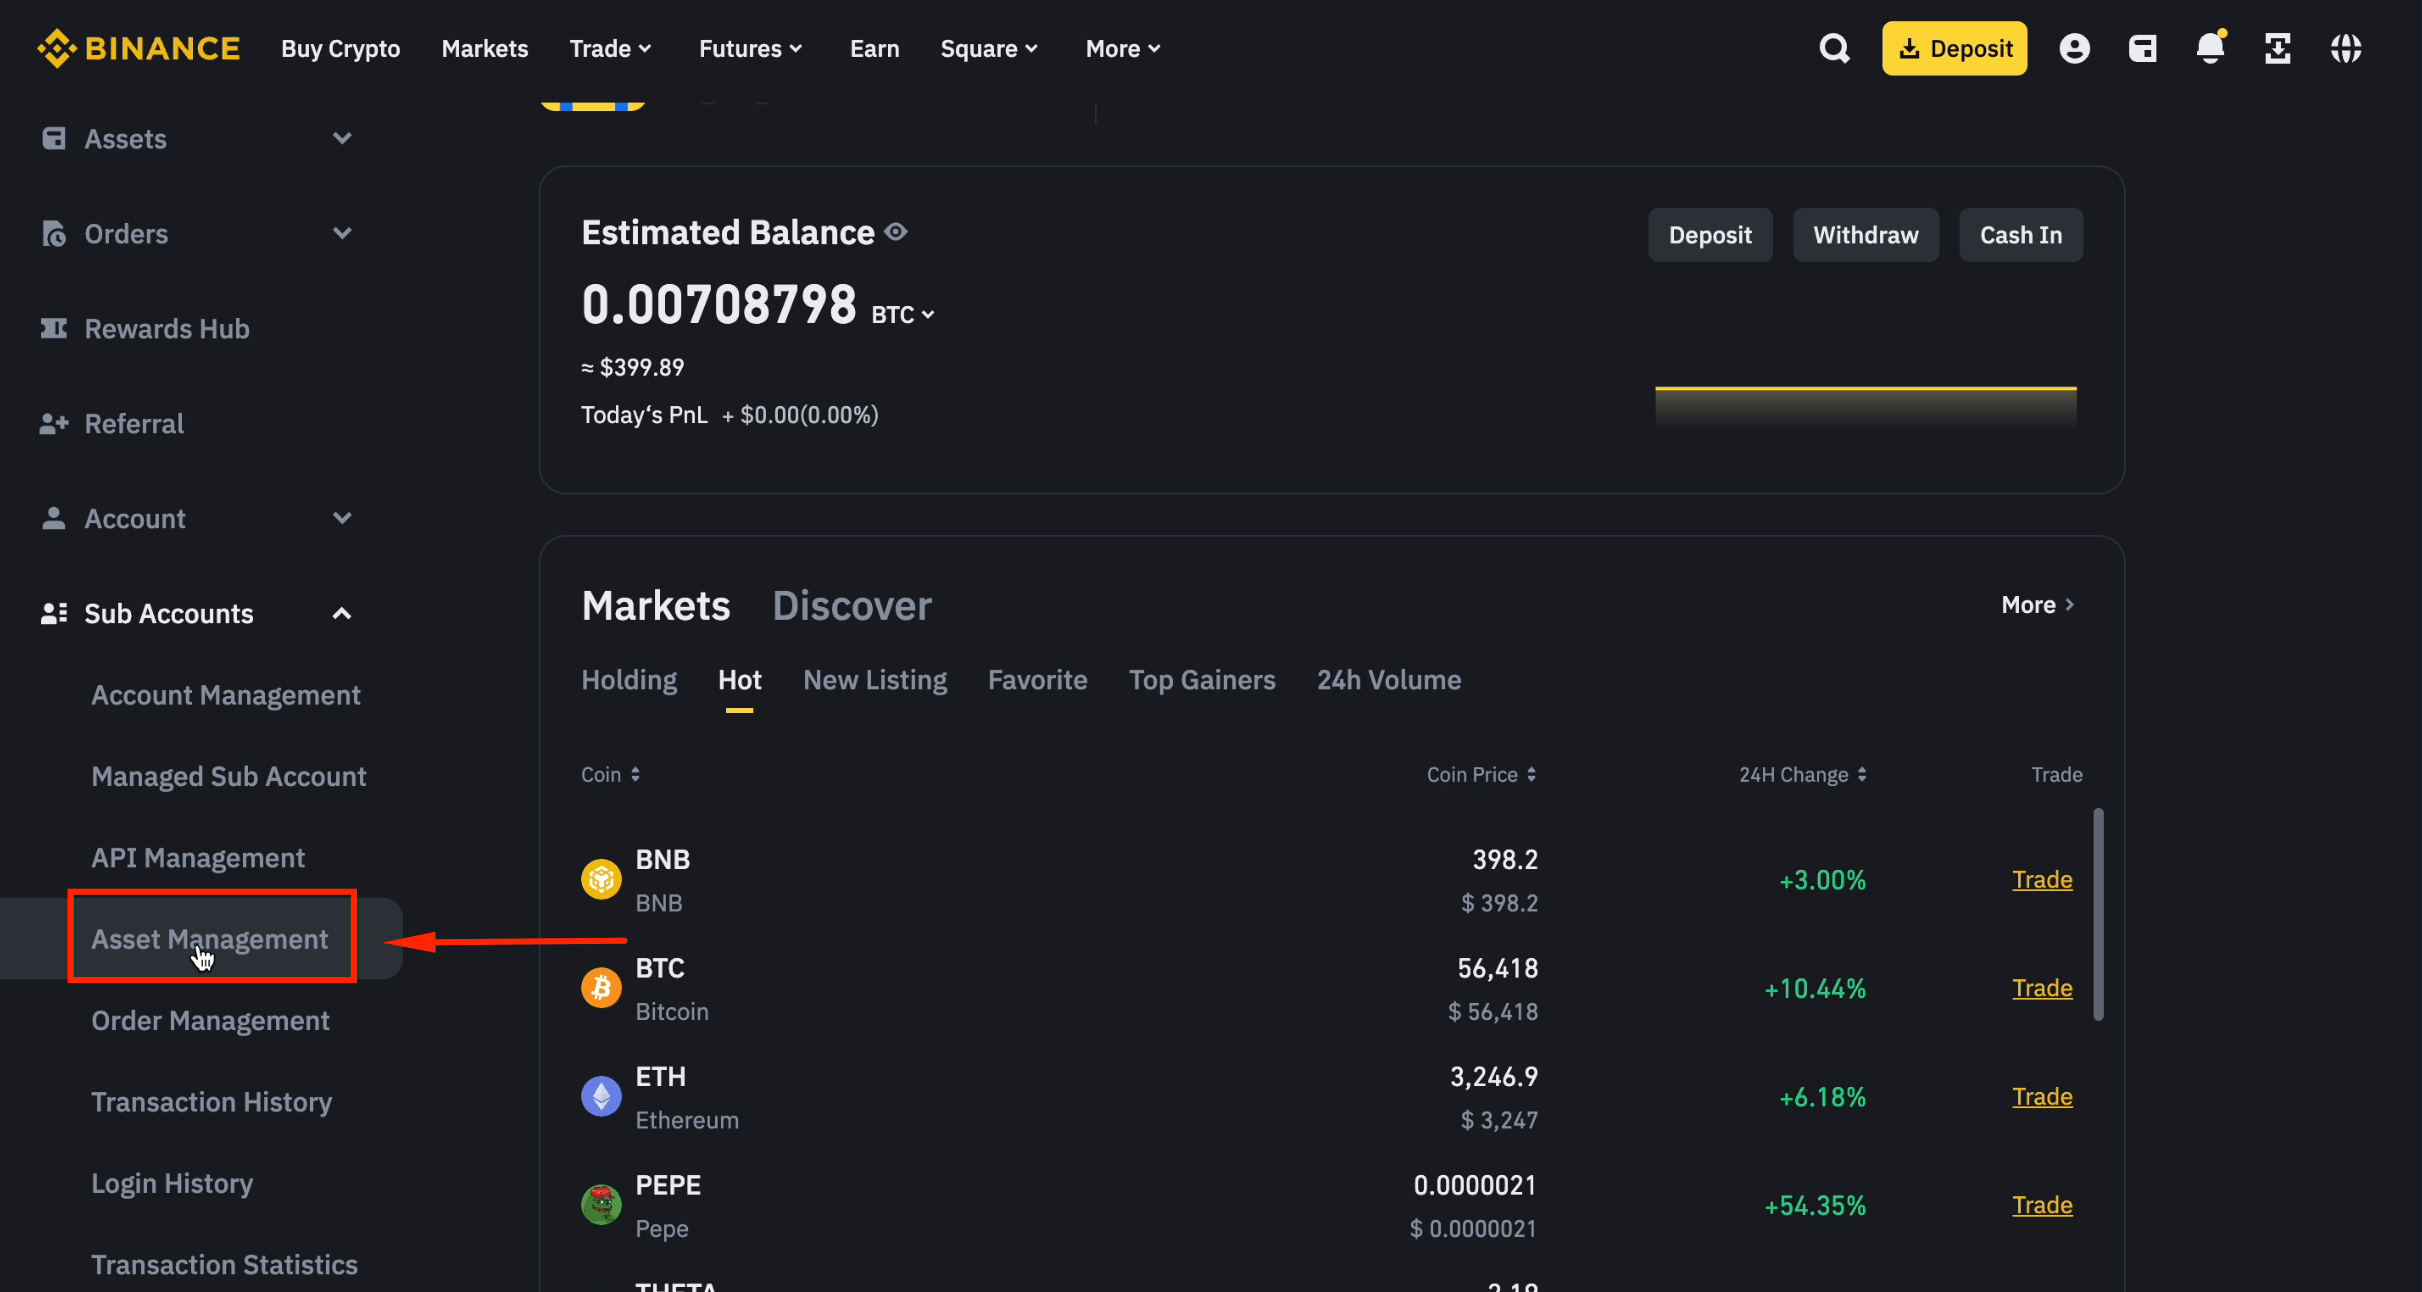
Step 7: Open Asset Management
Click [Asset Management].
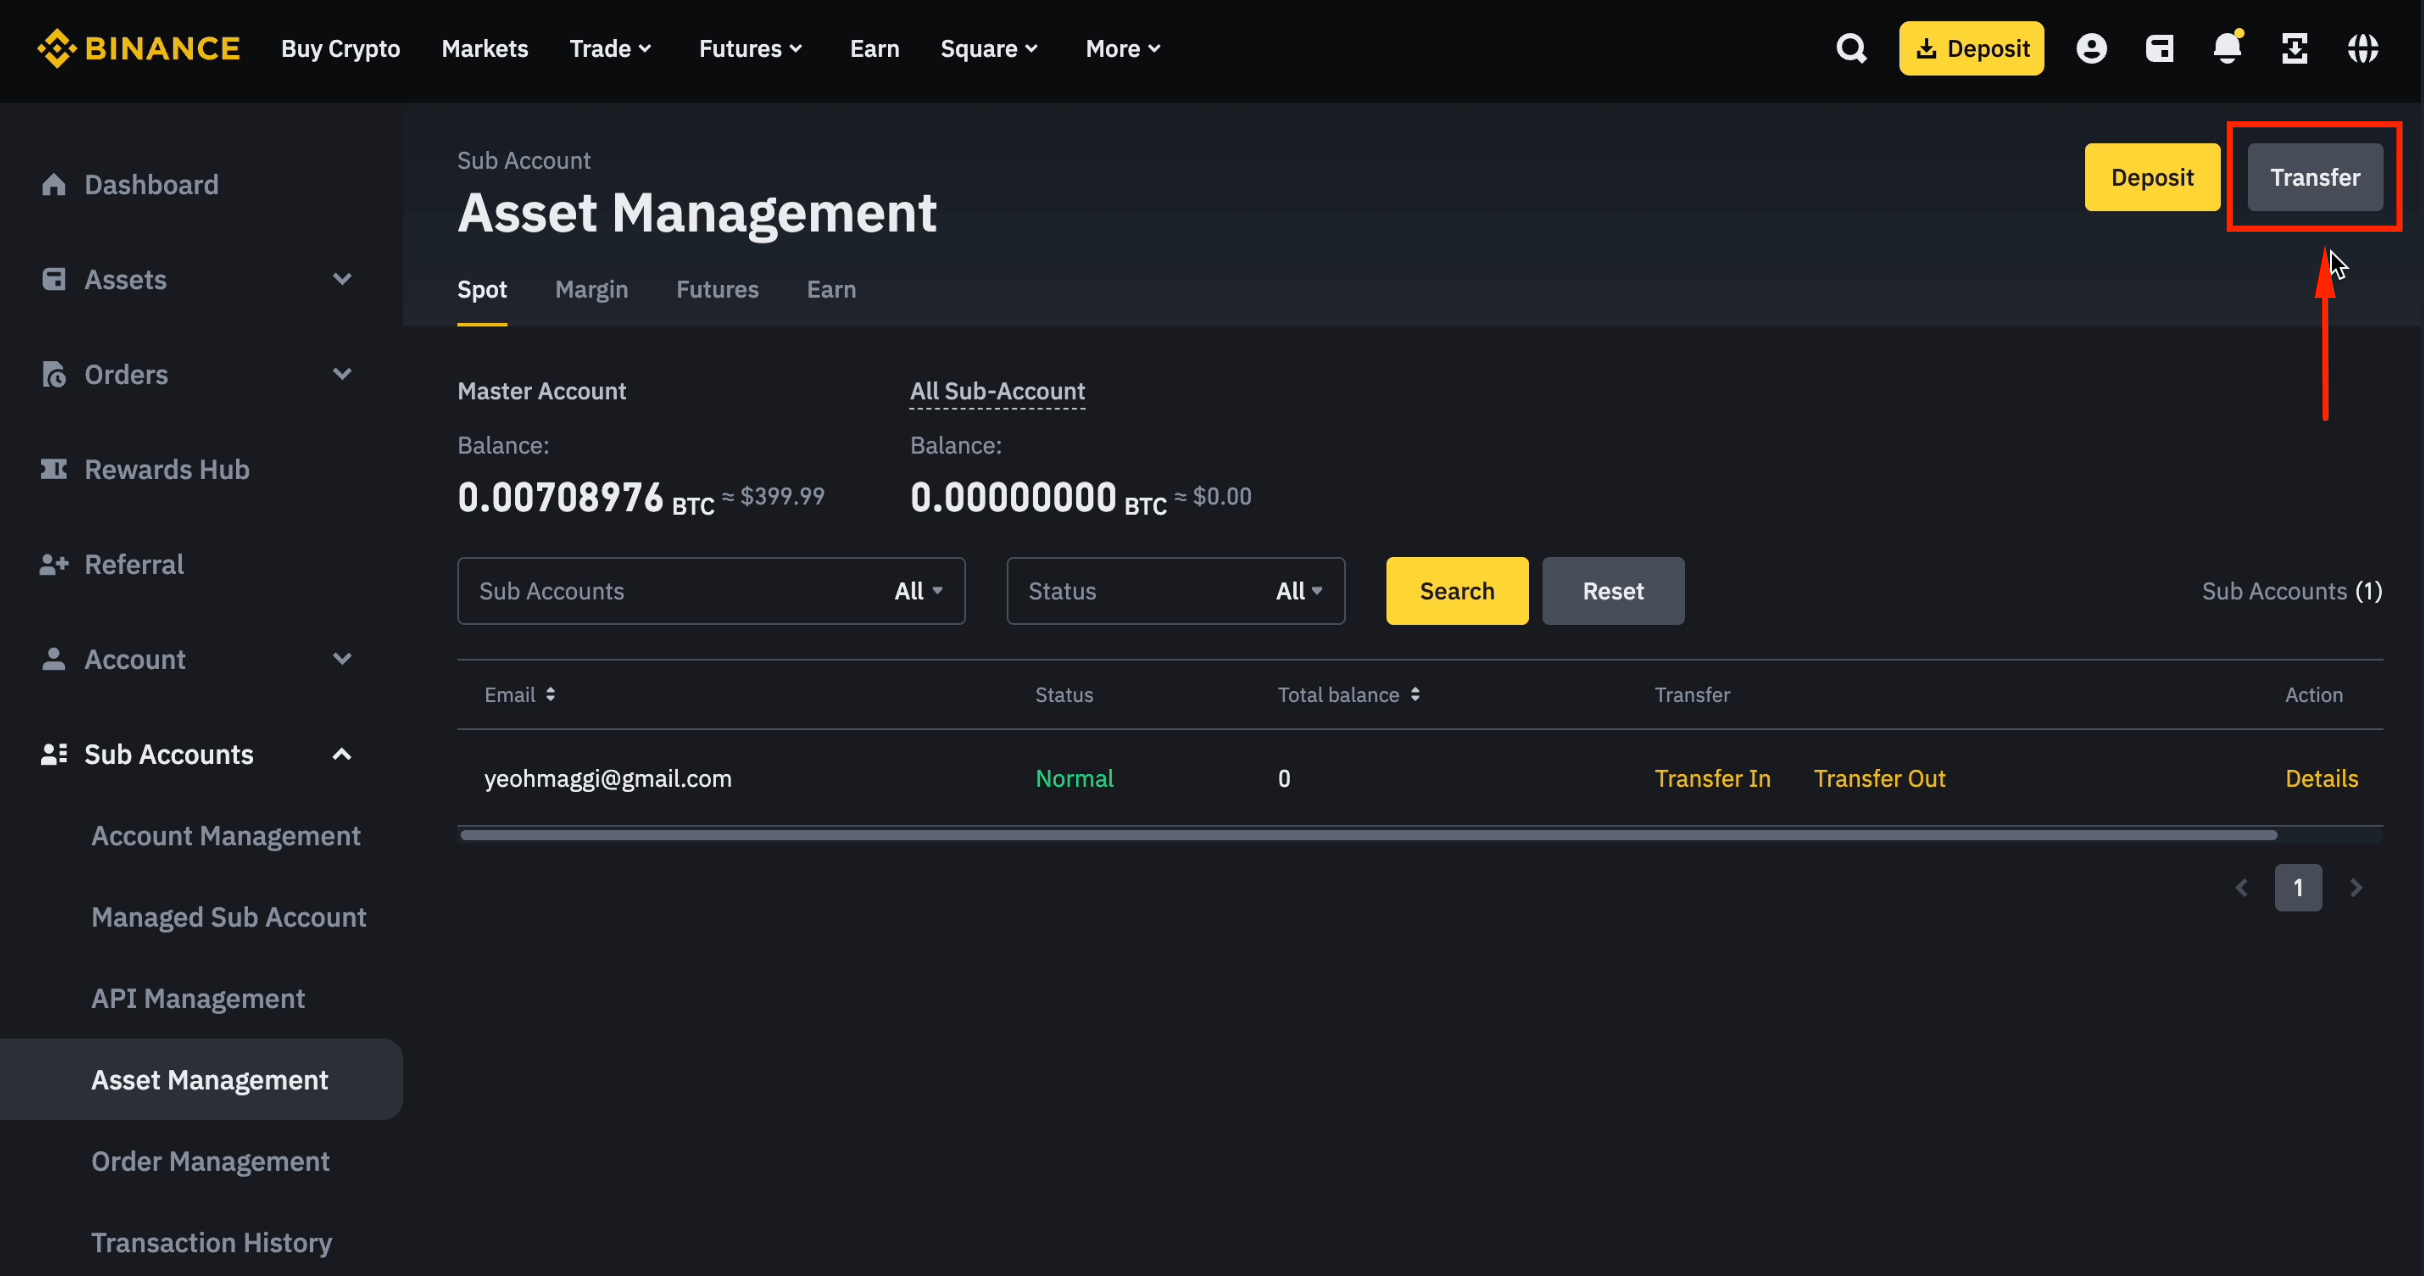
Step 8: Click Transfer
Click [Transfer] to begin moving funds.
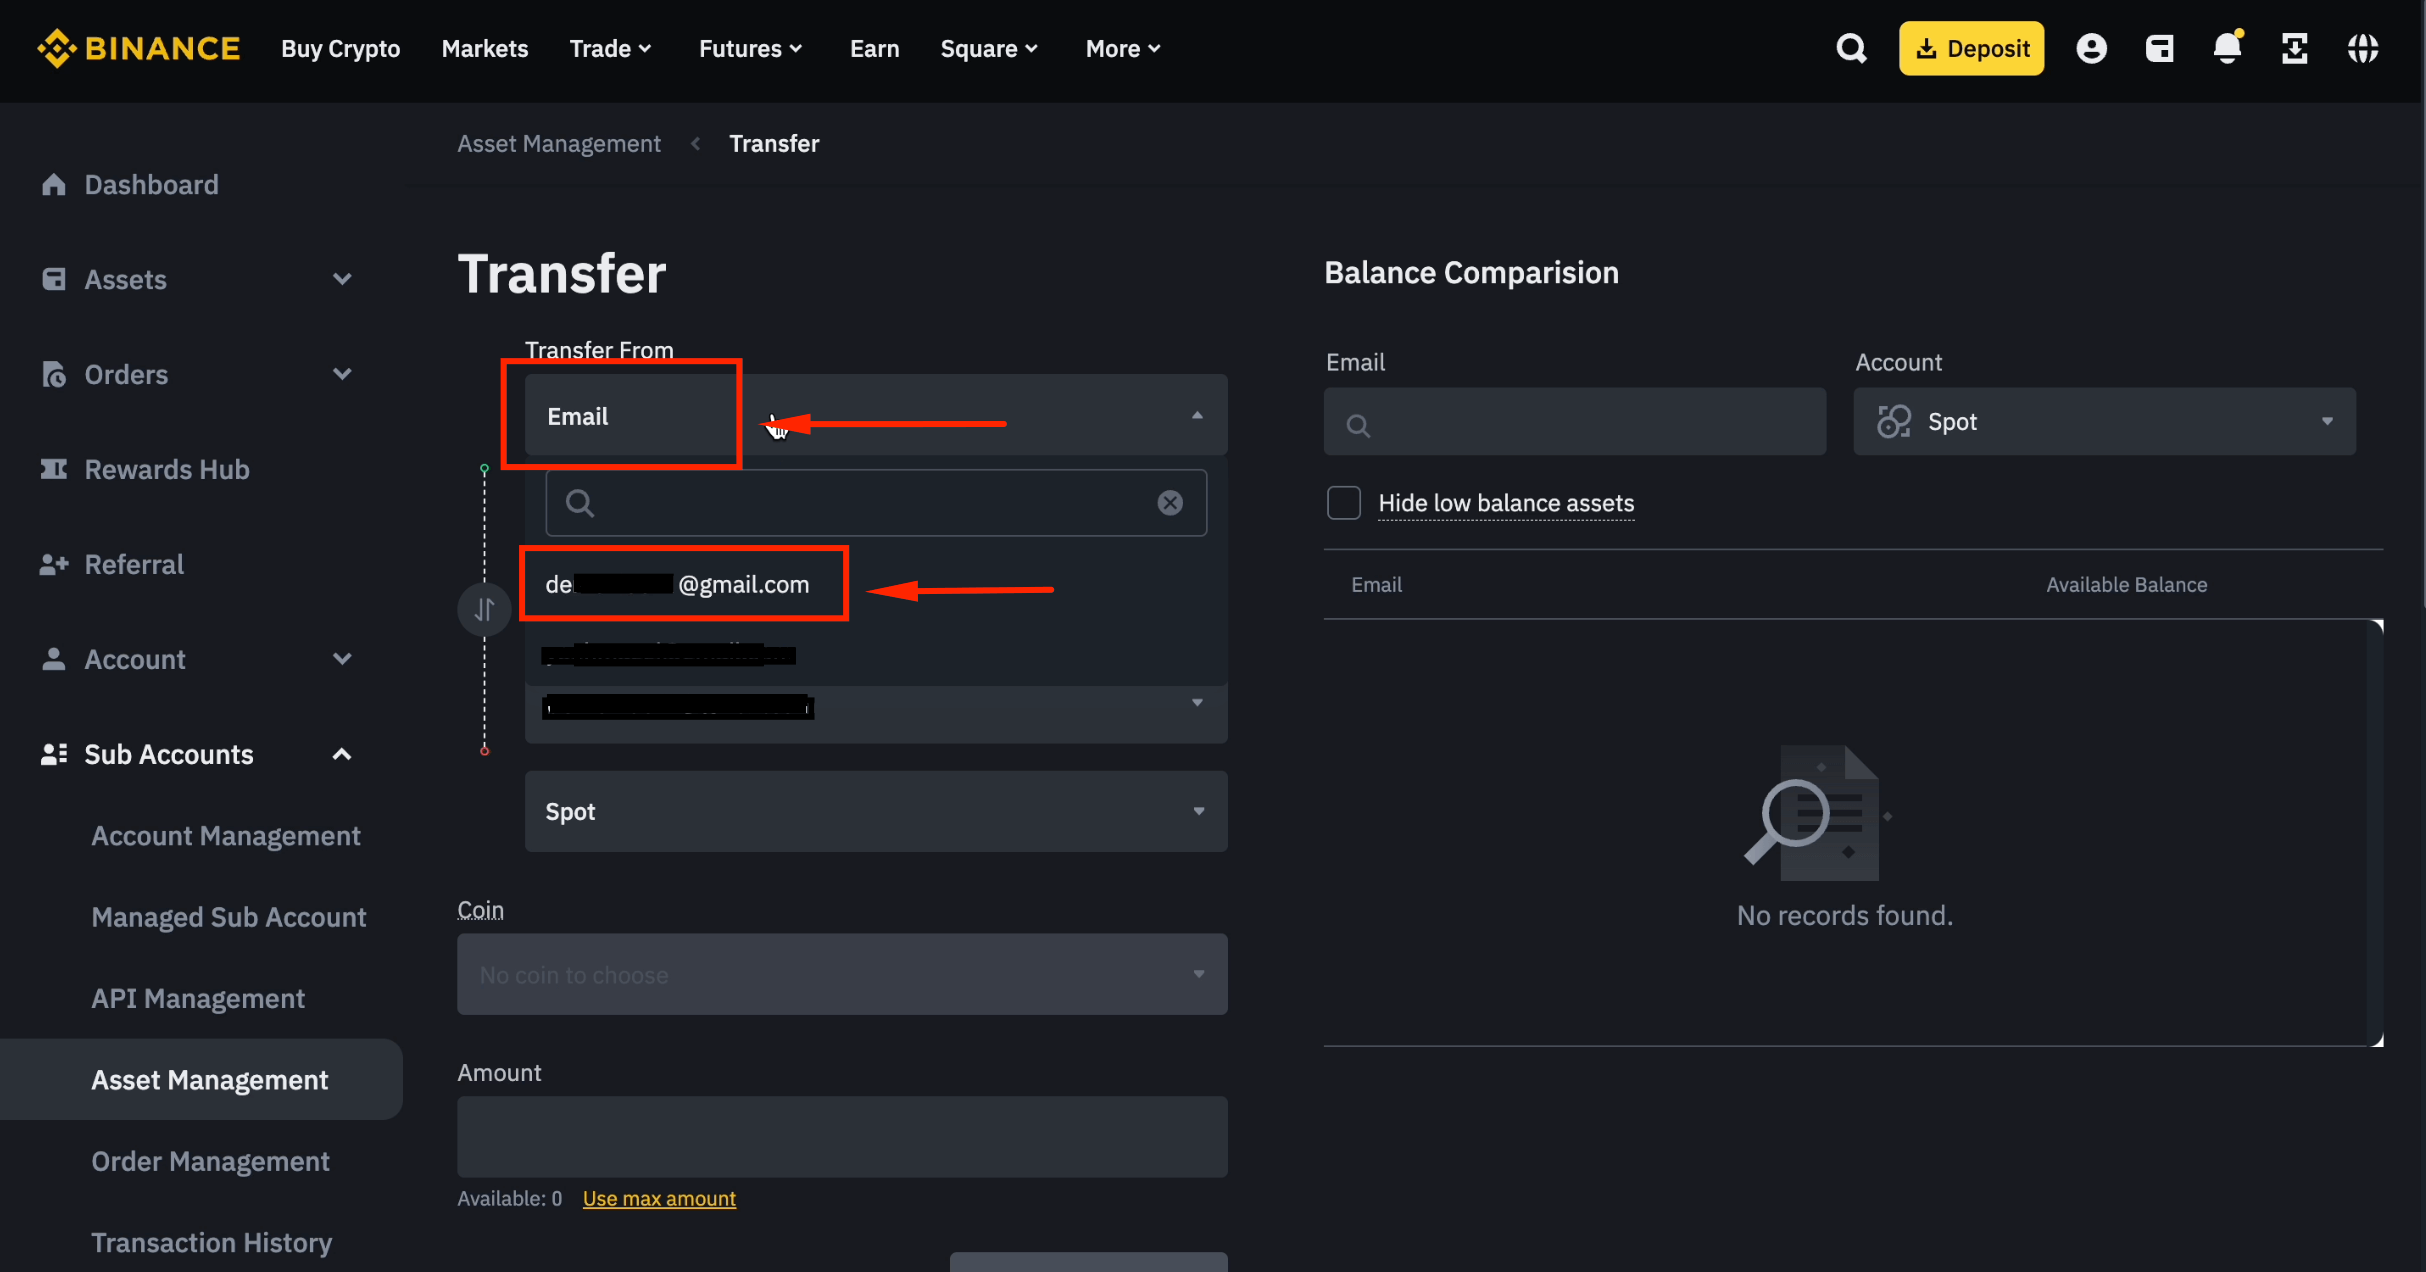
Step 9: Set the Source Account
Choose [Email], then select your main account email as the "Transfer from" source.
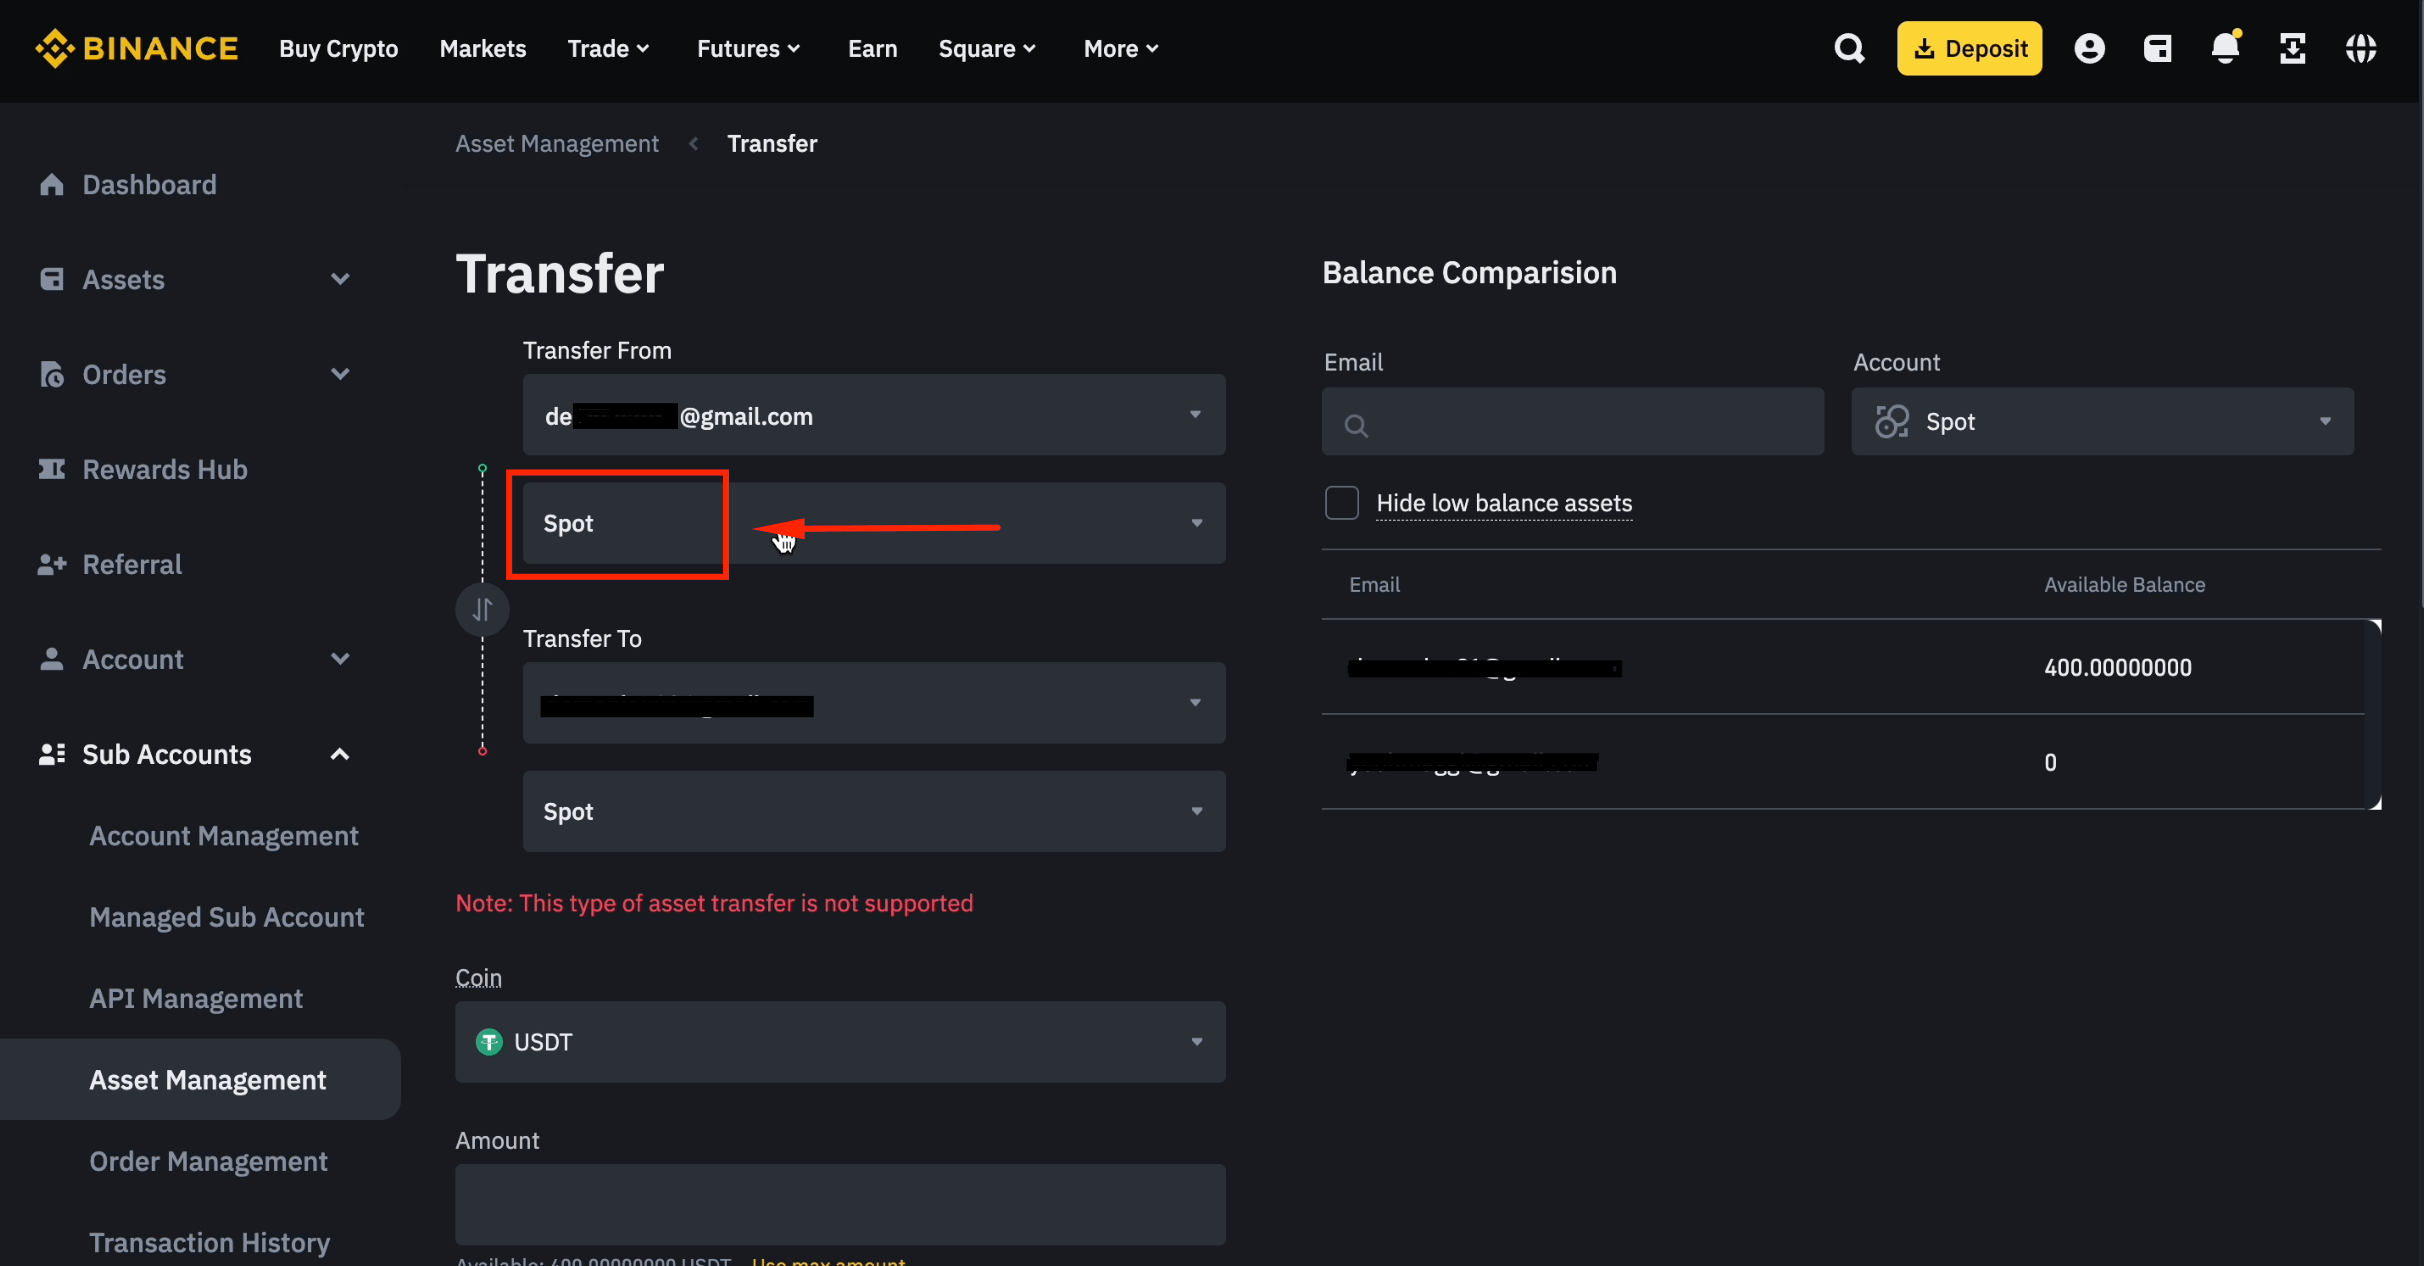
Step 10: Select Spot Wallet
Click [Spot] as the source wallet.
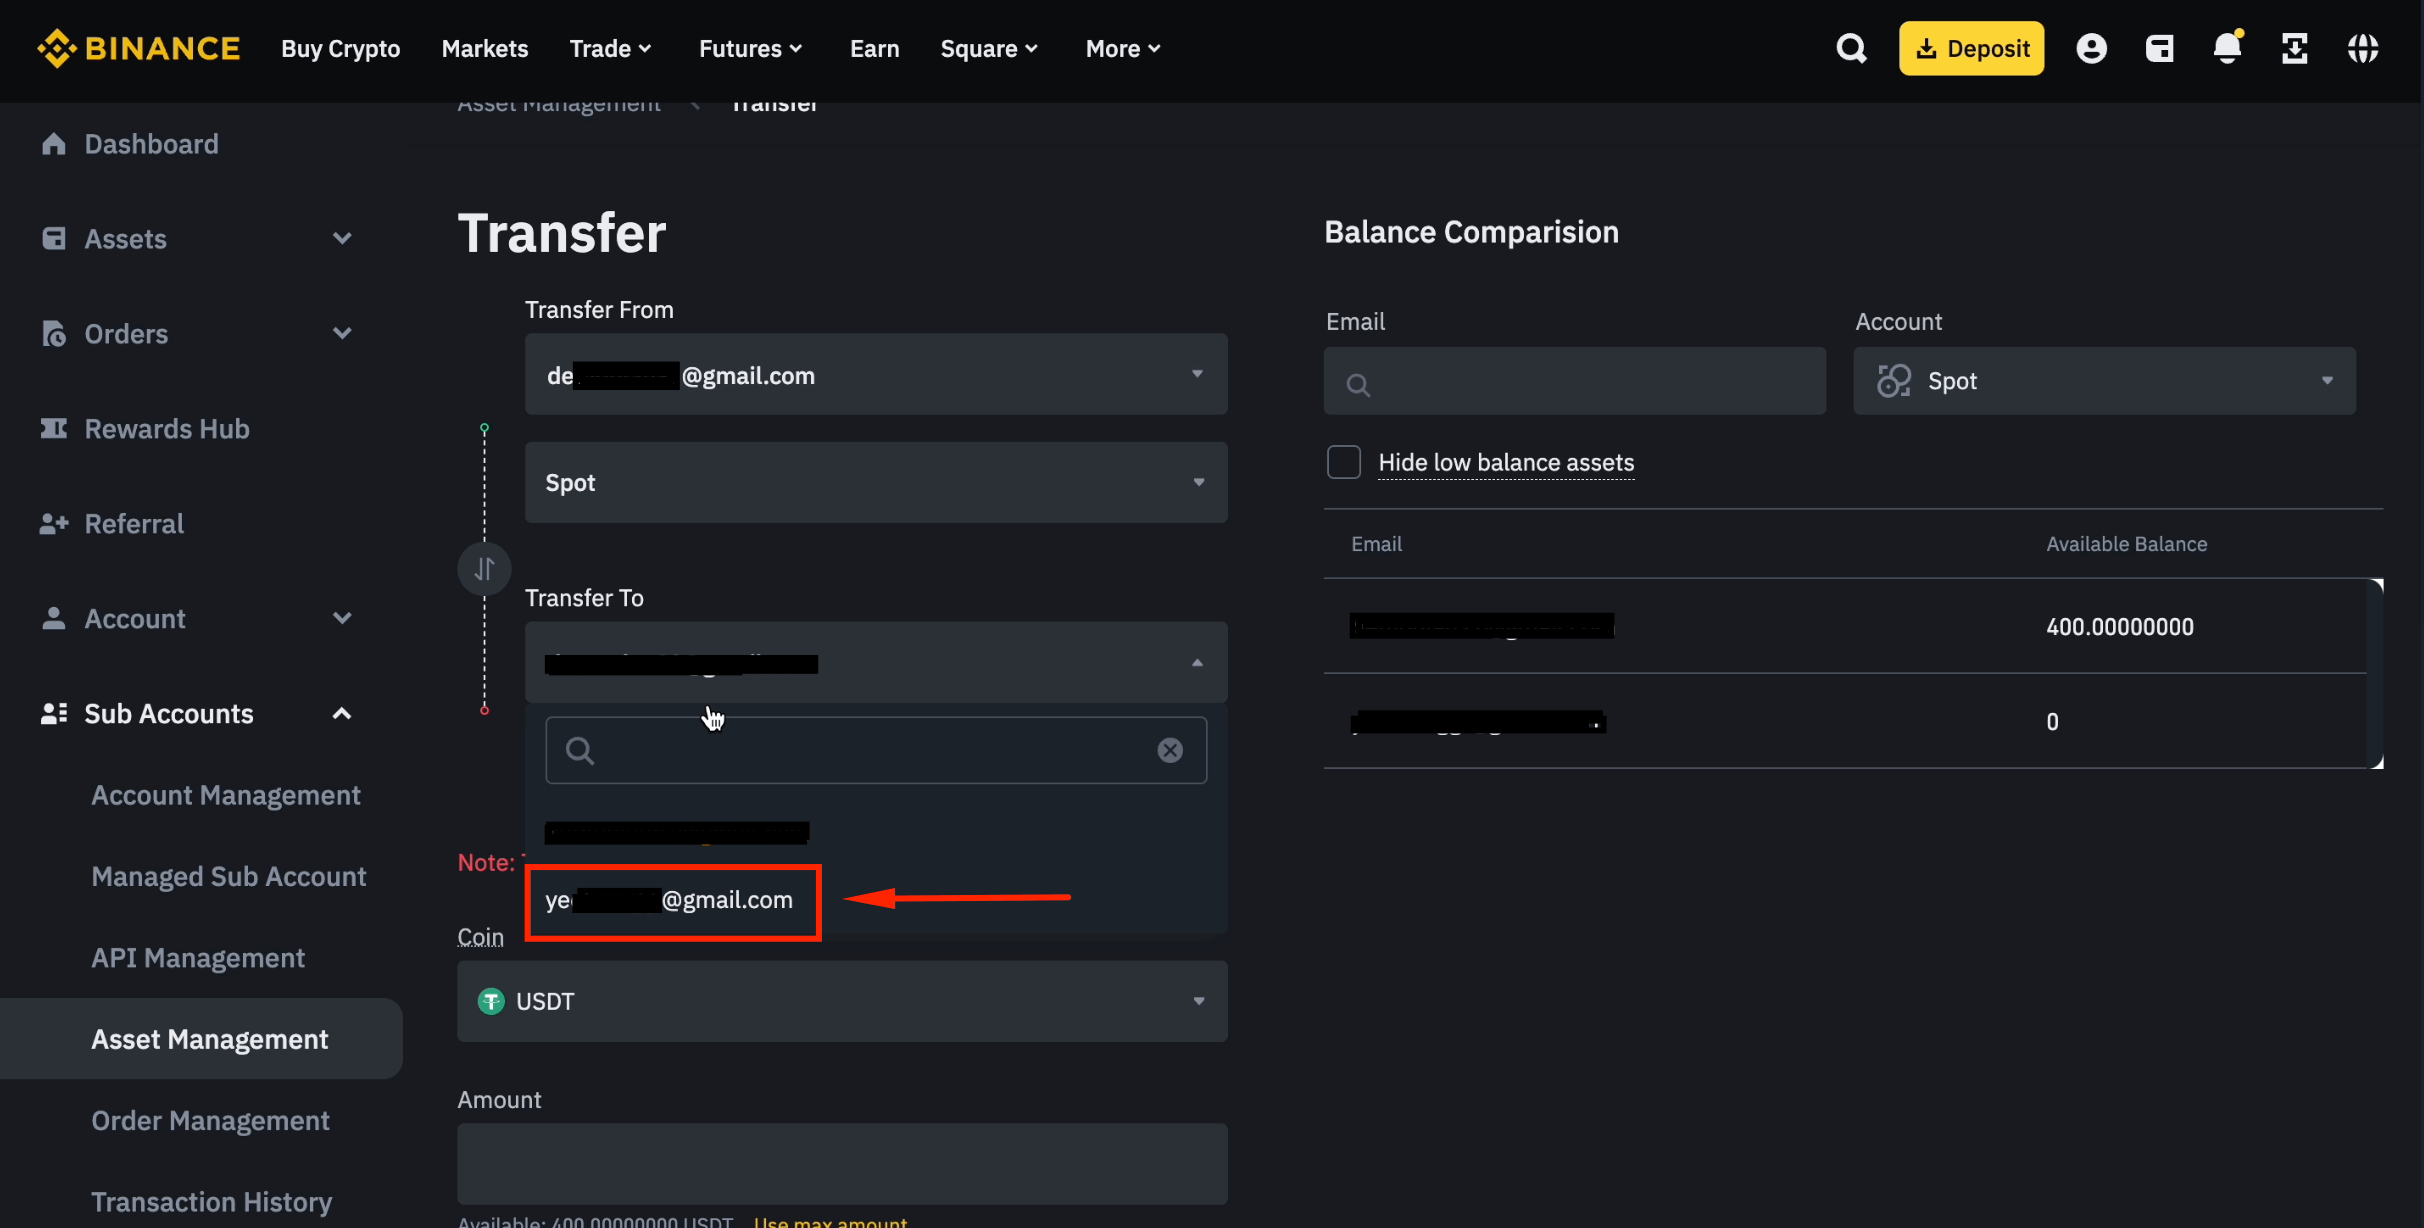
Step 11: Select the Sub-Account as Destination
Choose your sub-account email as the "Transfer to" destination.
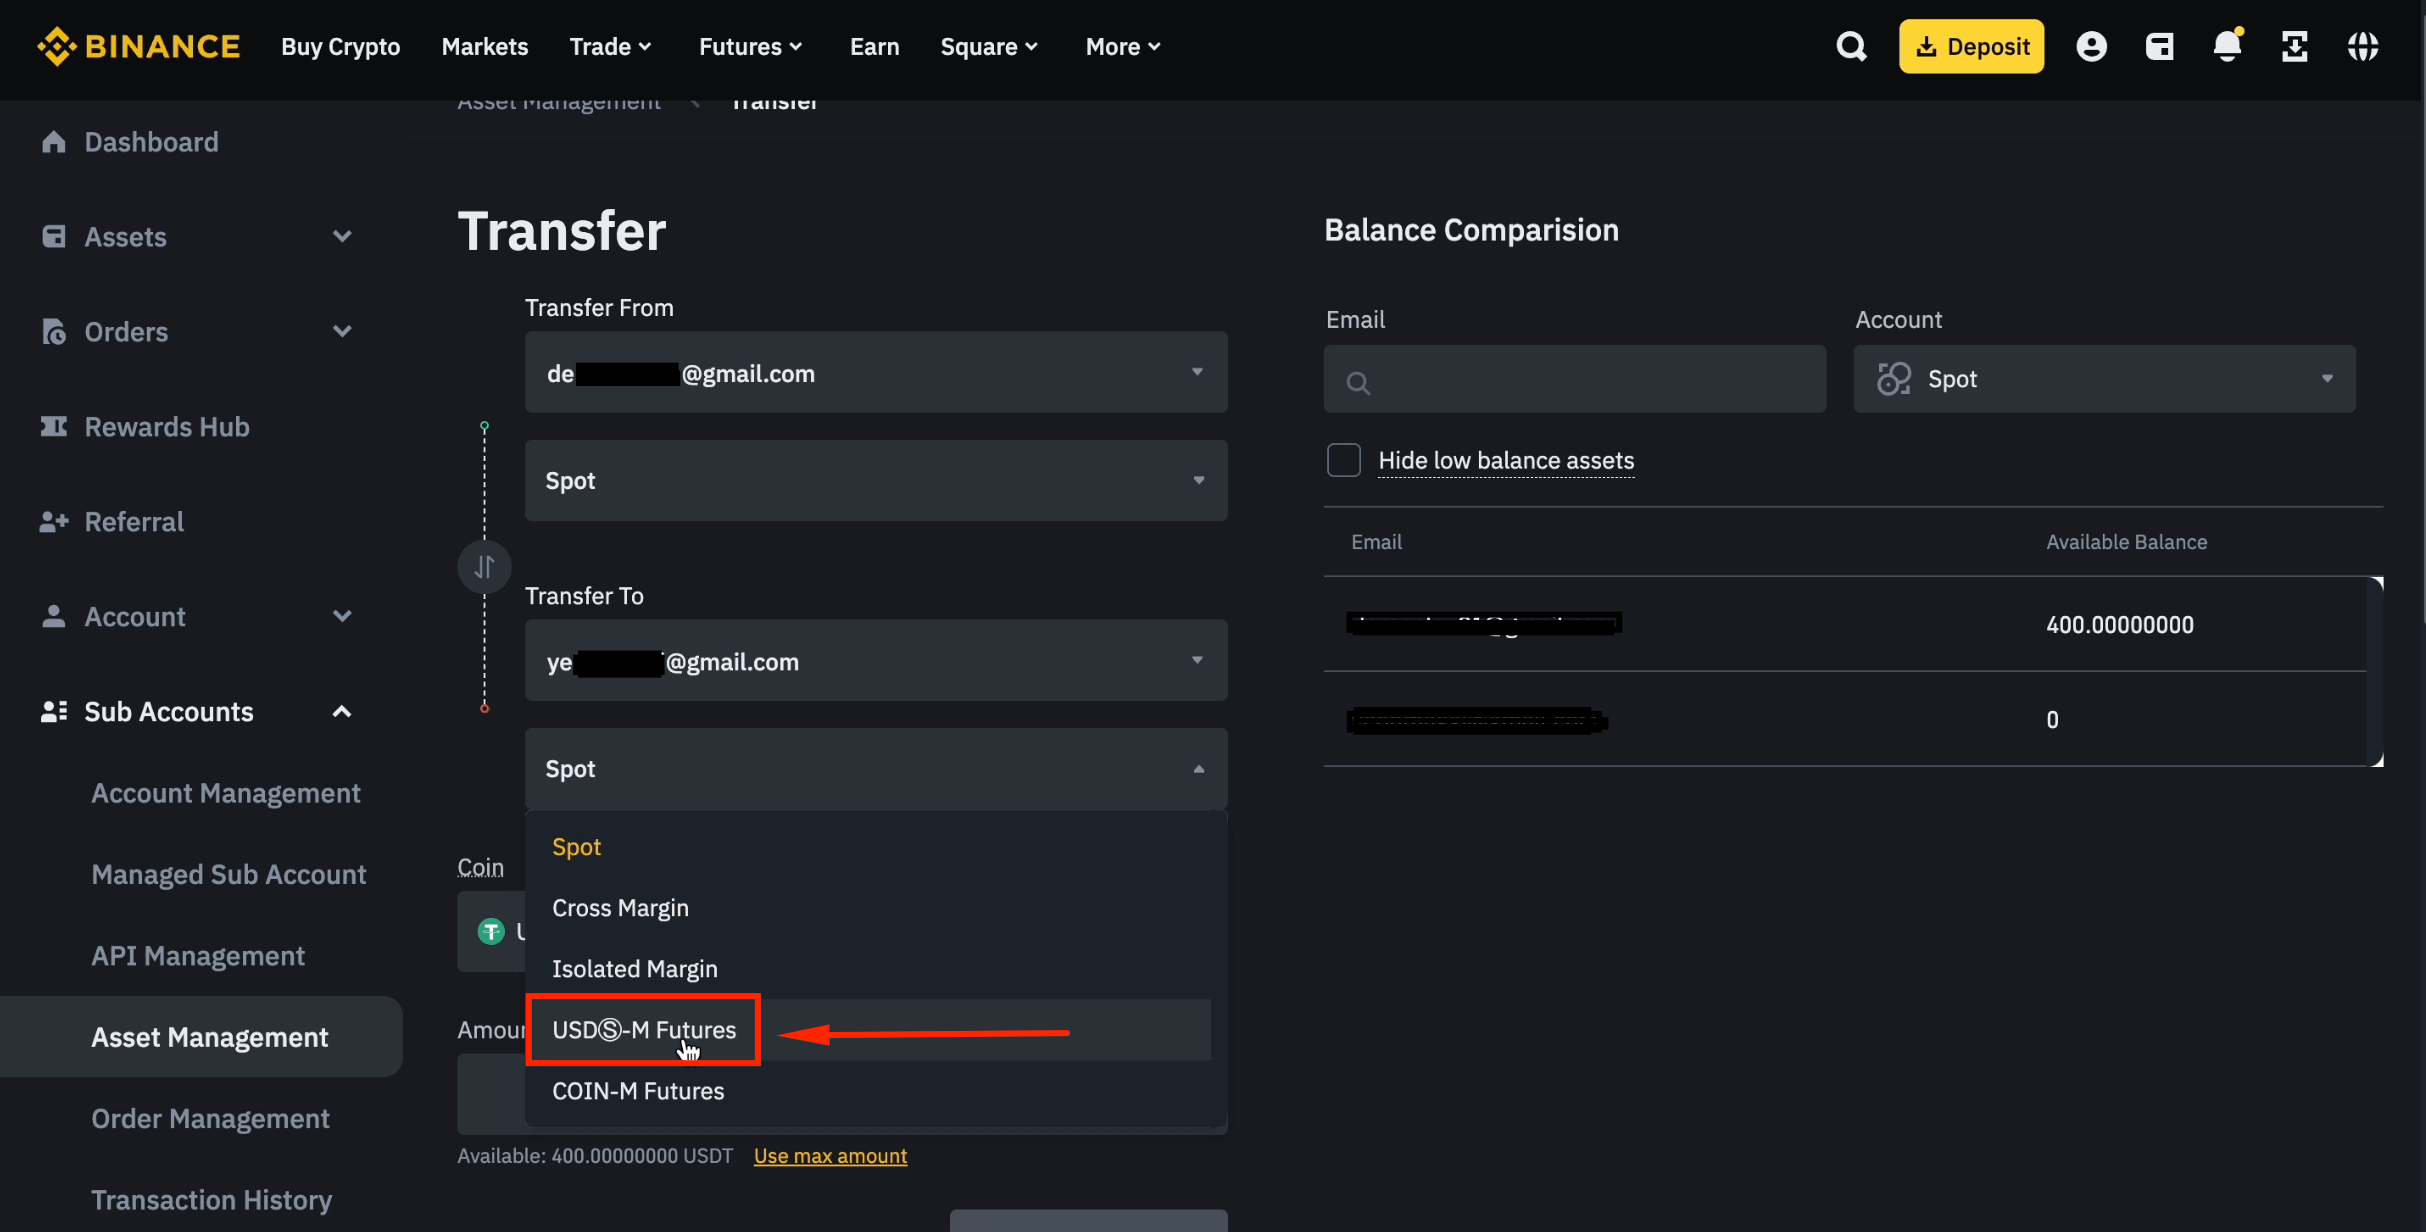
Step 12: Choose USD-M Futures Wallet
Select [USD-M Futures] as the destination wallet.
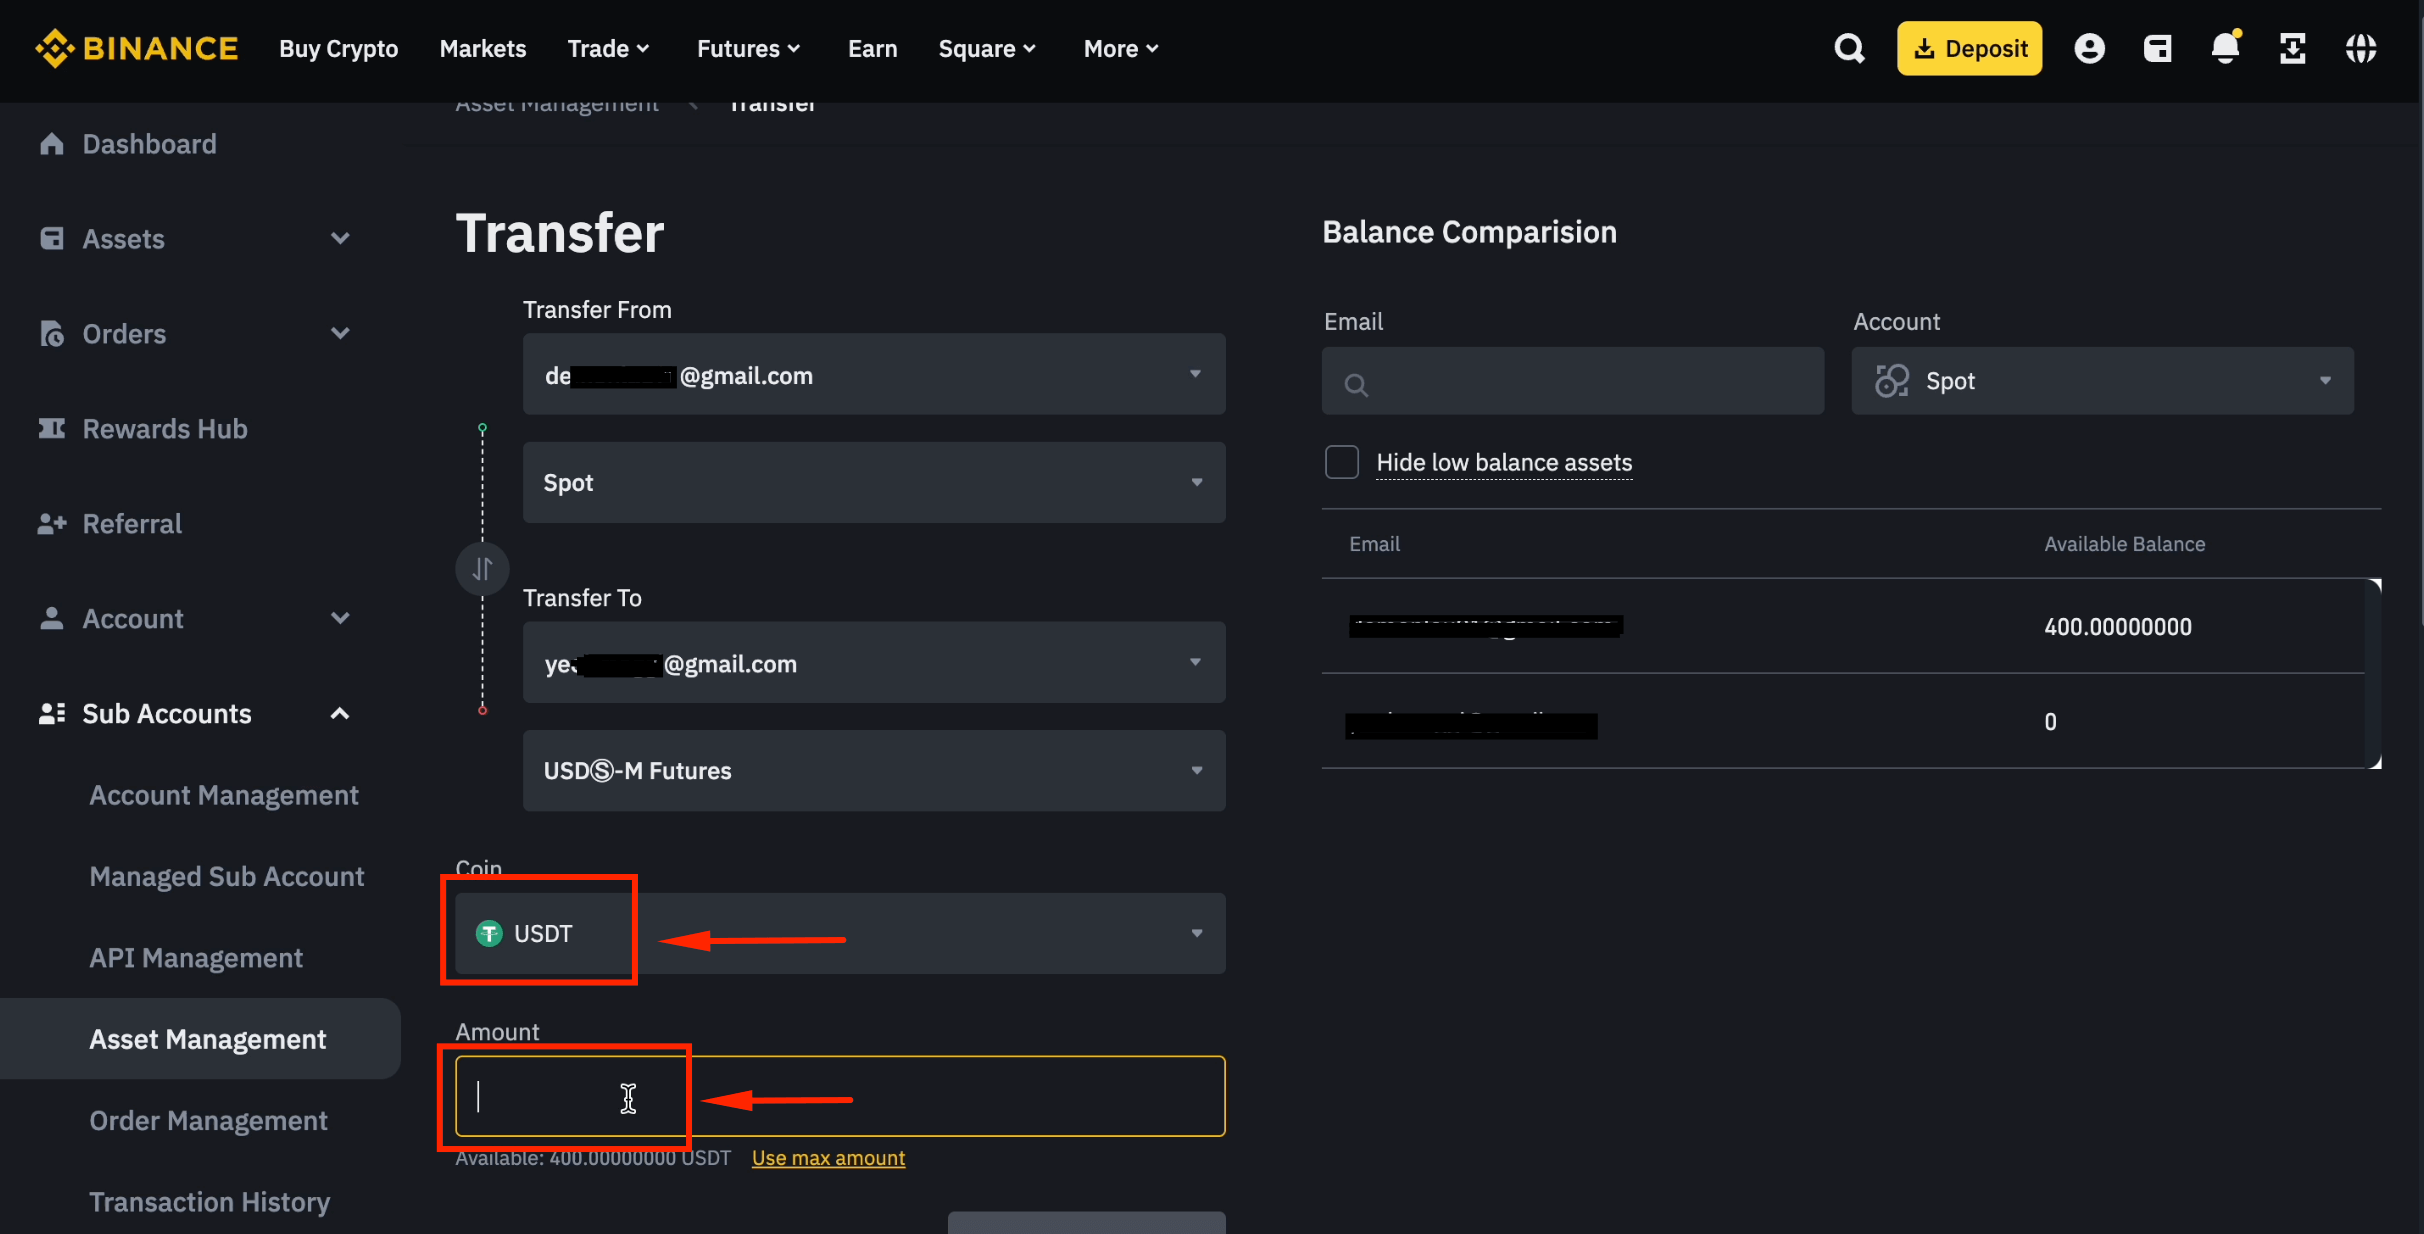
Step 13: Enter the Transfer Amount
Select [USDT] as the coin and enter the amount you want to transfer.
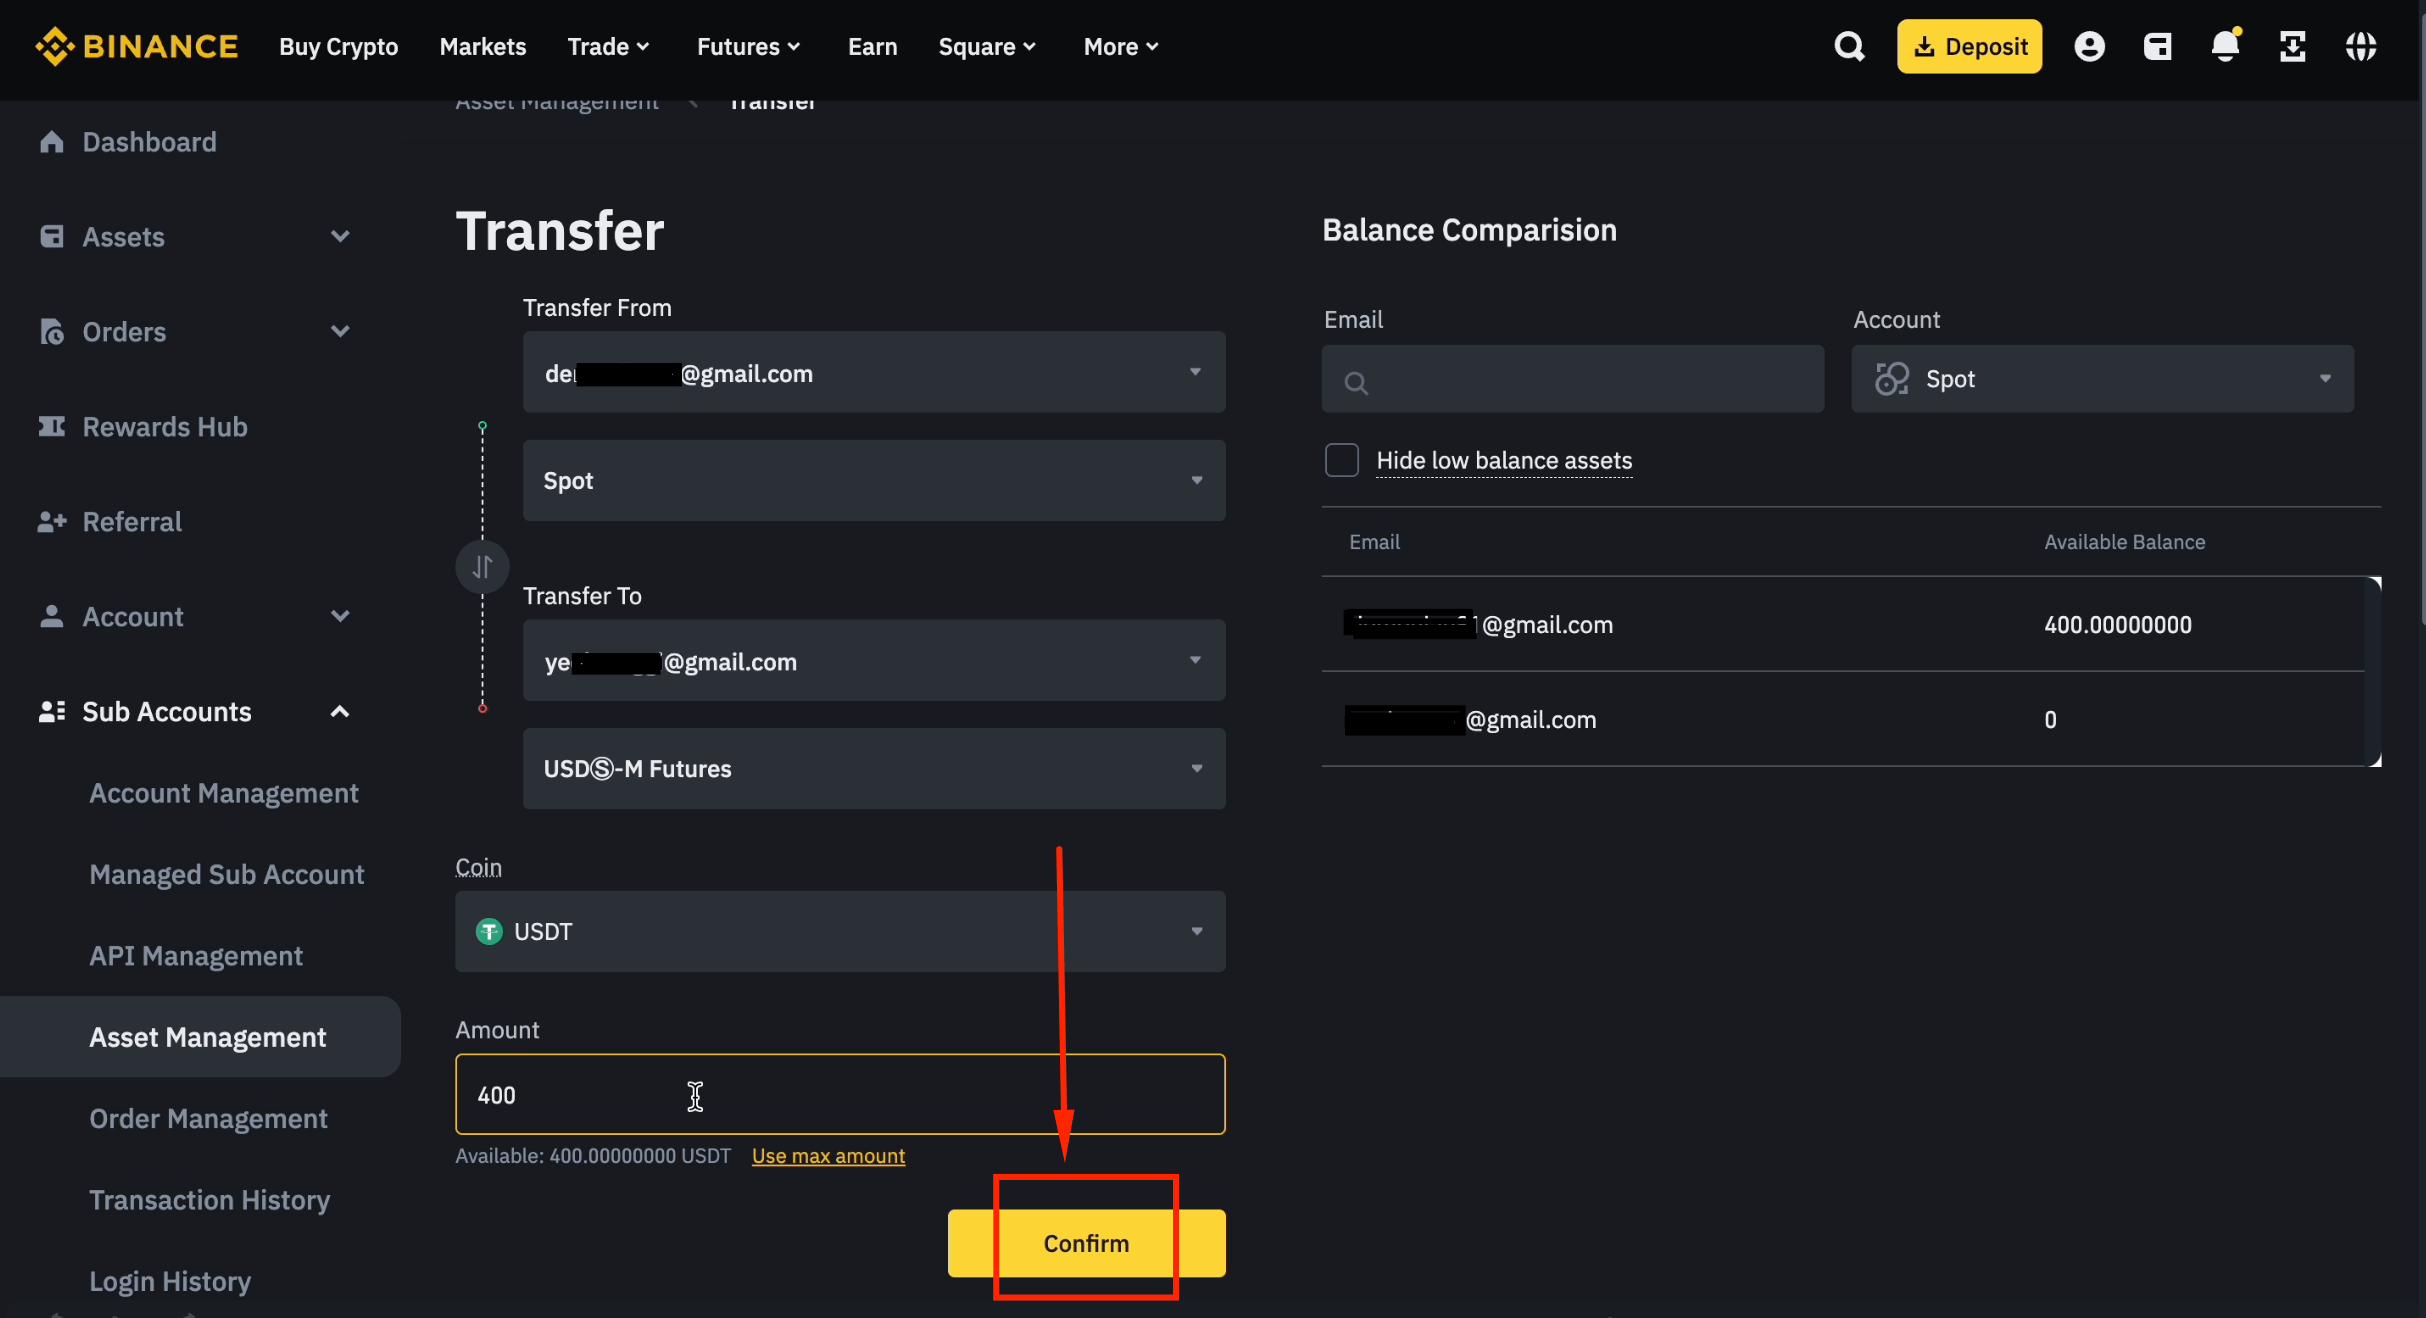
Step 14: Confirm the Transfer
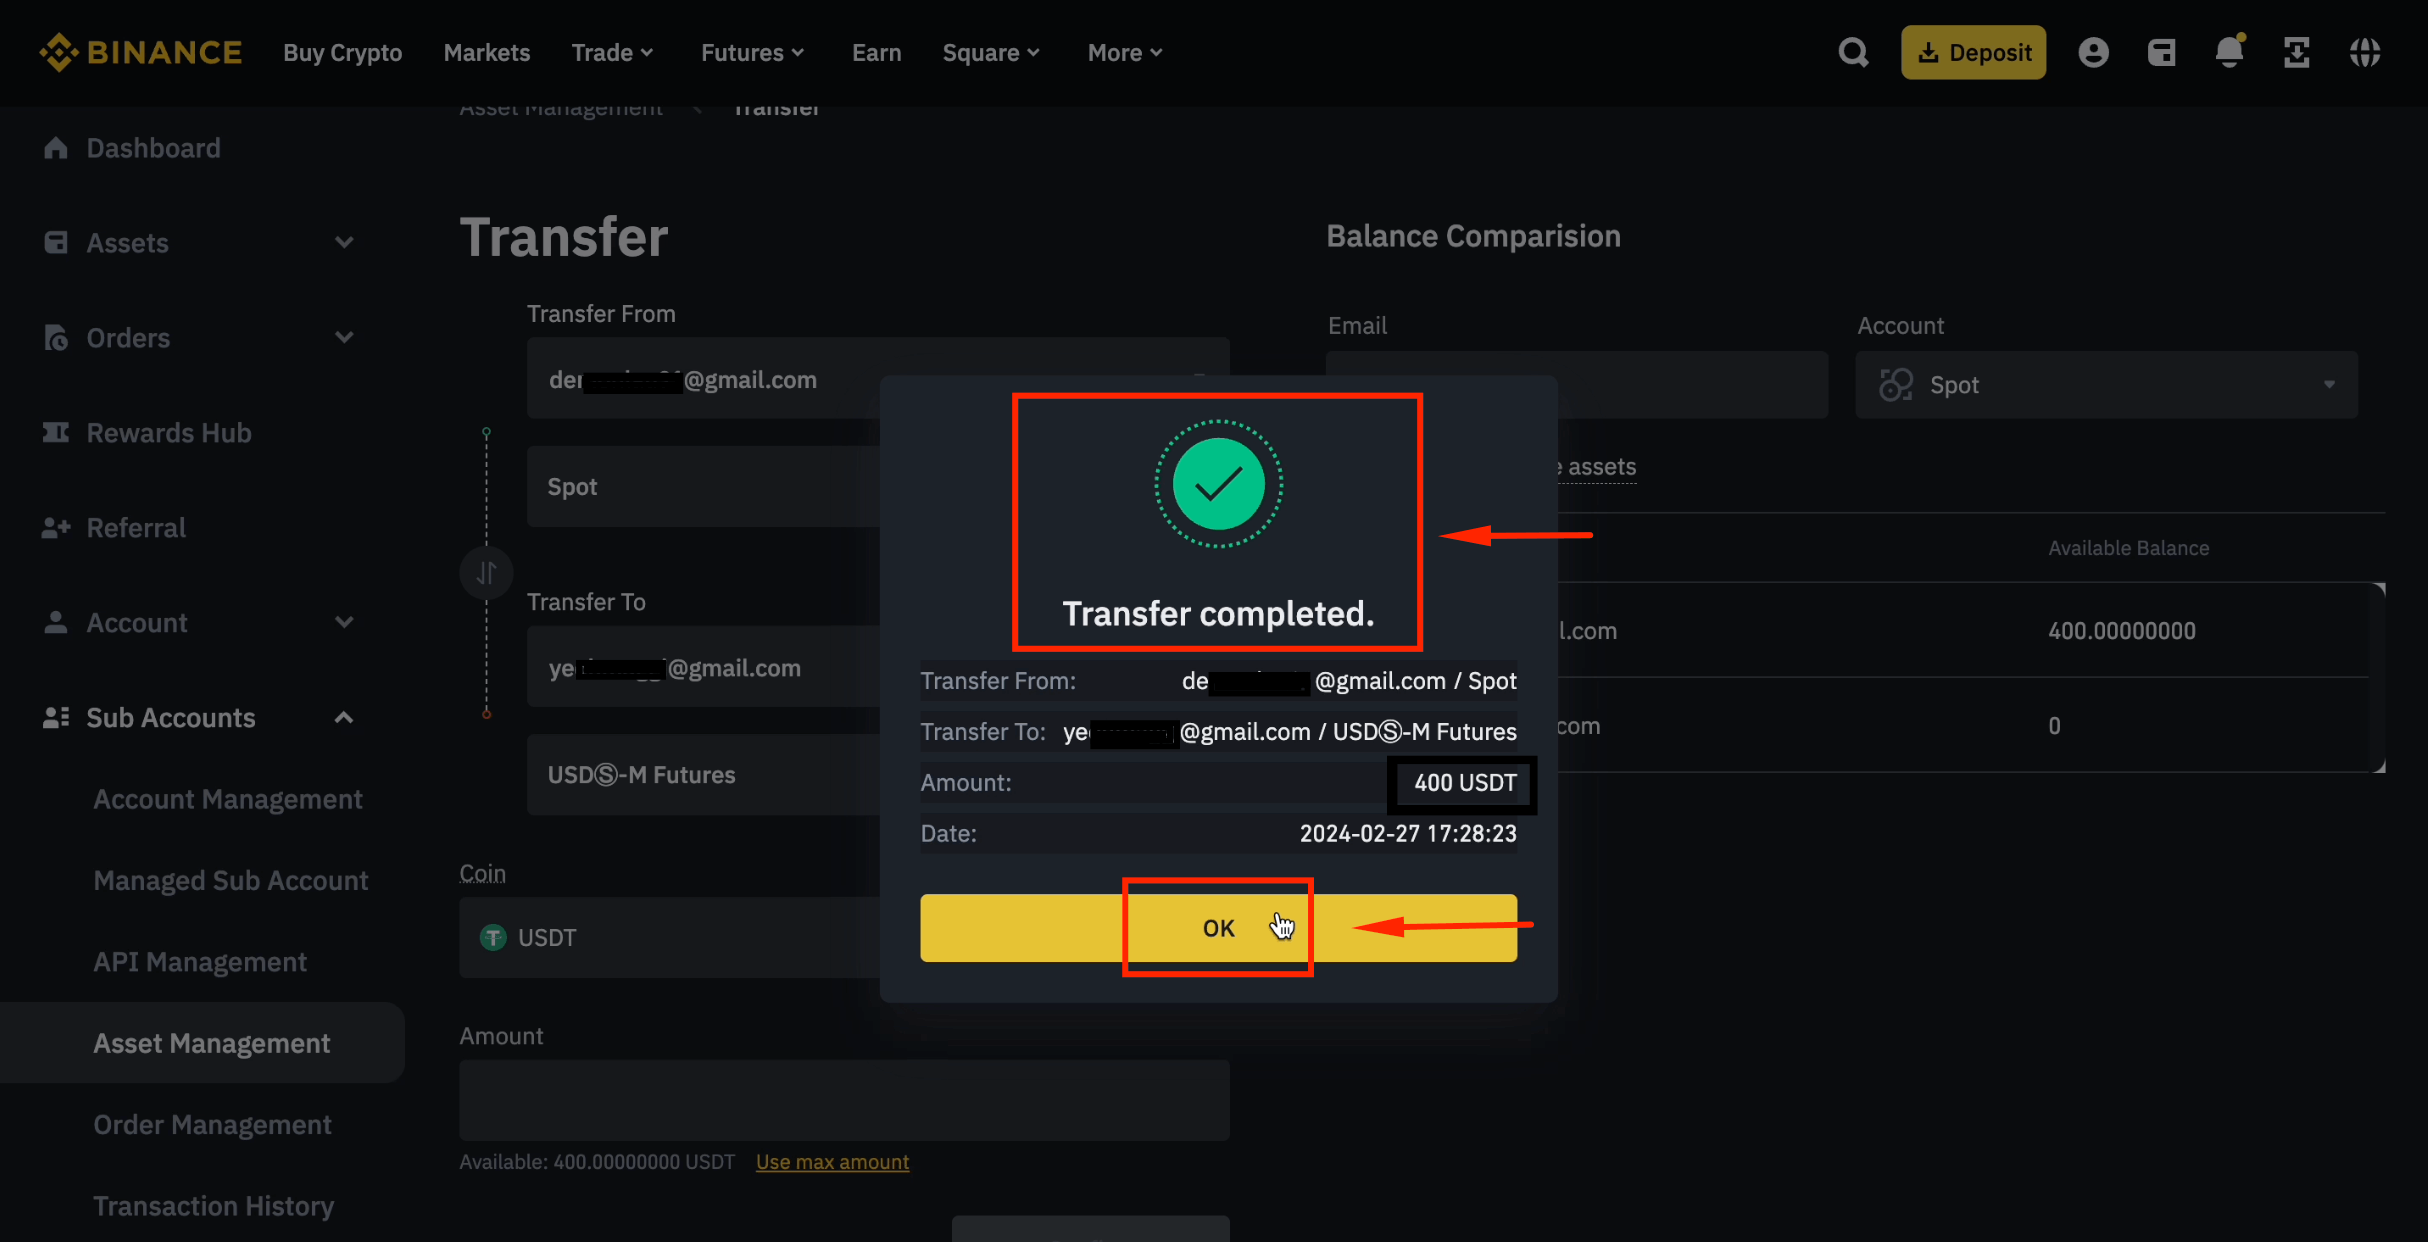
Click [Confirm] to execute the transfer.
Step 15: Transfer Complete
Click [OK]. Funds have been transferred to your sub-account successfully.
Create Sub-Account API Key & Bind in CoinTech2u
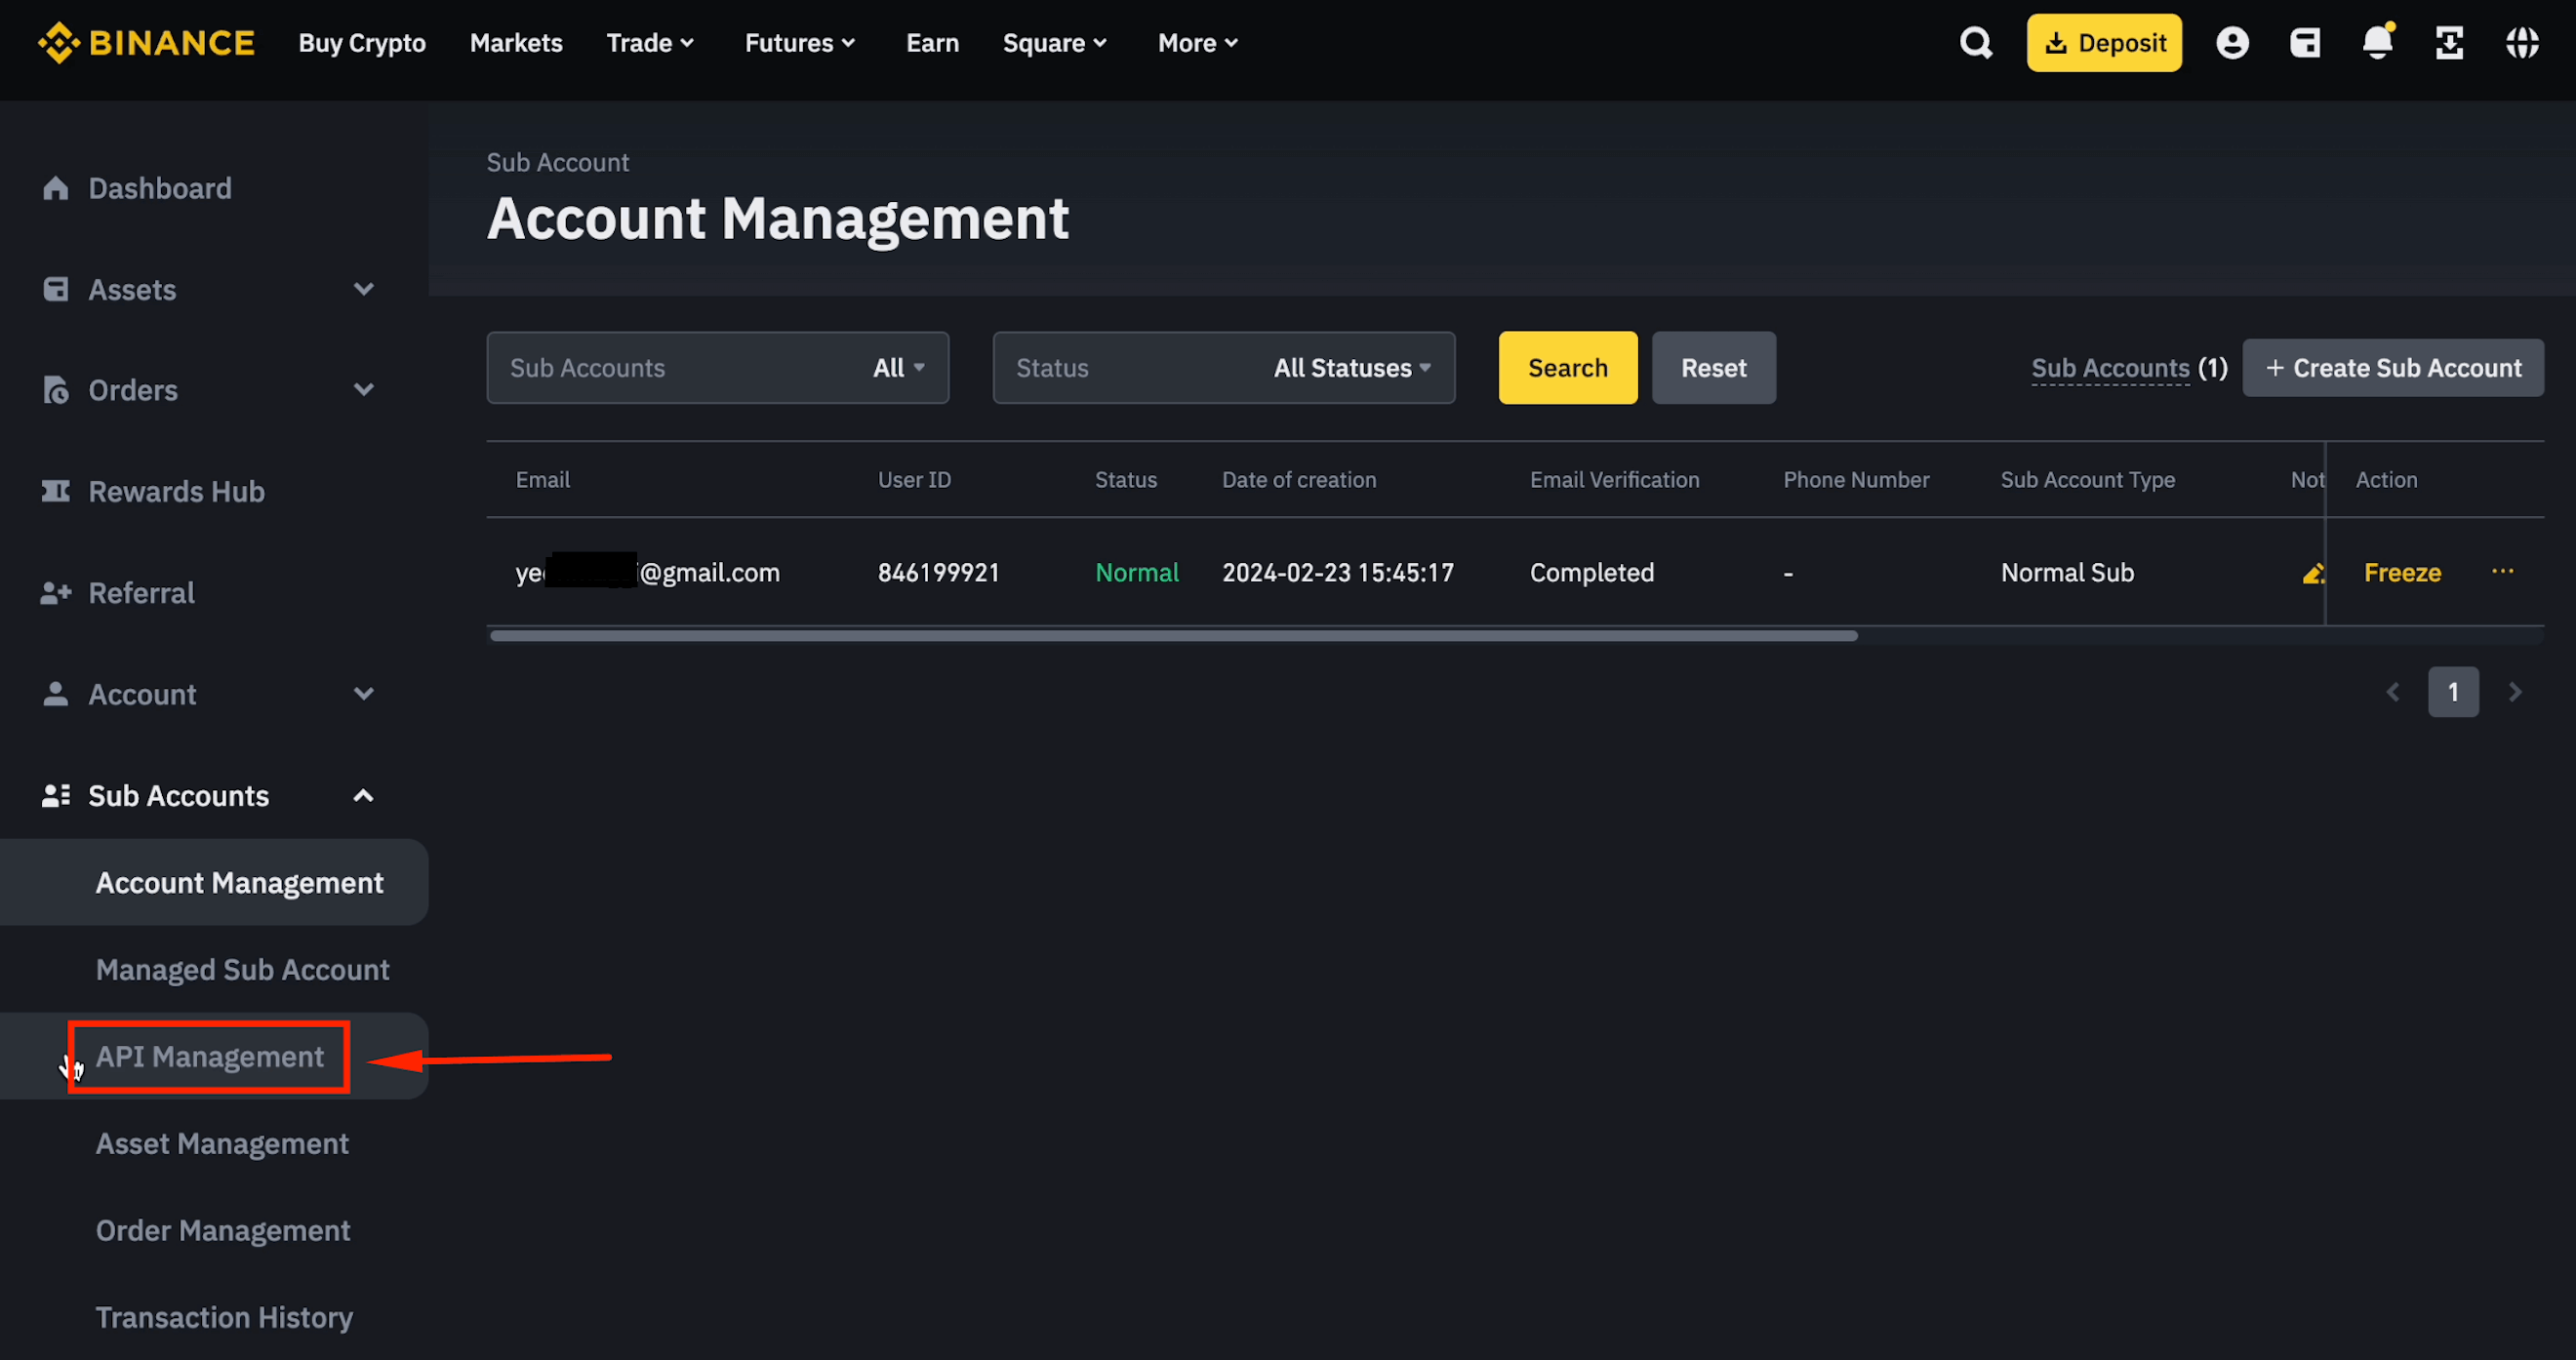
Step 1: Open API Management
Click [API Management] from the sub-account dashboard.
Step 2: Choose System Generated
Select [System generated] and click [Next].

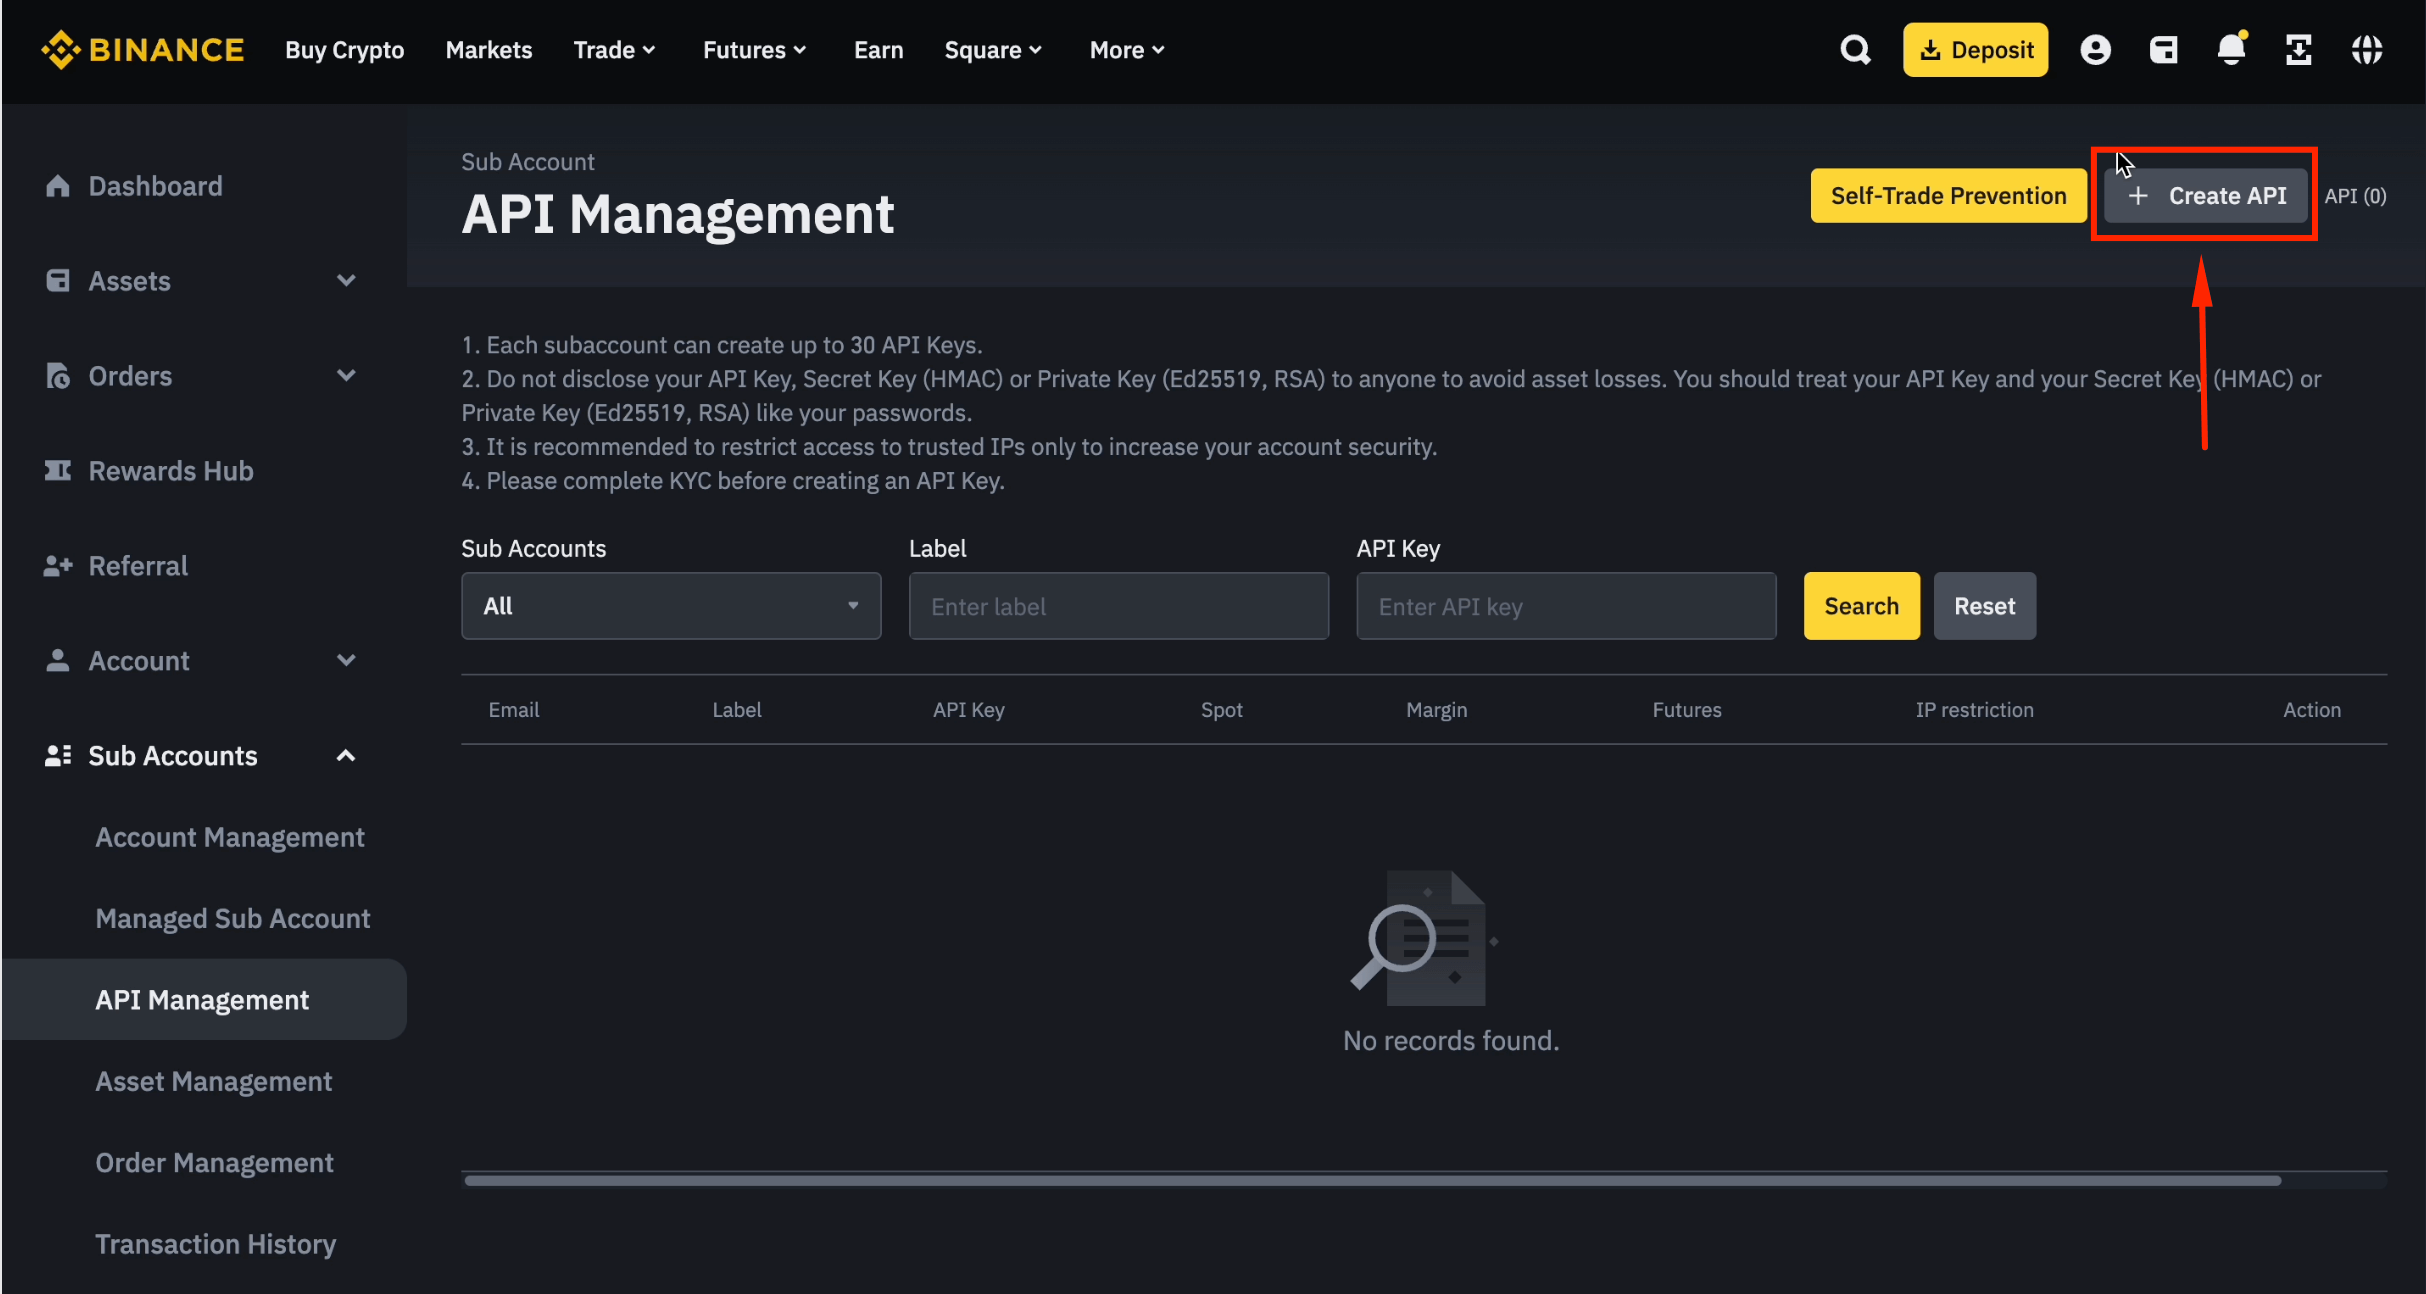
Step 3: Create the API Key
Click [+ Create API].
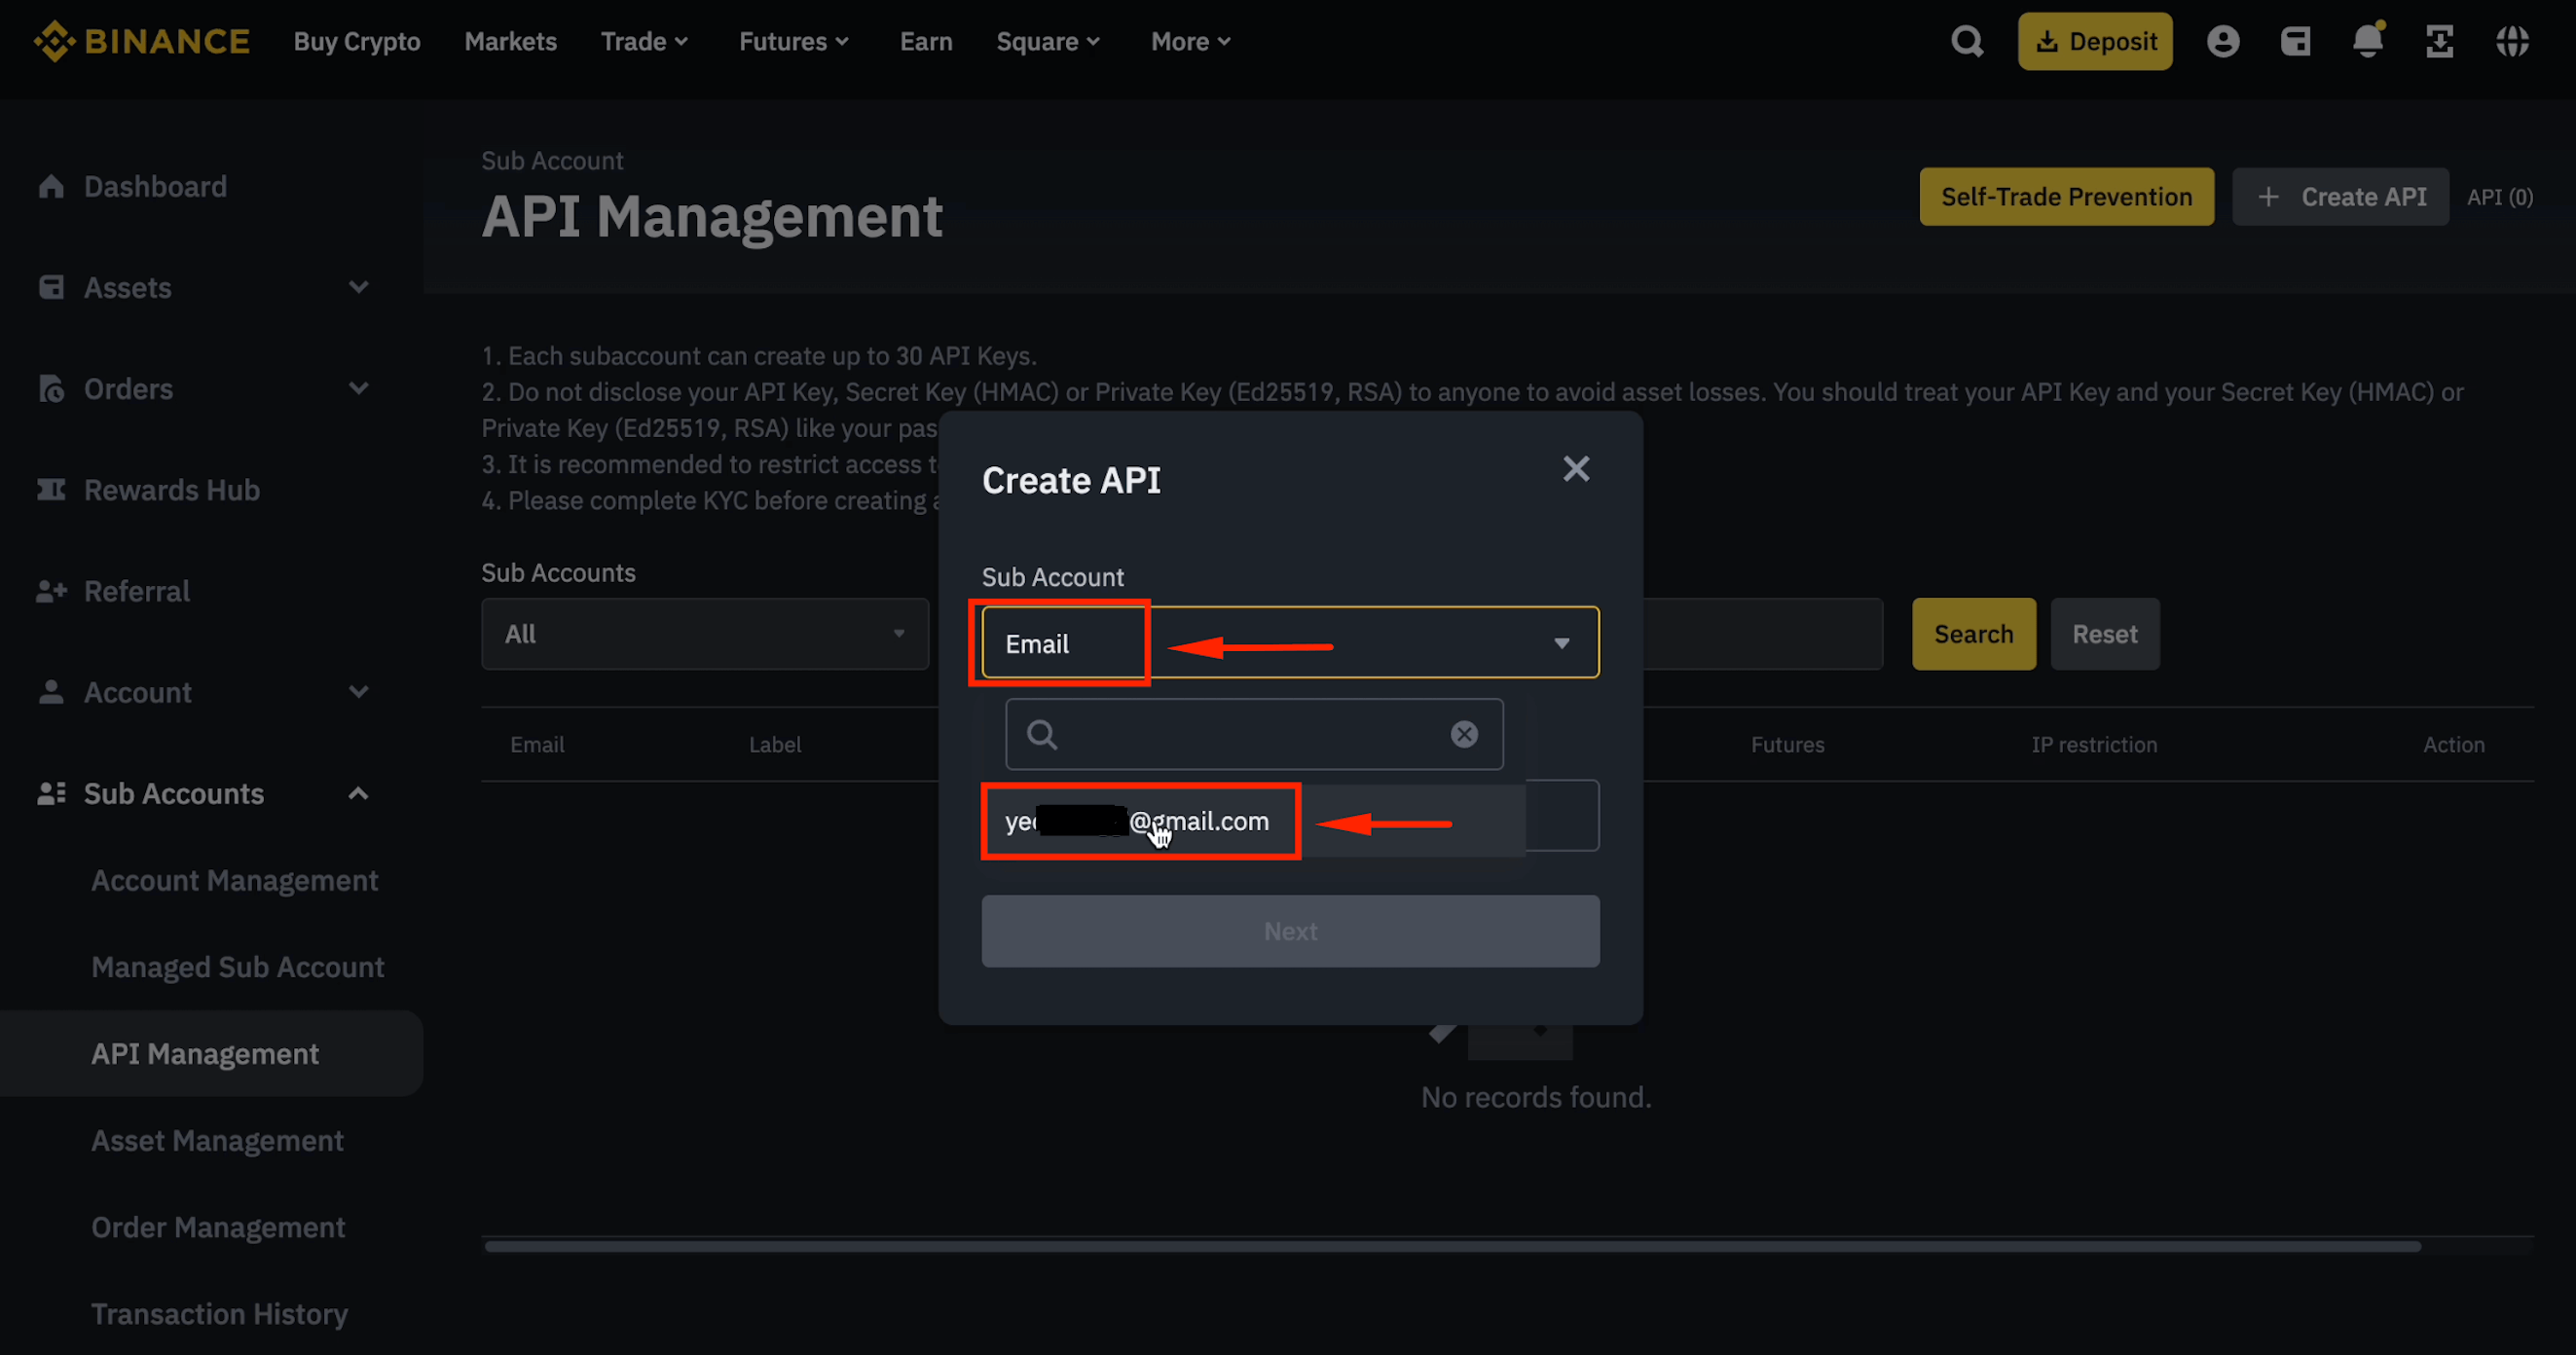
Step 4: Select the Sub-Account
Choose [Email] and select your sub-account email.
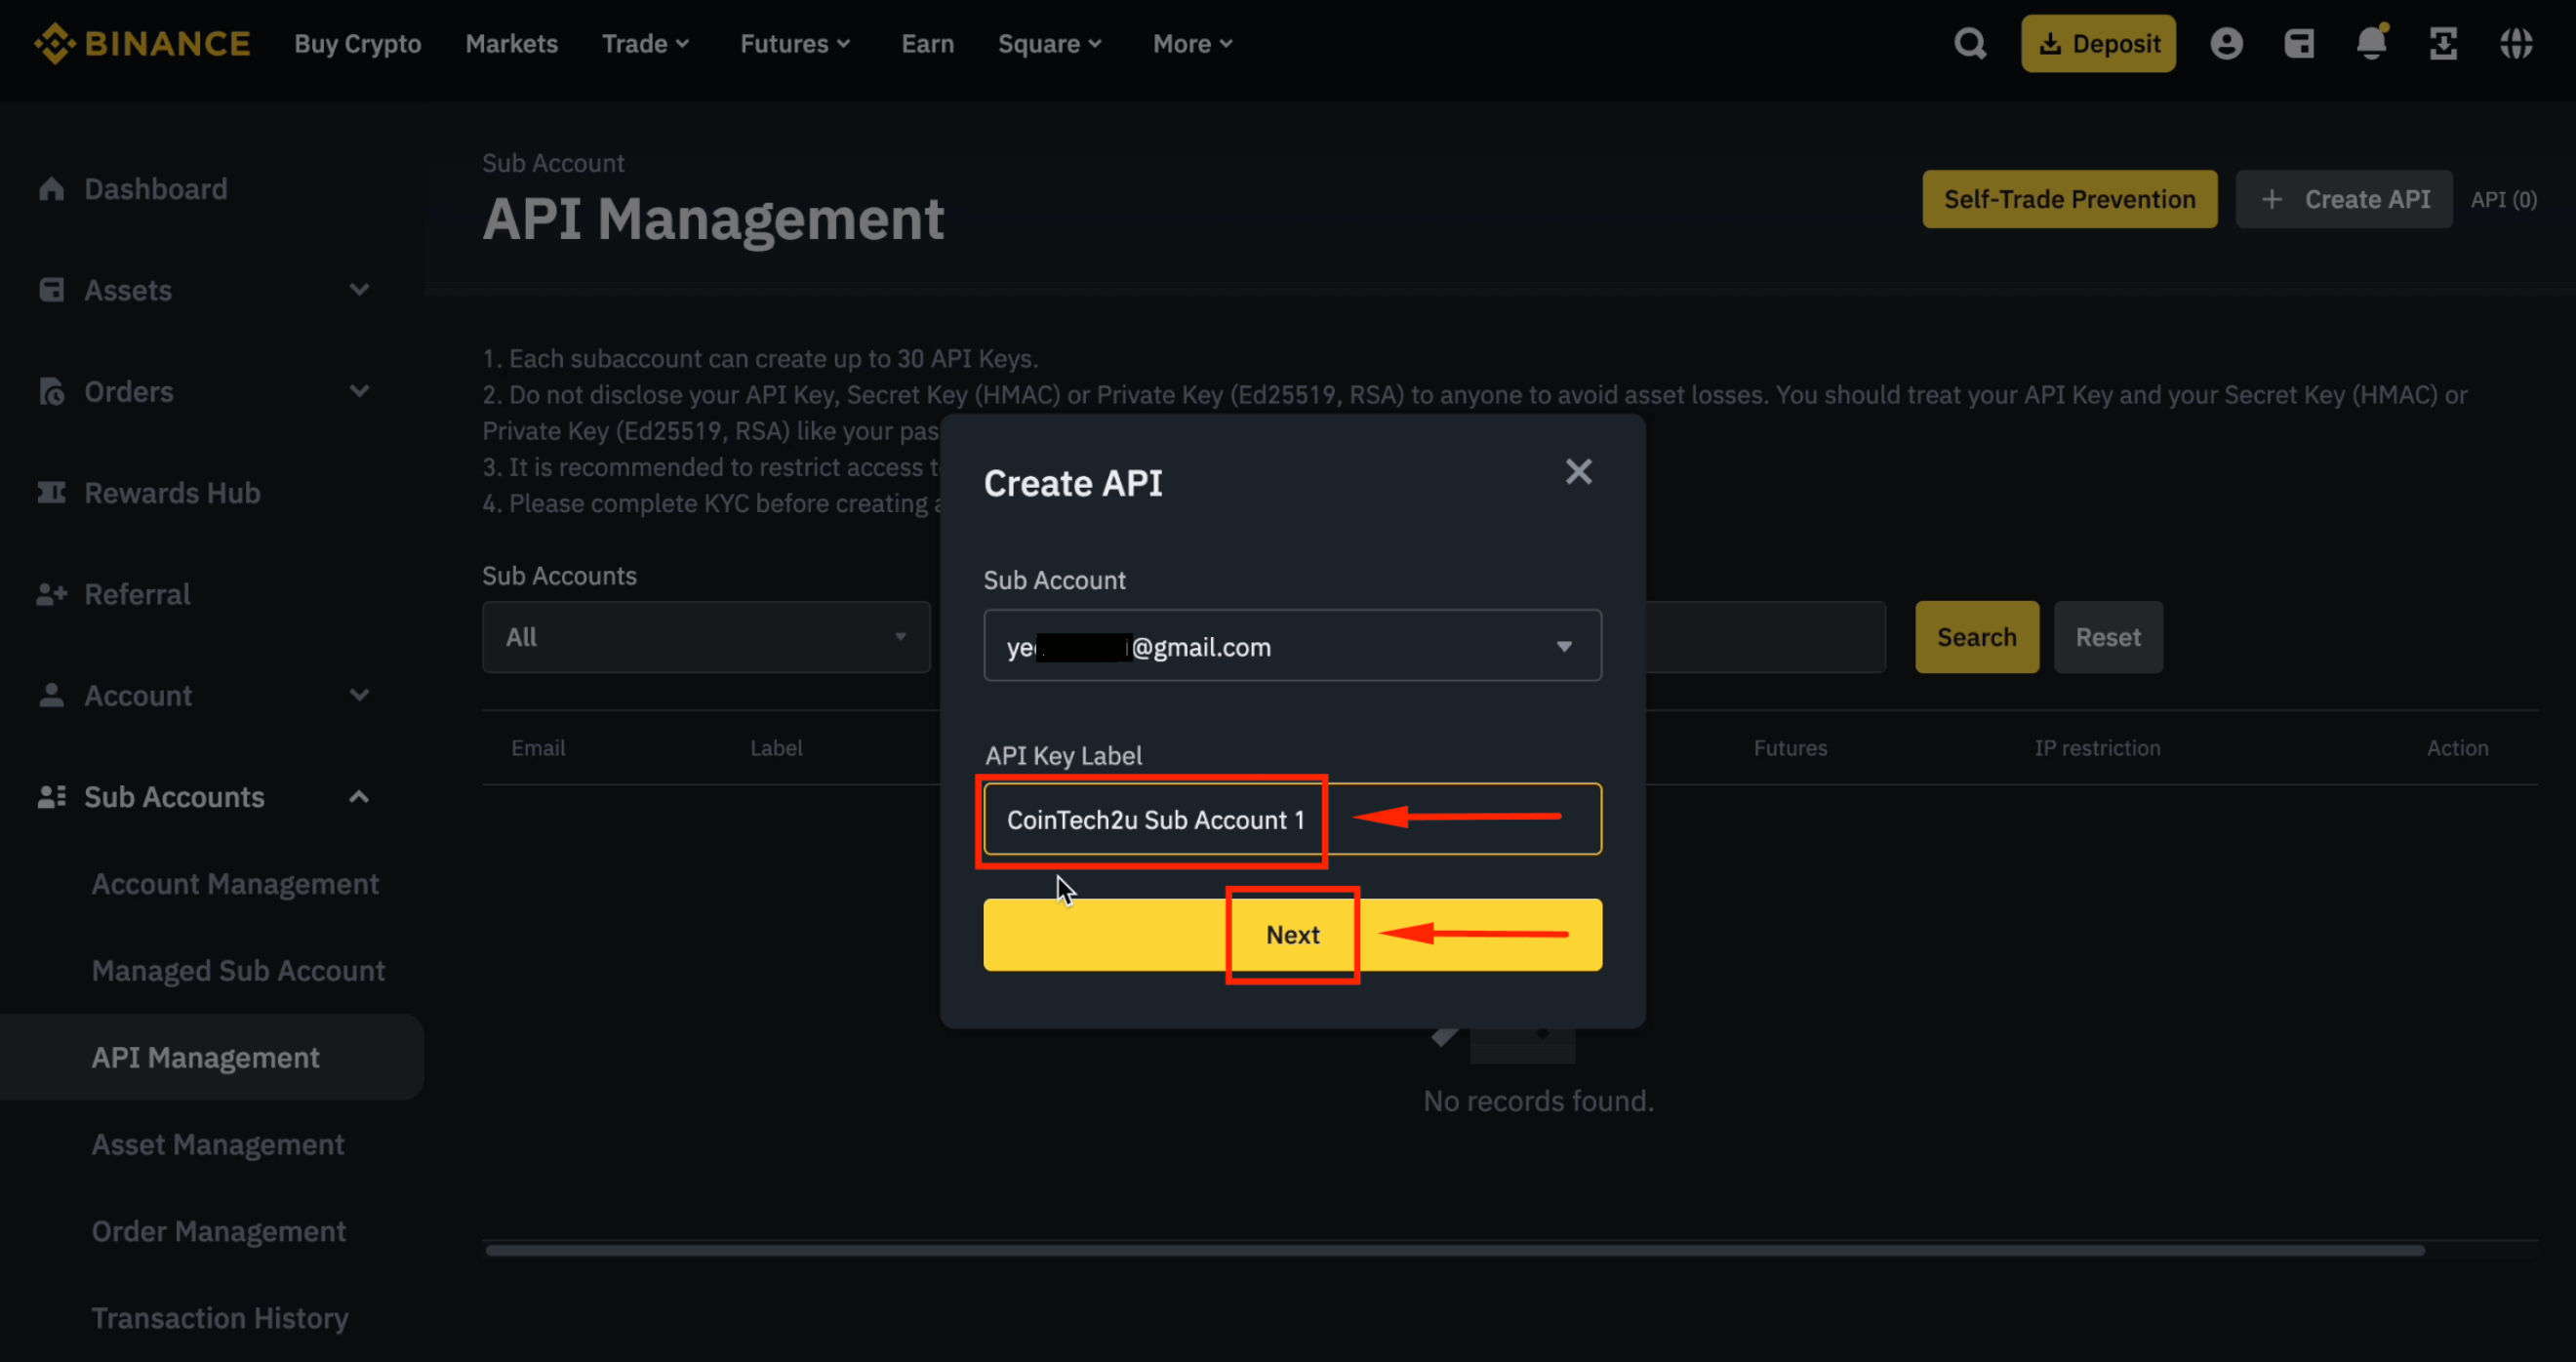
Step 5: Name Your Sub-Account API Key
Type "CoinTech2u Sub Account 1" and click [Next].
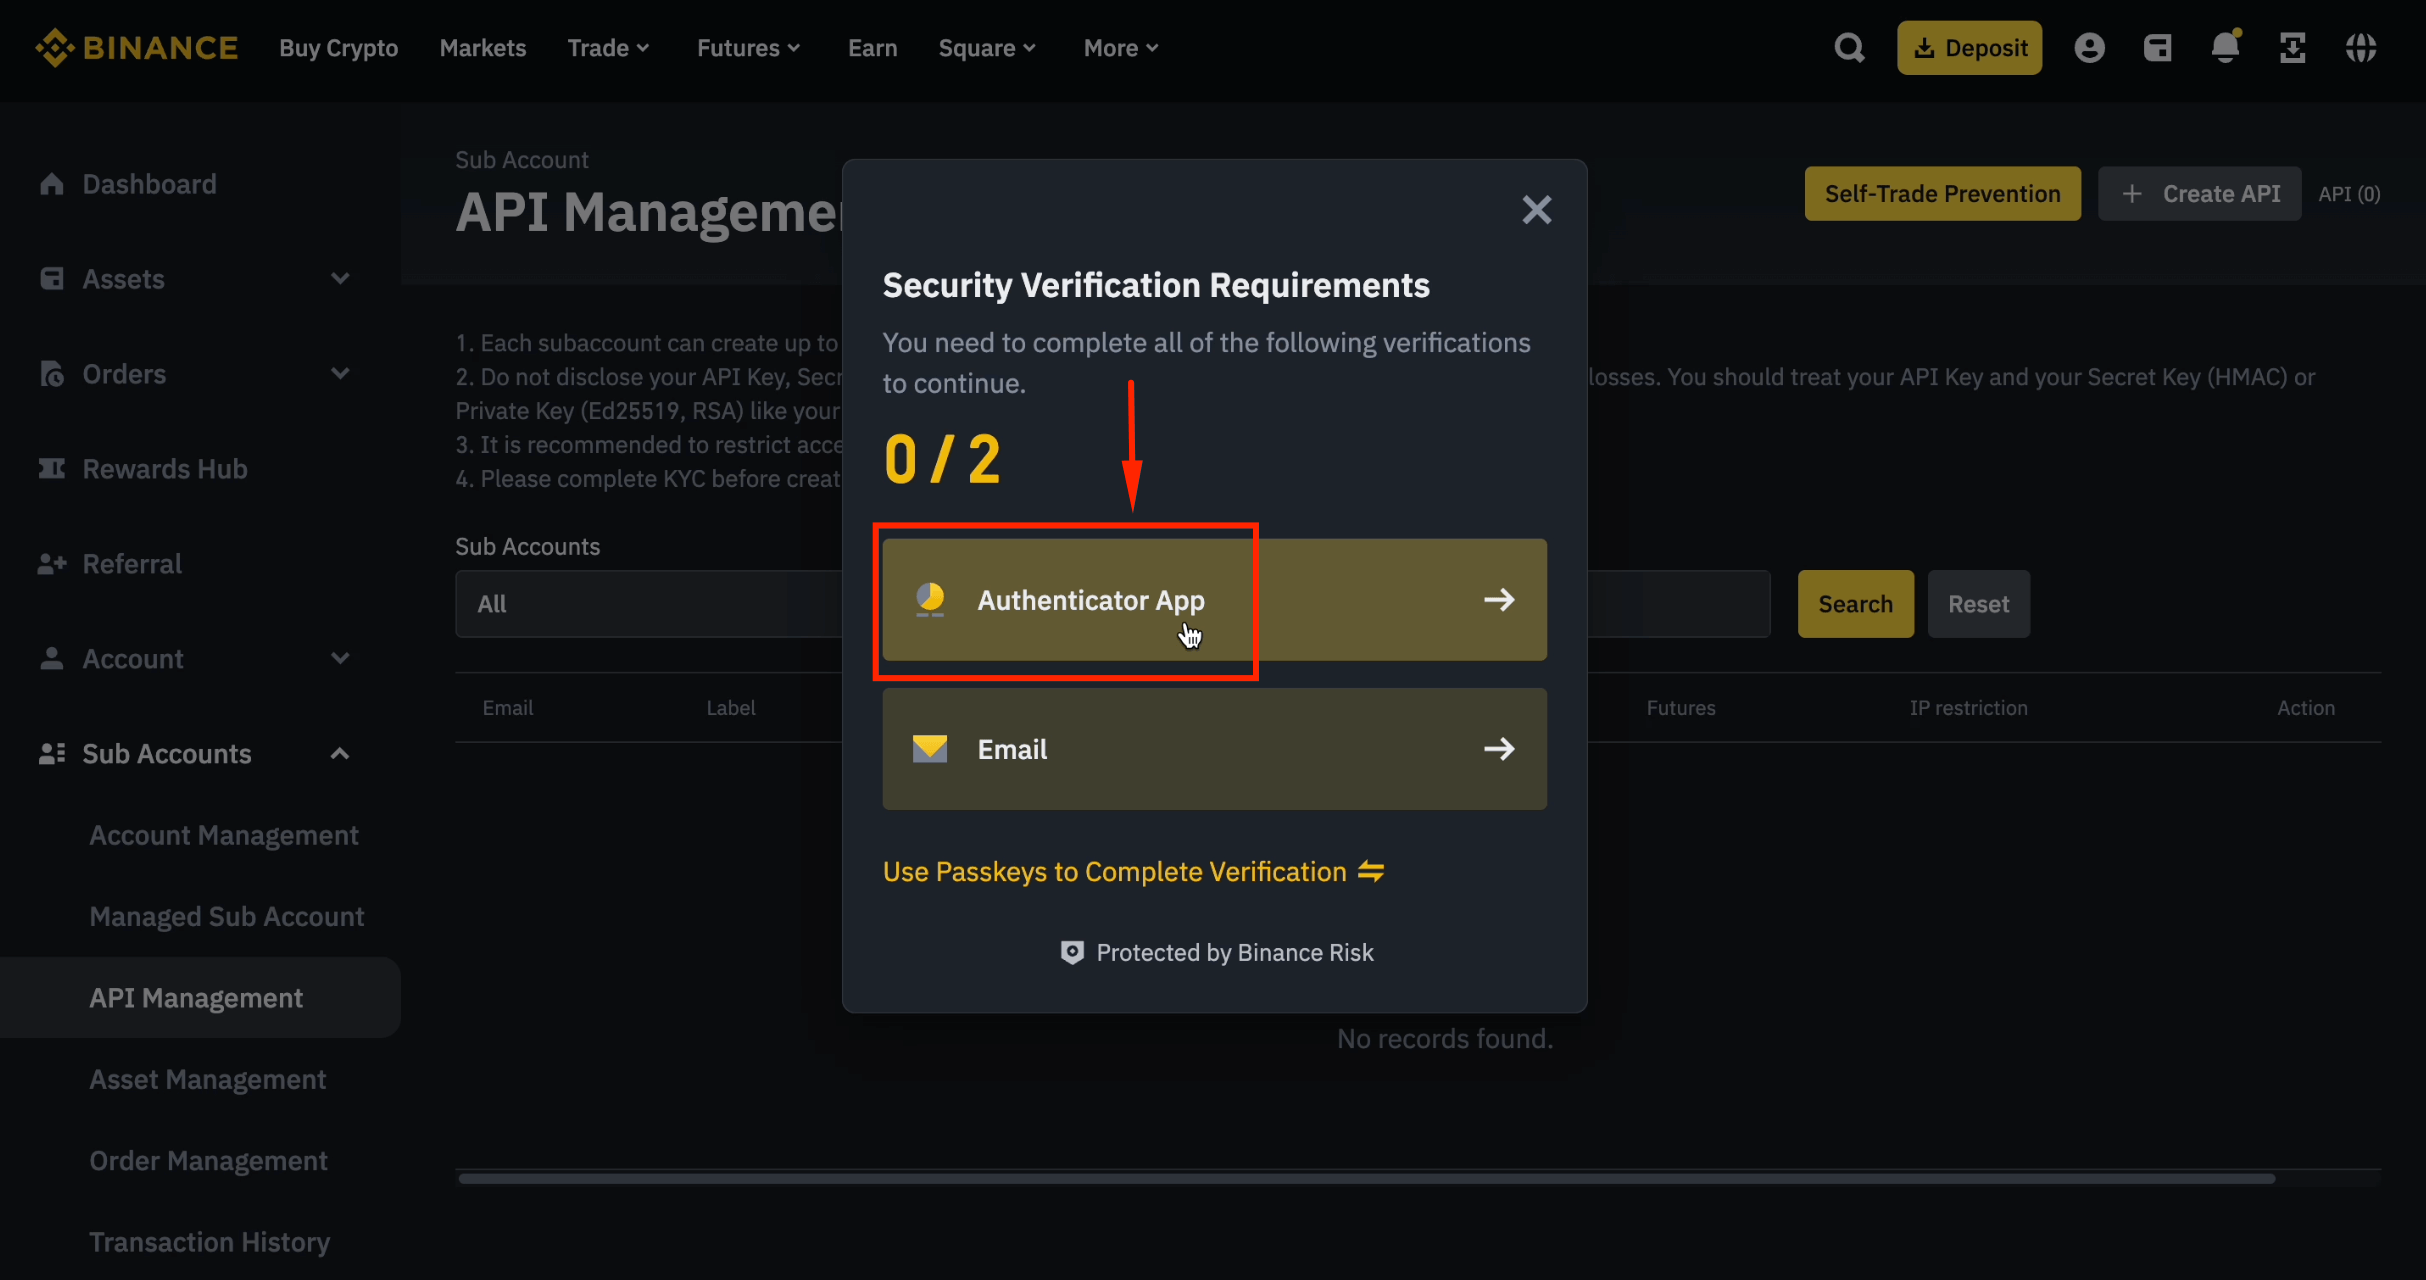
Step 6: Verify with Authenticator App
Click [Authenticator App].
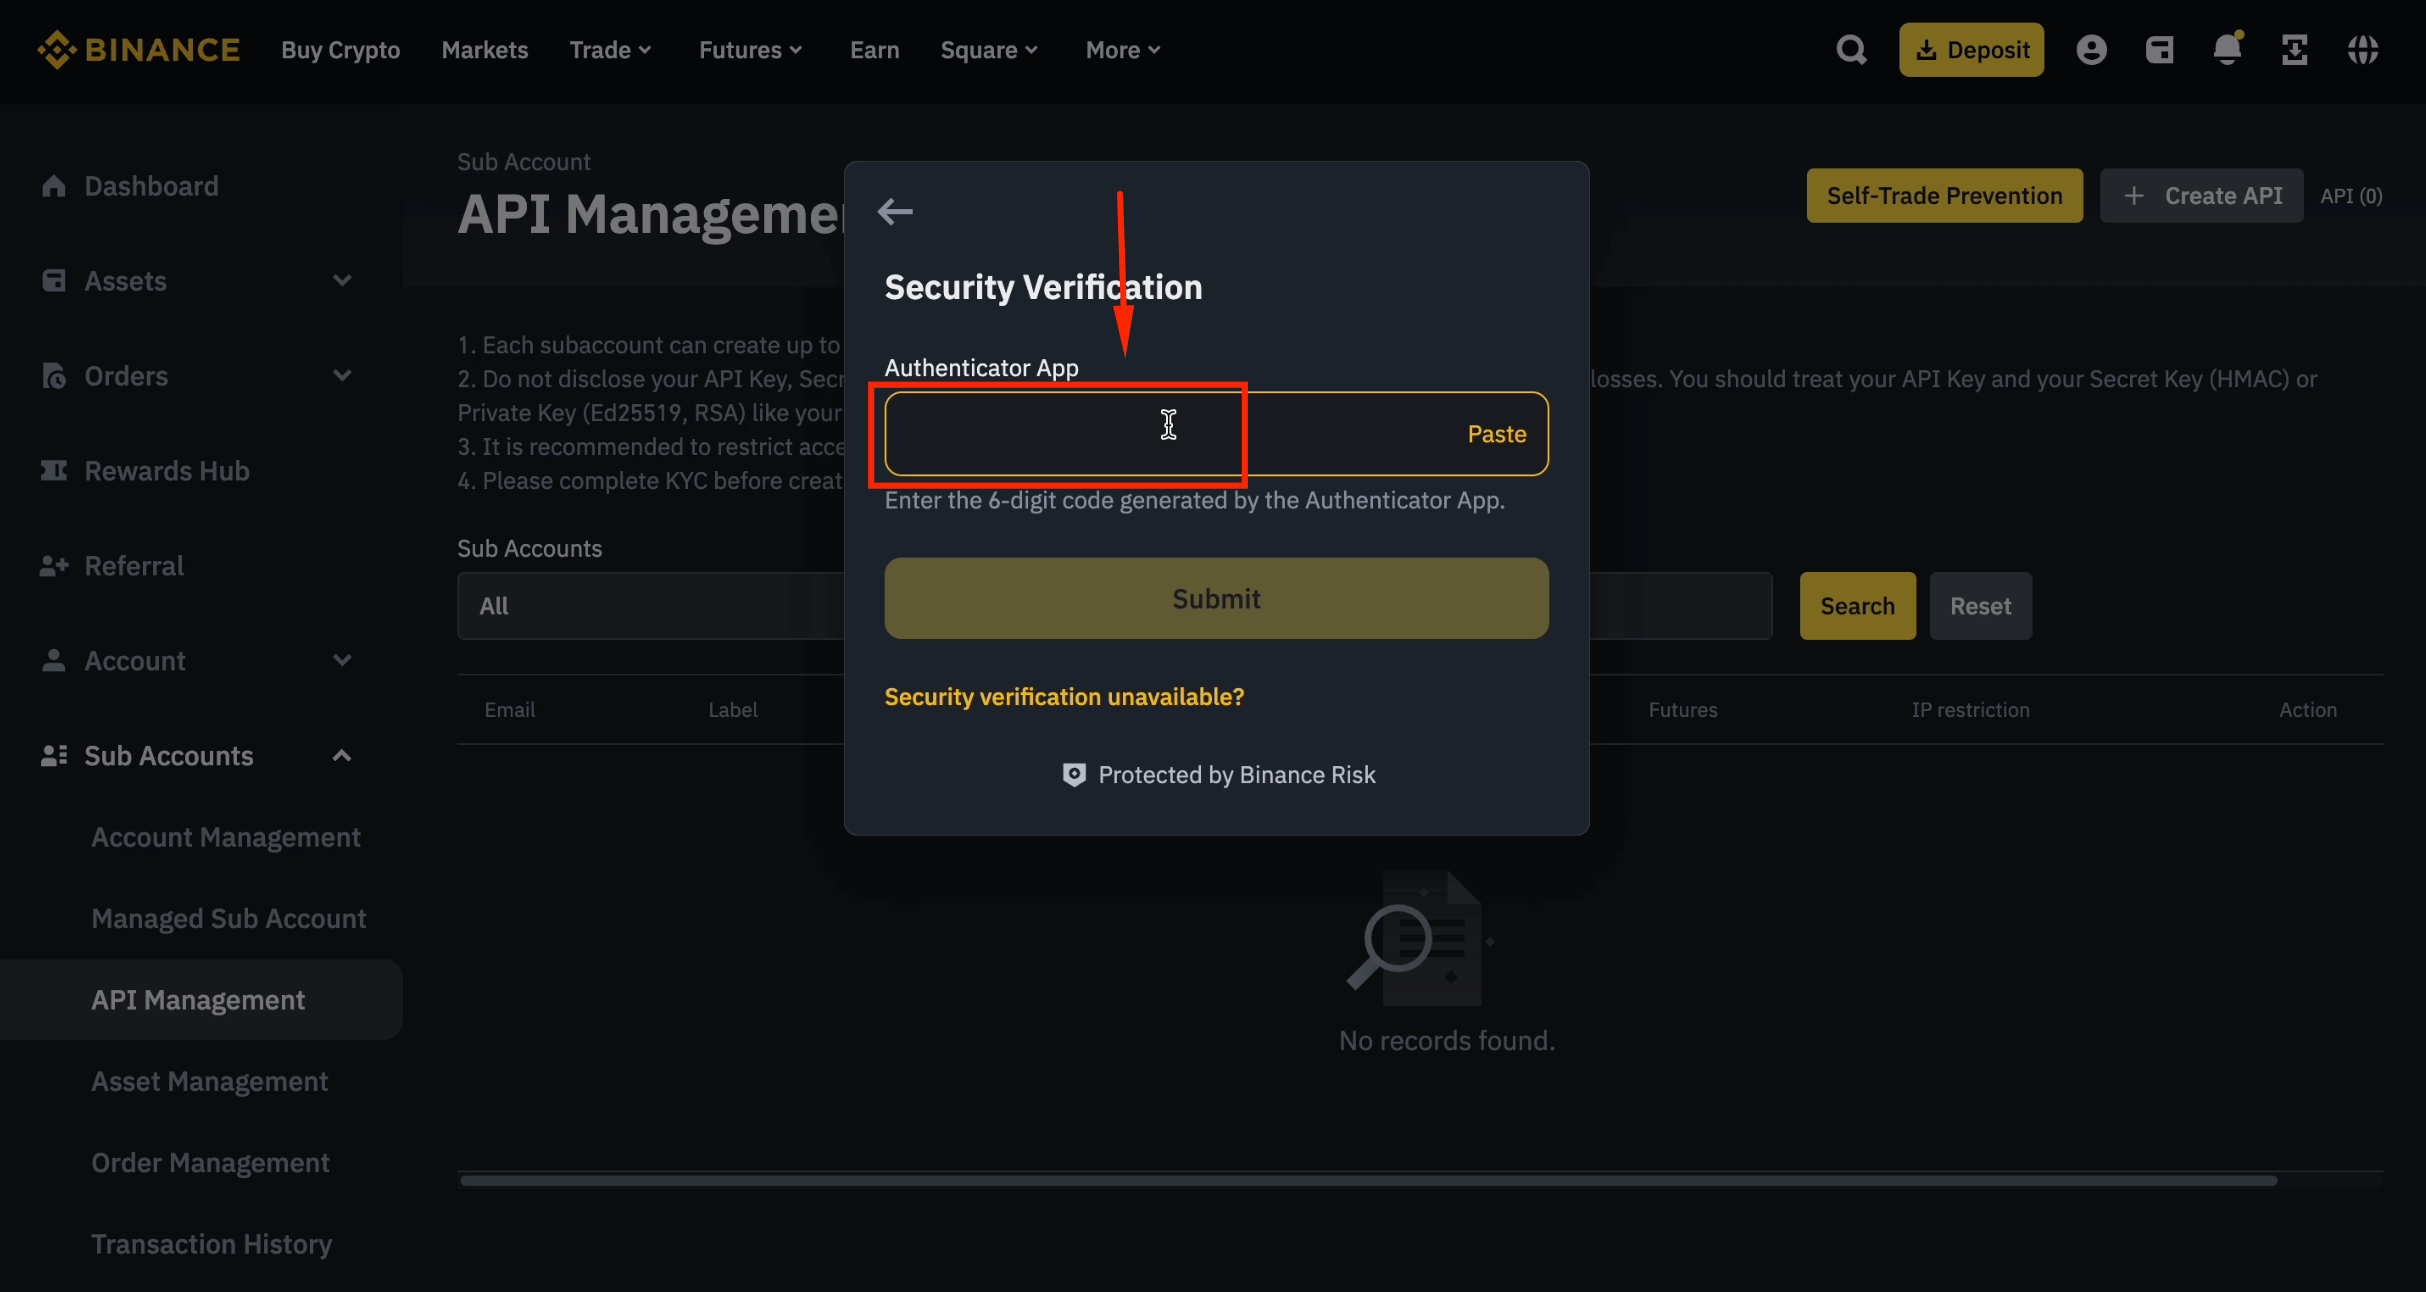
Step 7: Enter the 6-Digit Code
Enter the 6-digit code from Google Authenticator and click [Submit].
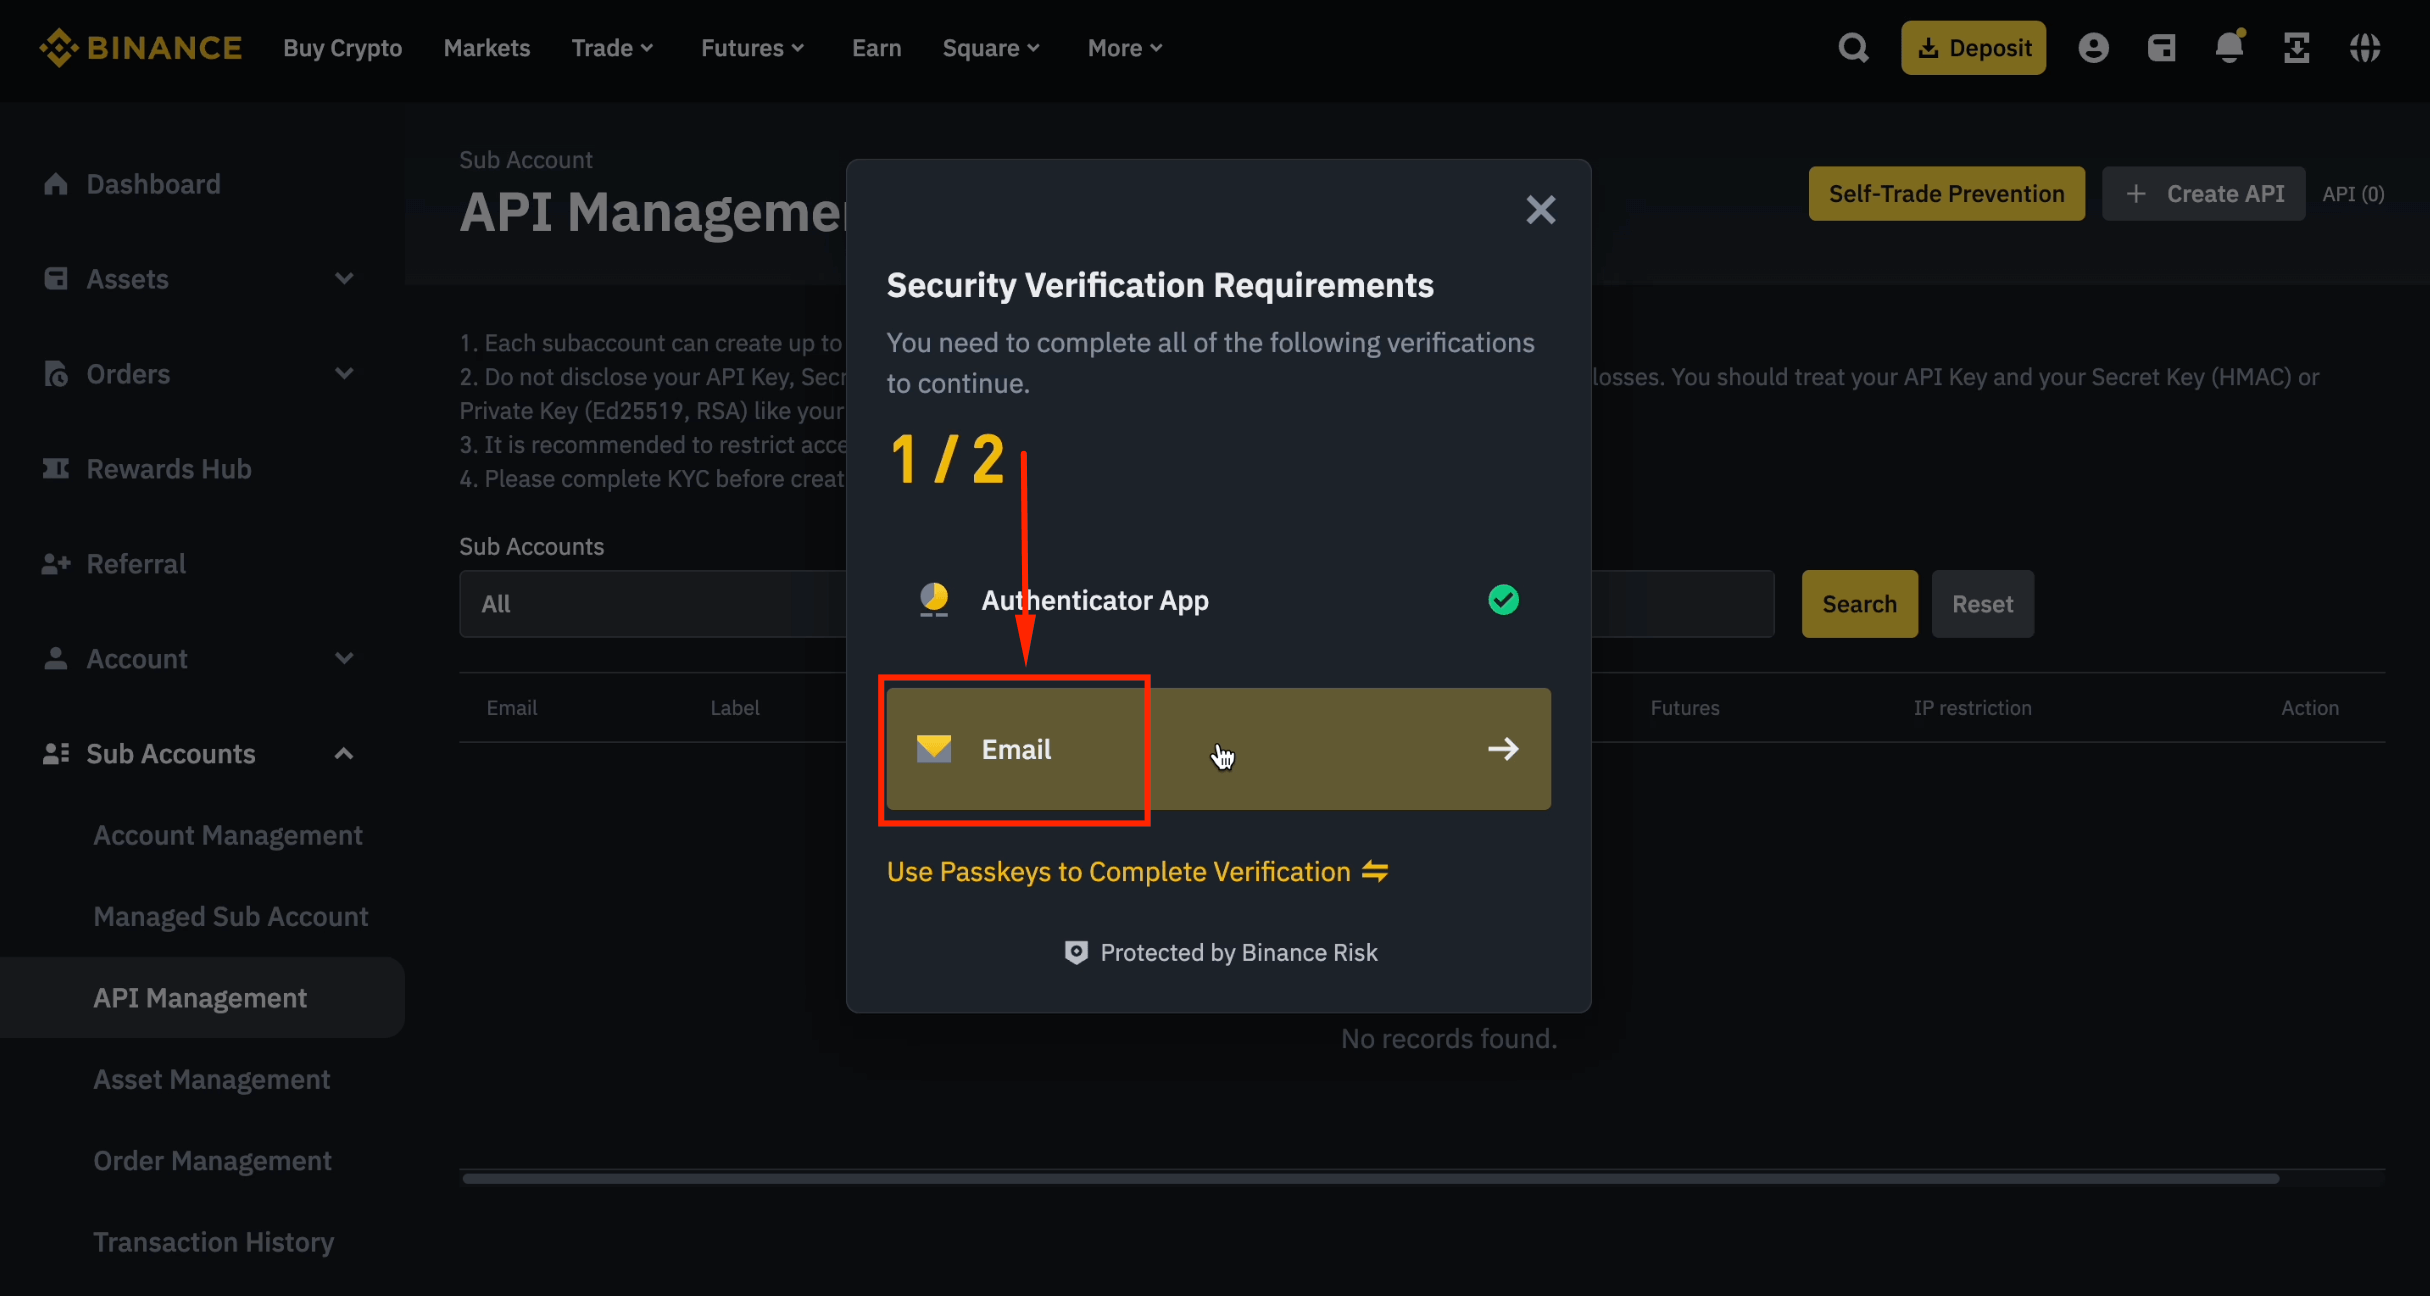
Step 8: Verify via Email
Click [Email] to receive a verification code.
Step 9: Submit Email Code
Enter the 6-digit code from your email and click [Submit].

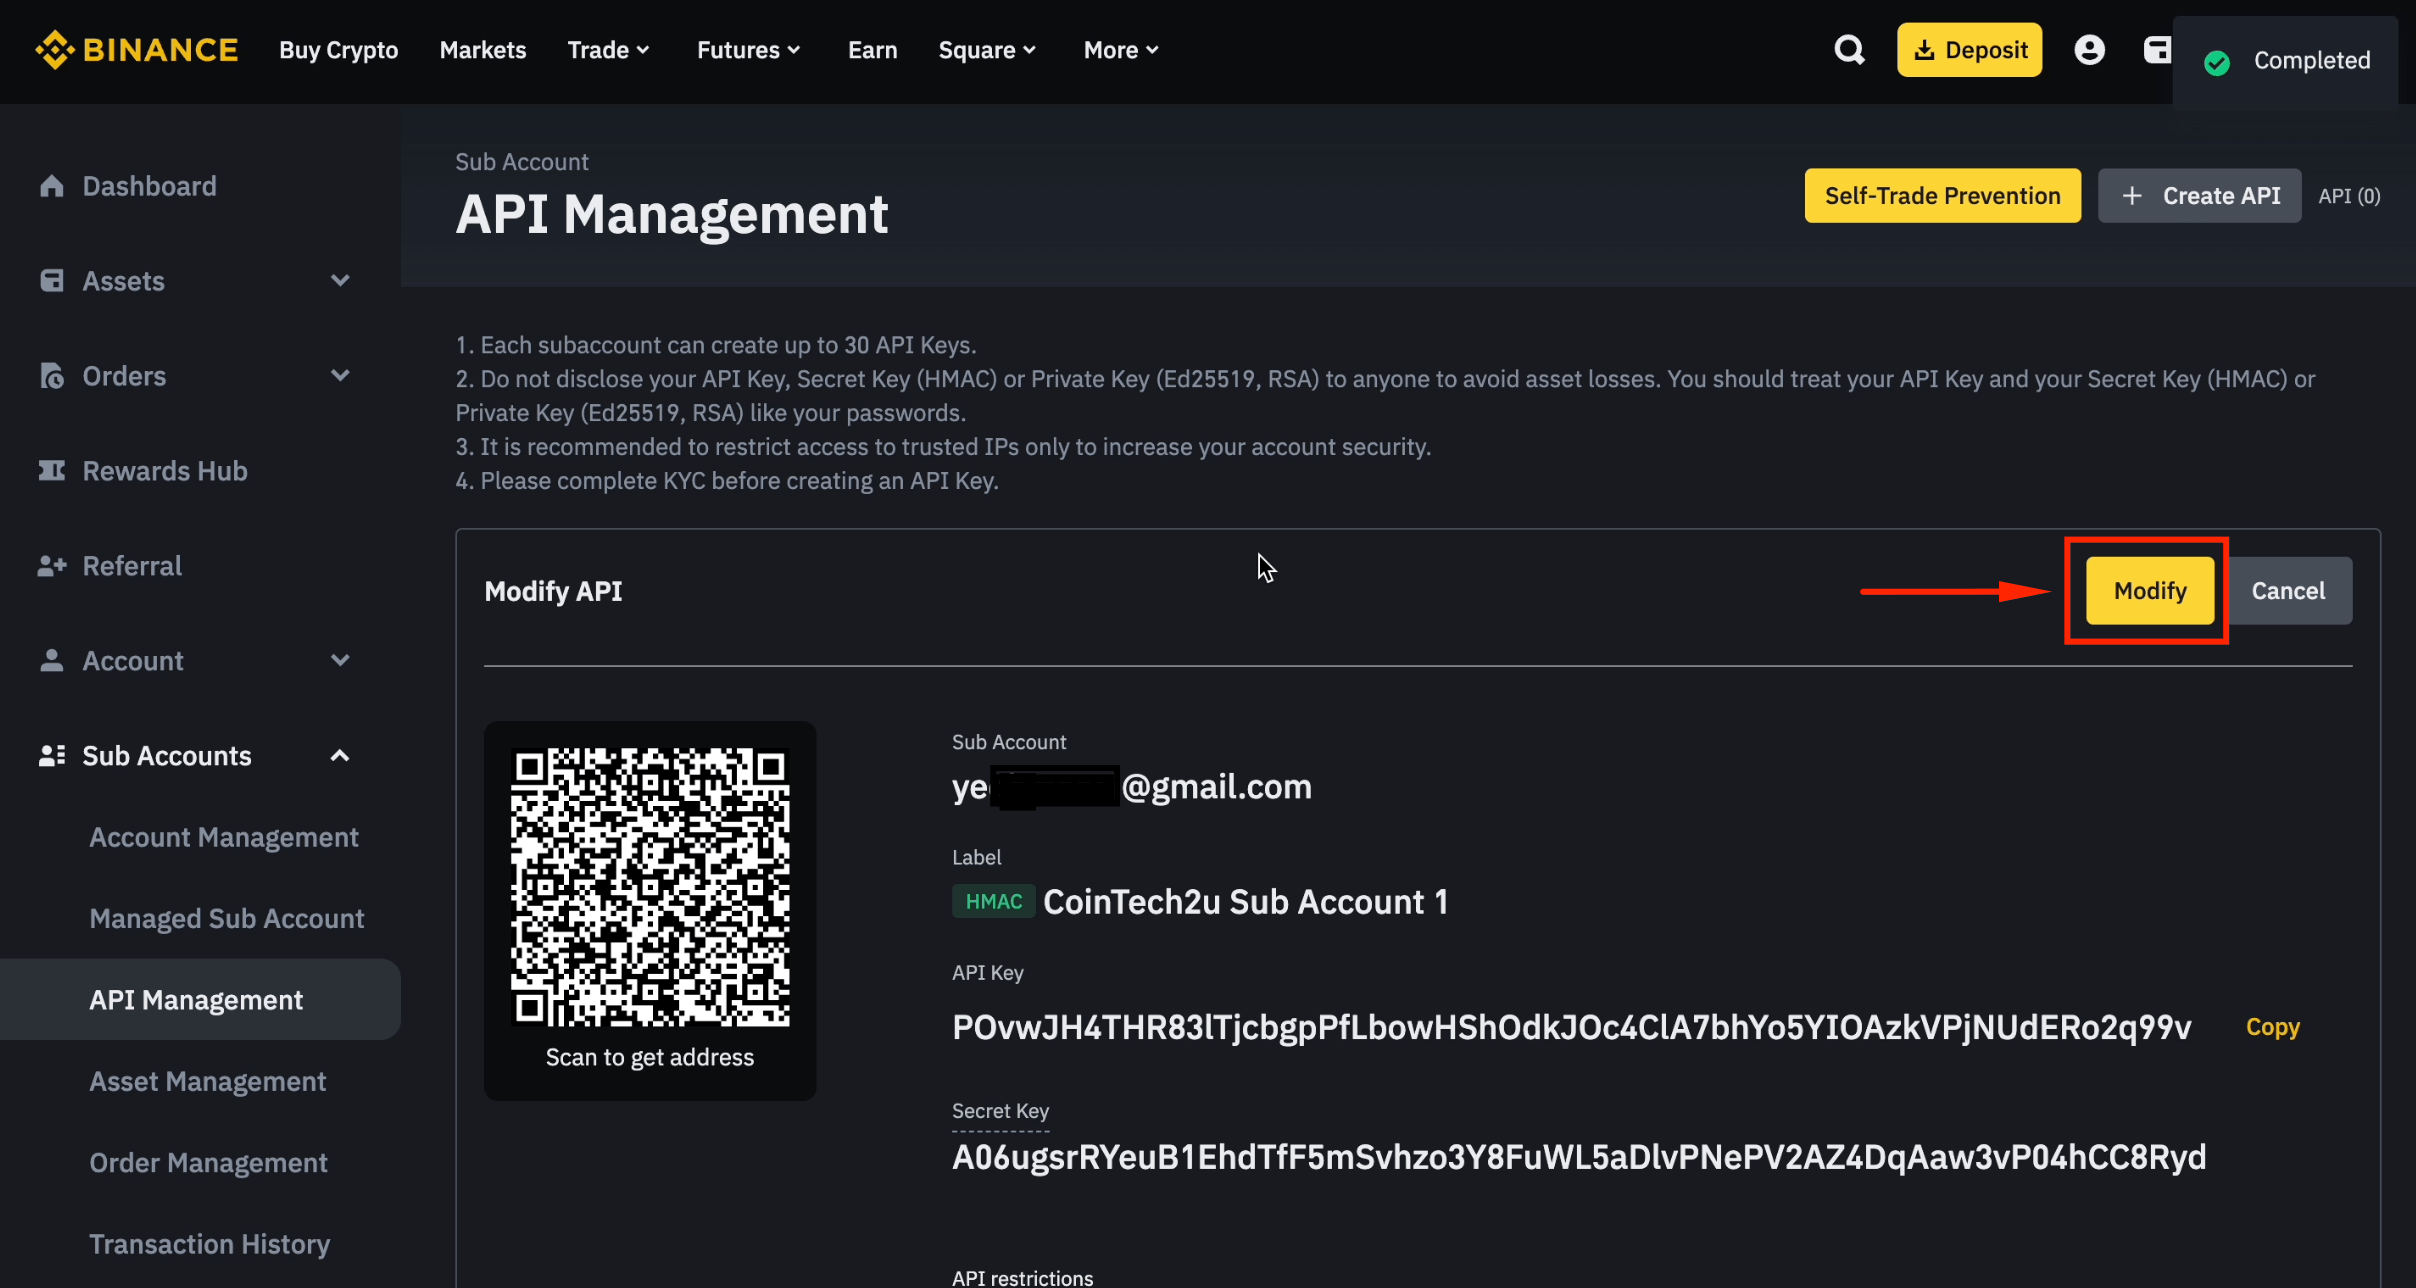
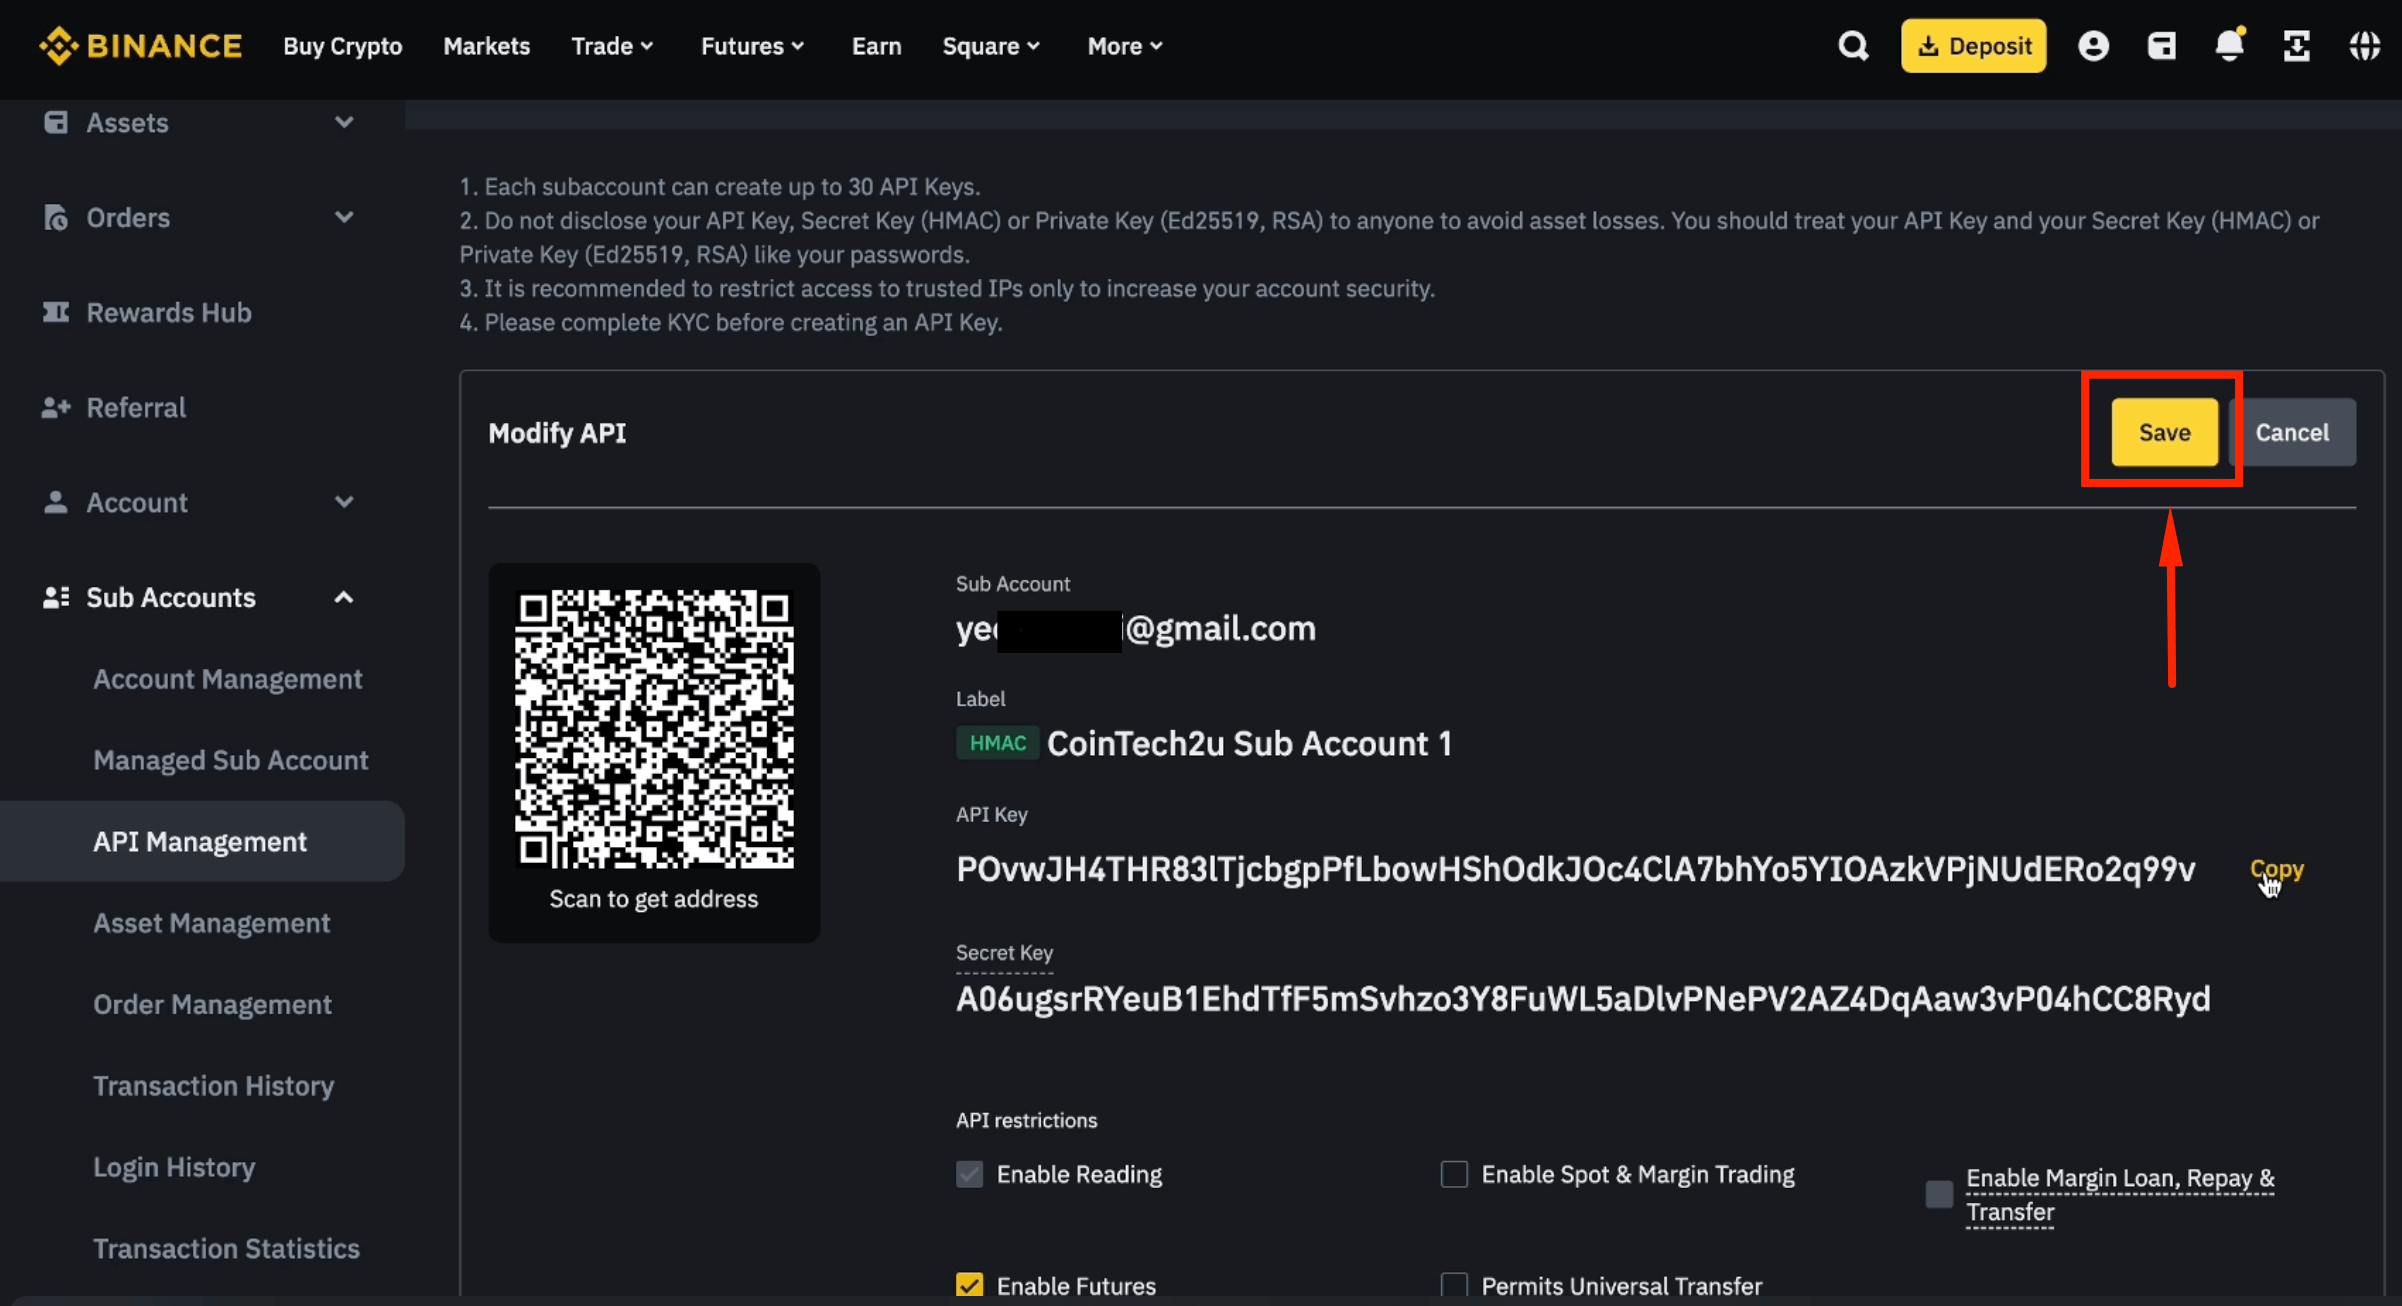
Step 10: Modify API Key Settings
Click [Modify] to edit the API key permissions.
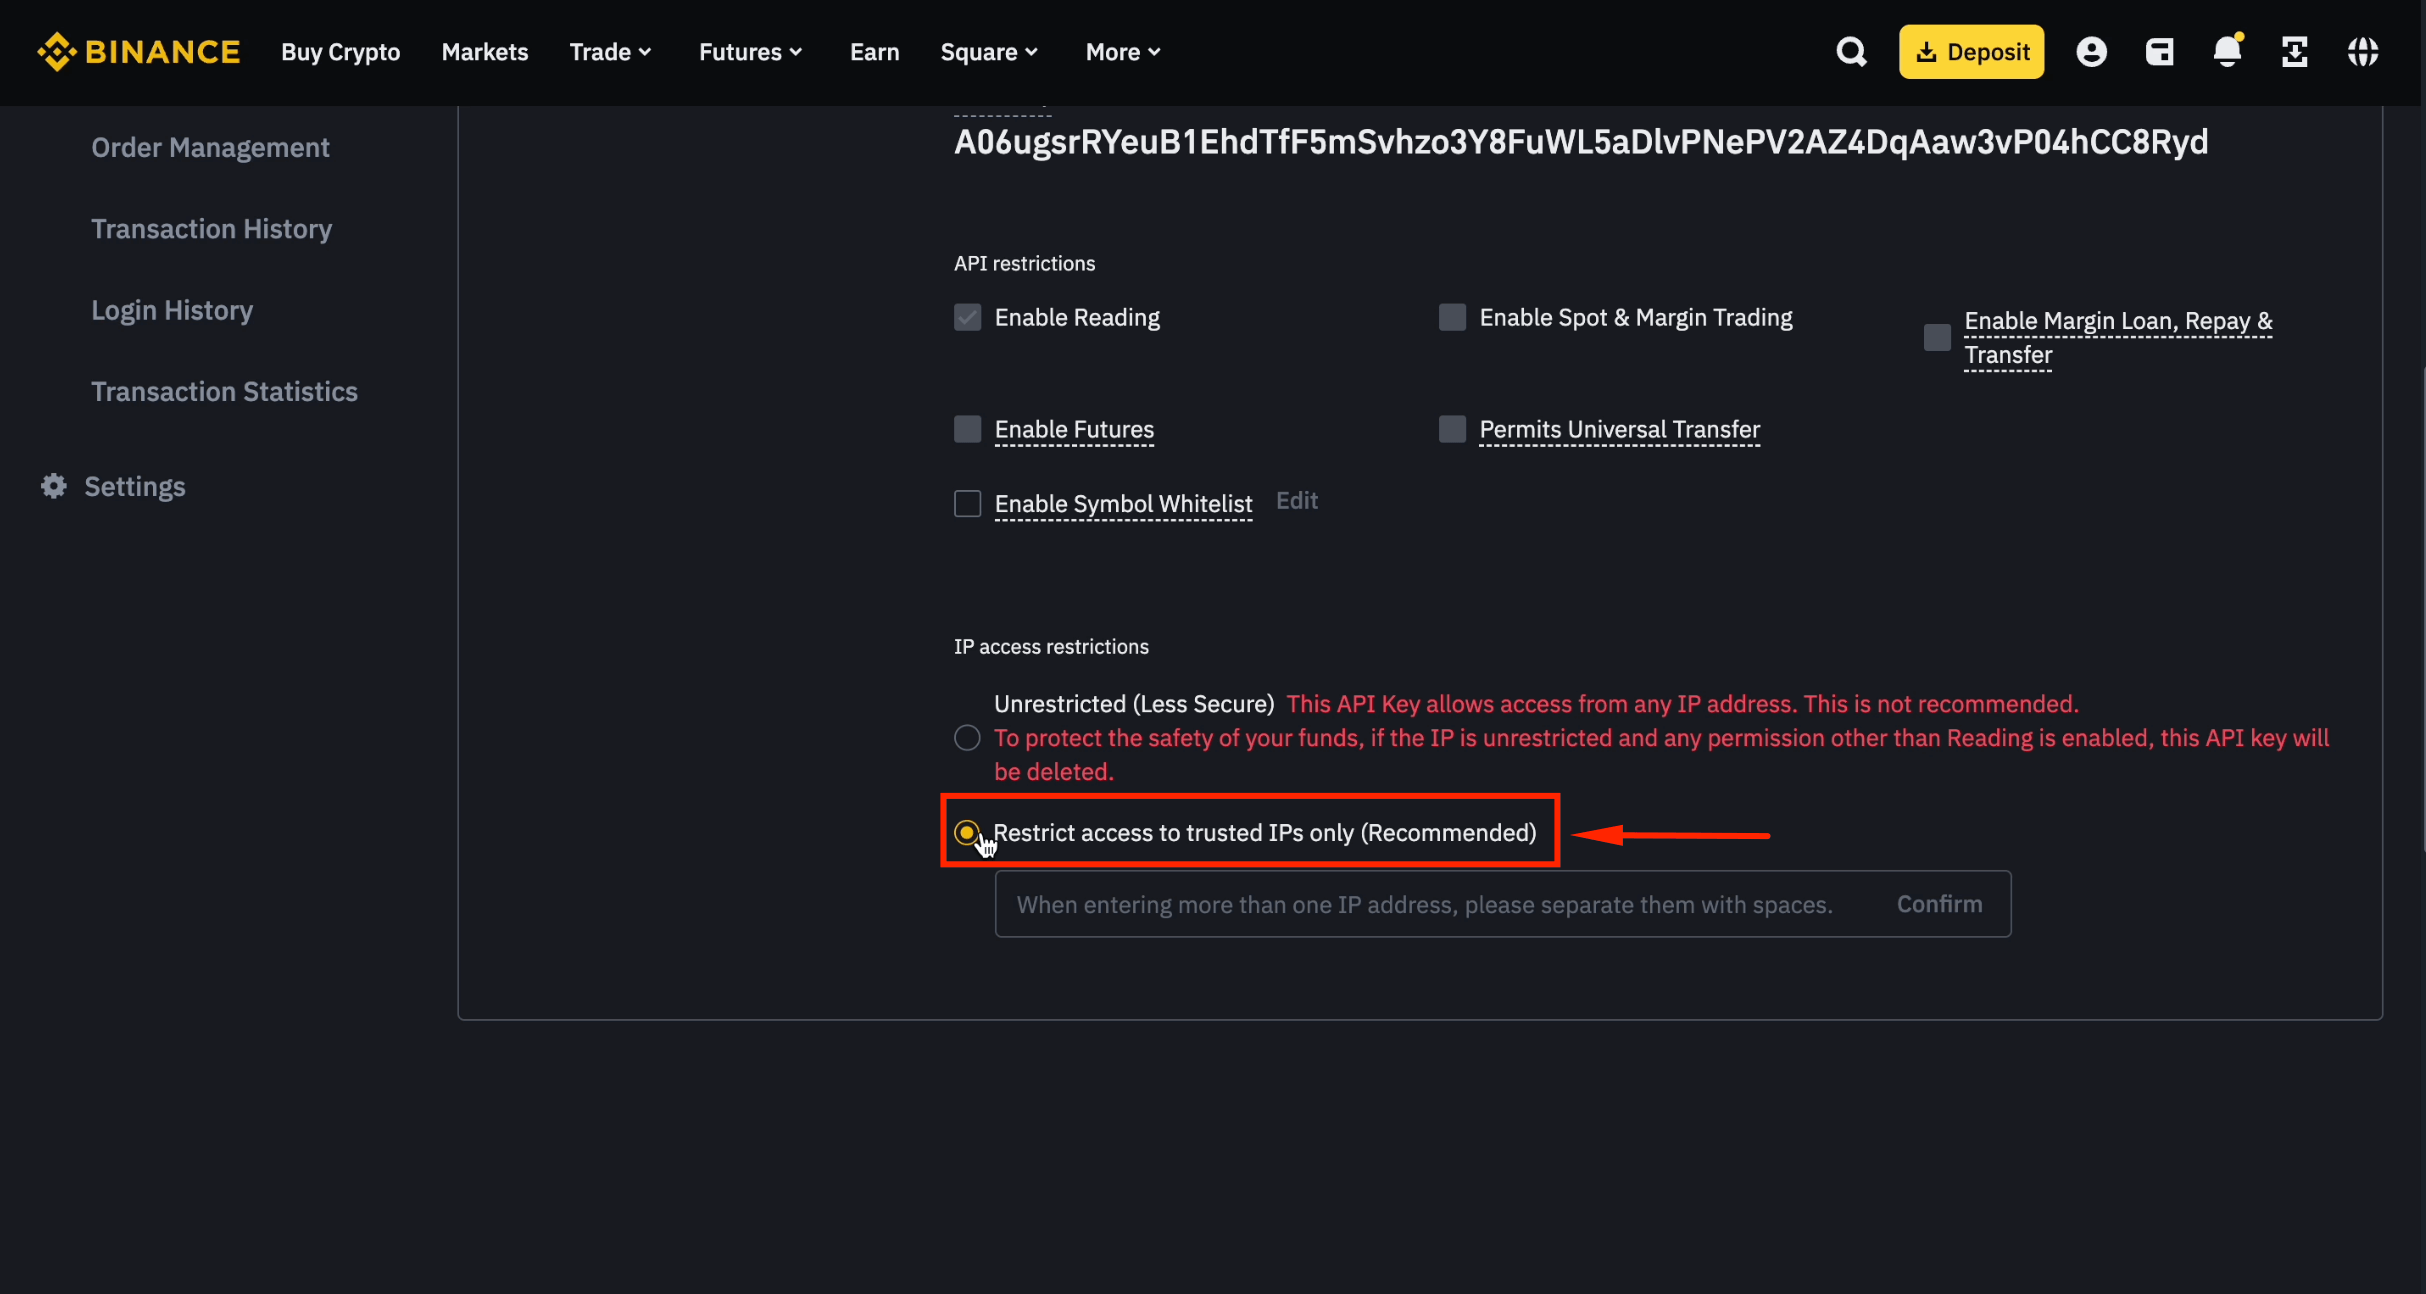
Step 11: Restrict to Trusted IPs
Choose [Restrict access to trusted IPs only].
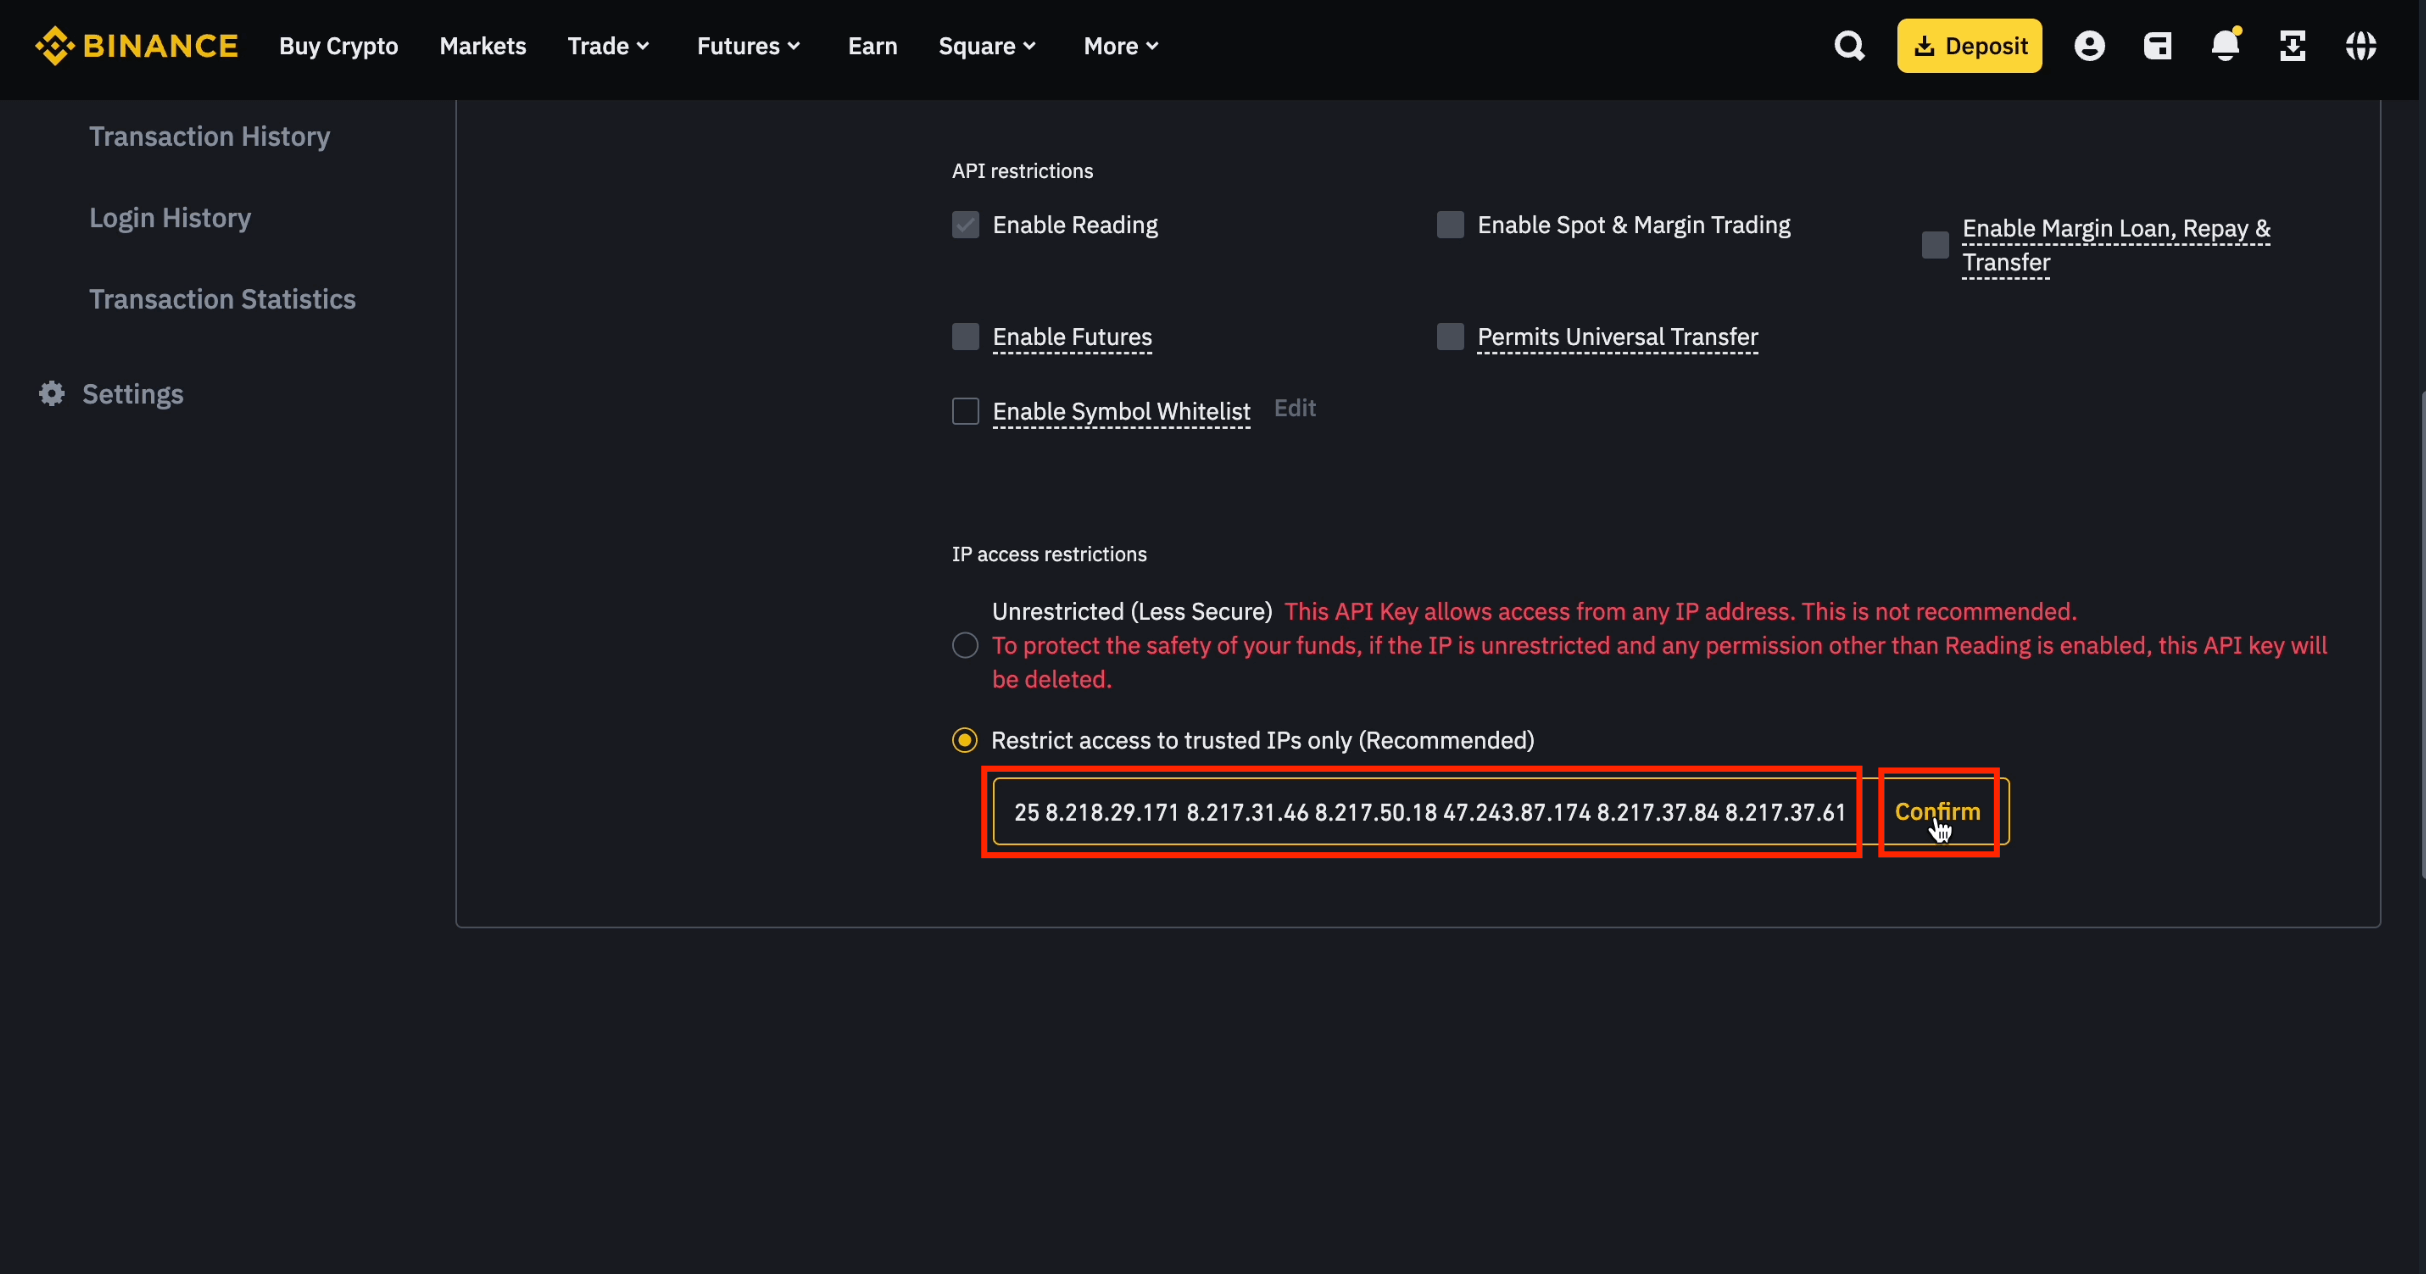
Step 12: Add 30 CoinTech2u IP Addresses
Copy and paste all 30 IP addresses below, then click [Confirm].
8.218.22.136 47.242.145.94 8.218.5.187 8.210.116.248 8.218.7.196 47.242.32.173 8.218.7.70 8.218.27.161 8.218.19.105 8.218.8.63 47.243.114.177 8.218.242.247 8.210.205.22 47.243.192.250 8.218.40.50 8.210.168.108 47.243.31.166 8.218.182.2 47.242.236.1 8.217.22.126 47.242.156.40 8.218.189.122 8.218.67.118 8.218.208.125 8.218.29.171 8.217.31.46 8.217.50.18 47.243.87.174 8.217.37.84 8.217.37.61
Step 13: Enable Futures Permission
Tick [Enable Futures].

Step 14: Copy API Key and Secret Key
Copy both the API Key and Secret Key and save them securely. The Secret Key is only shown once.
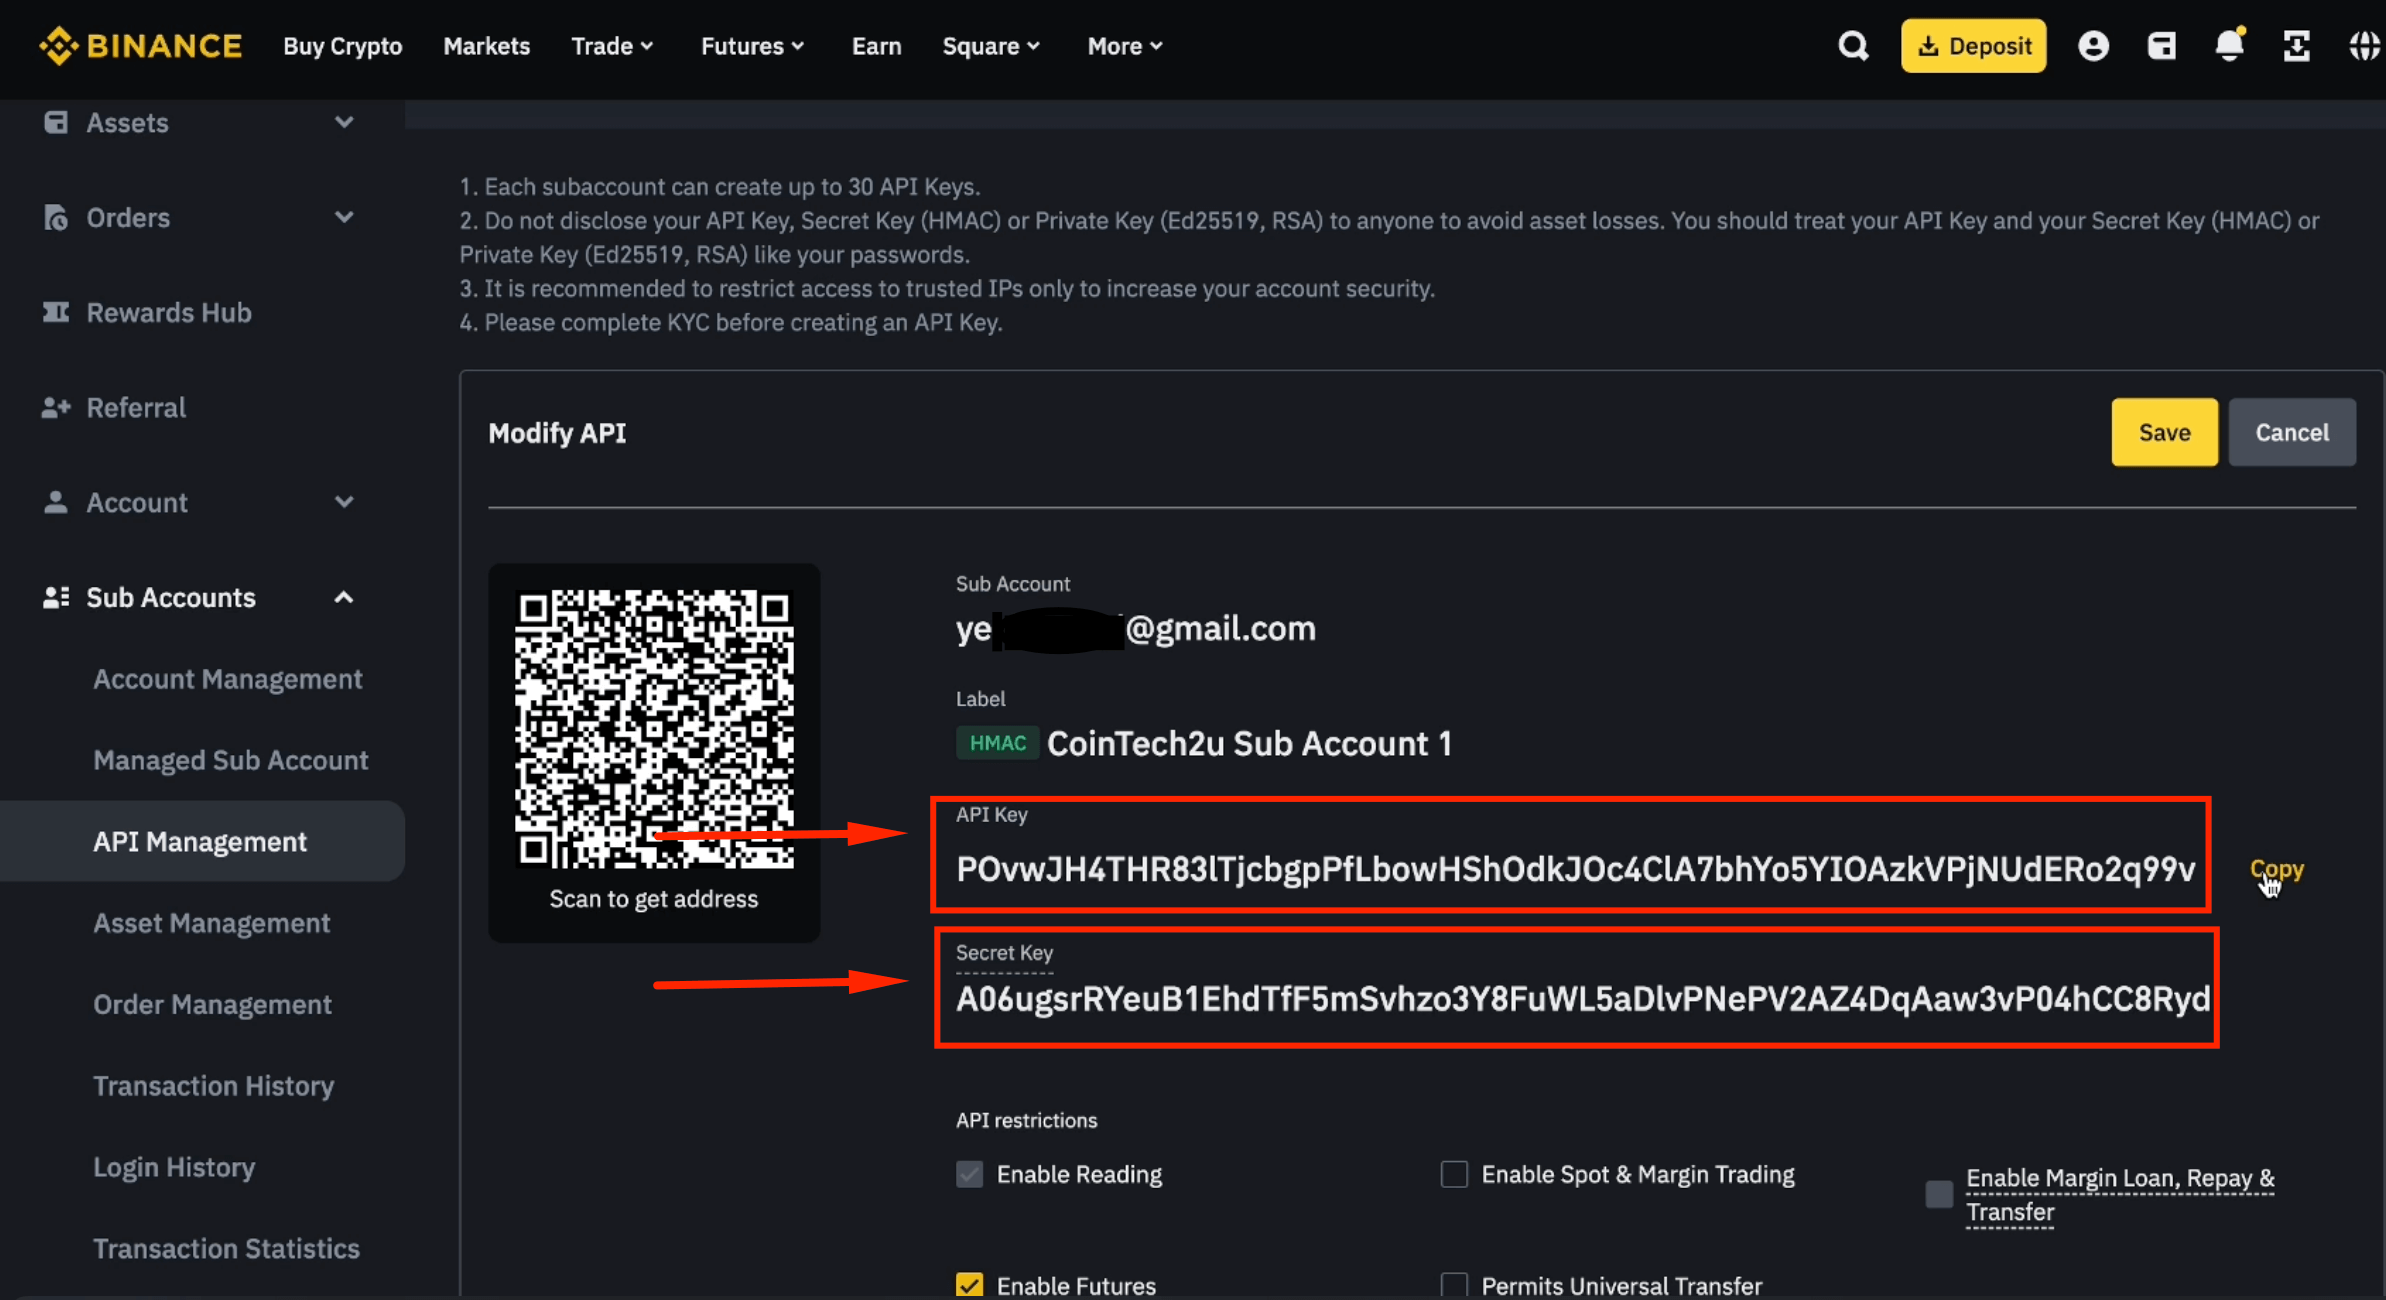
Step 15: Save API Key Settings
Click [Save] to finalize the sub-account API configuration.
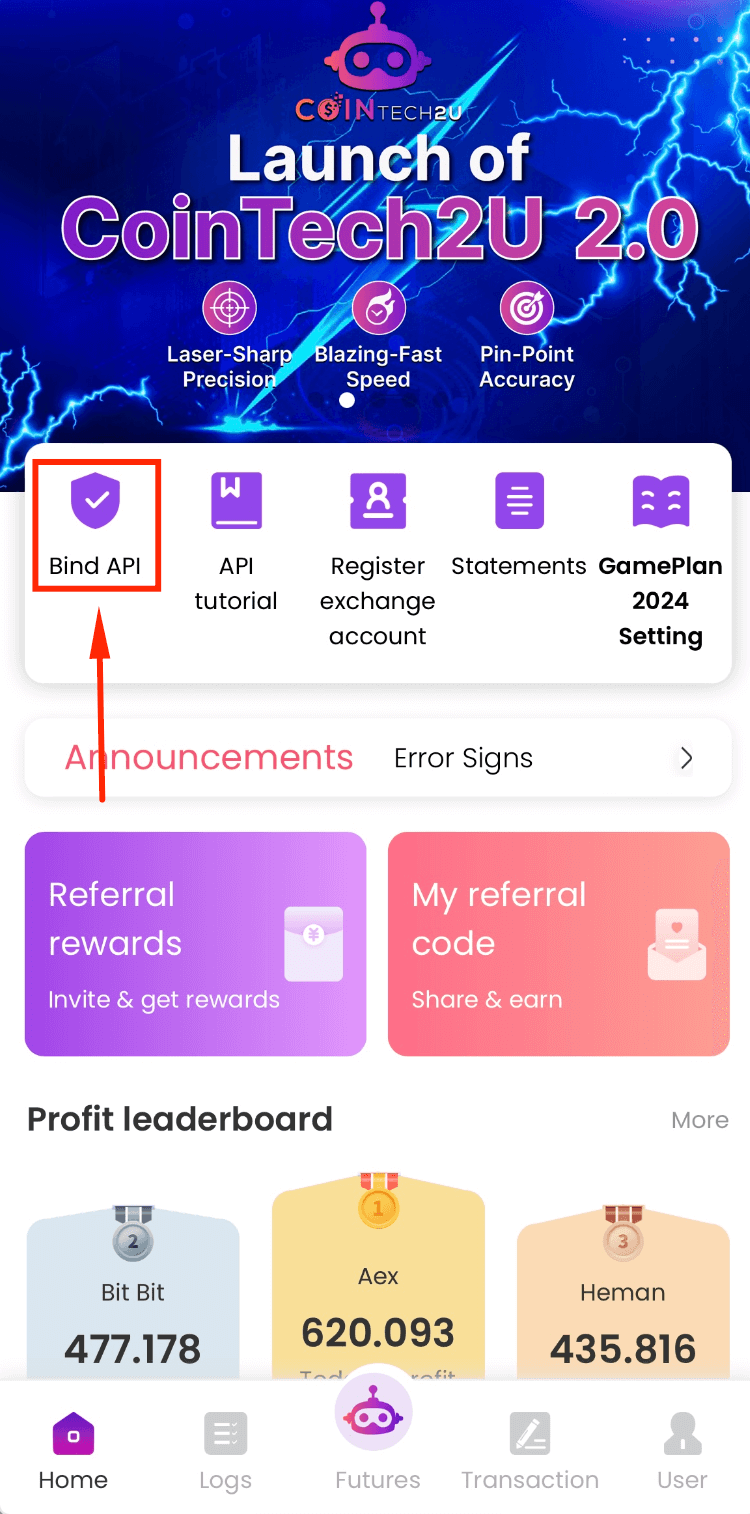
Step 16: Bind API in CoinTech2u
Open the CoinTech2u App and tap [Bind API] on the homepage.
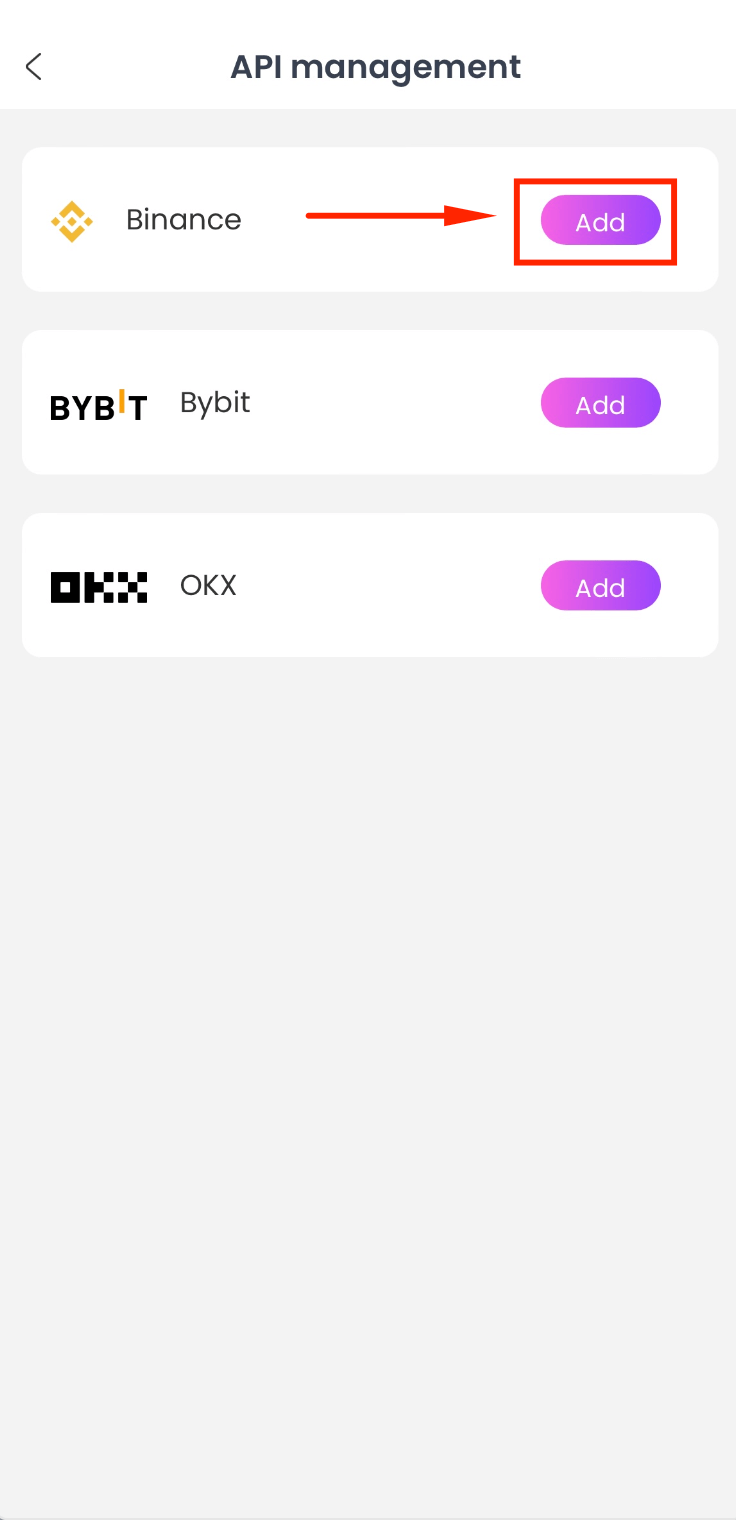
Step 17: Select Binance and Add
Choose Binance and tap [Add].
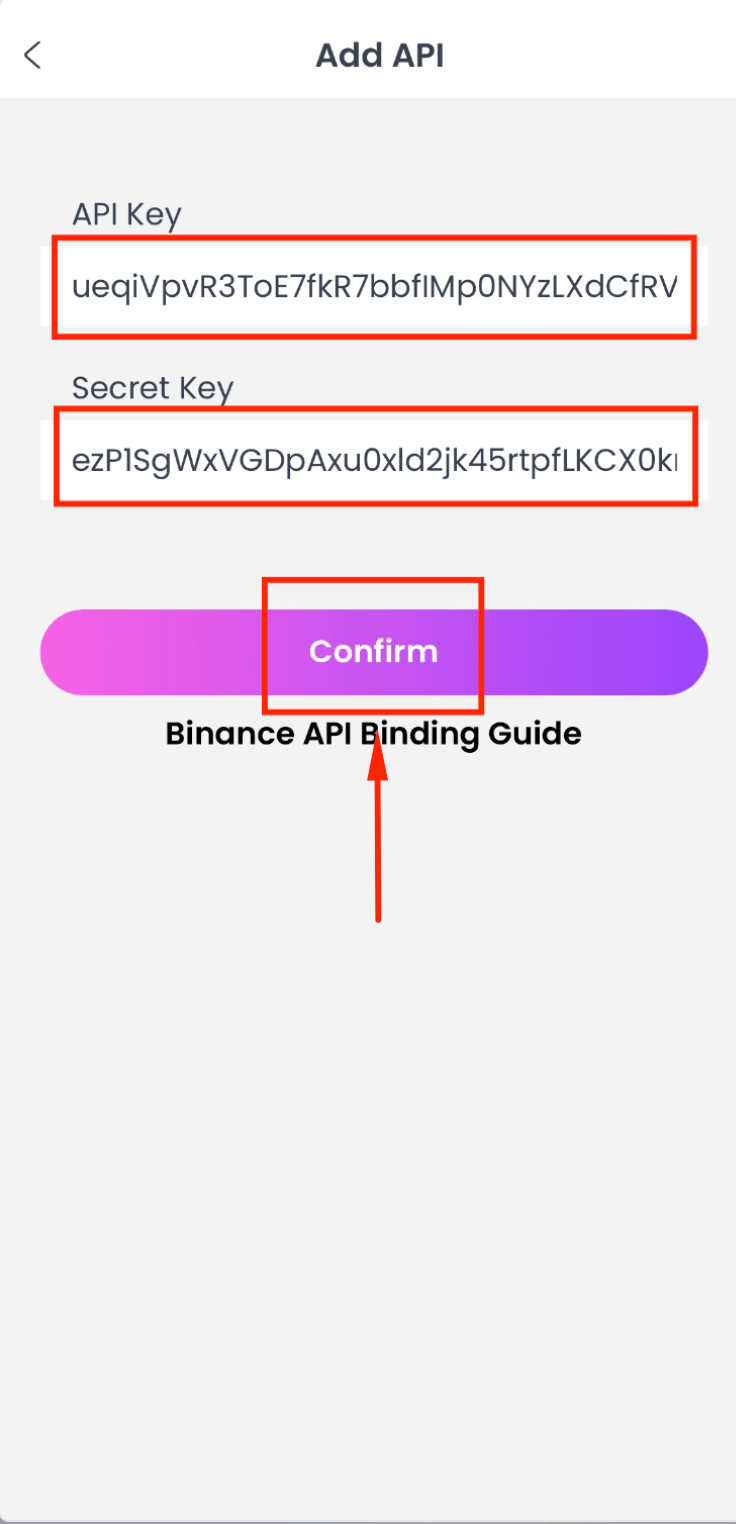
Step 18: Paste Sub-Account API Credentials
Paste the sub-account API Key and Secret Key, then tap [Confirm].
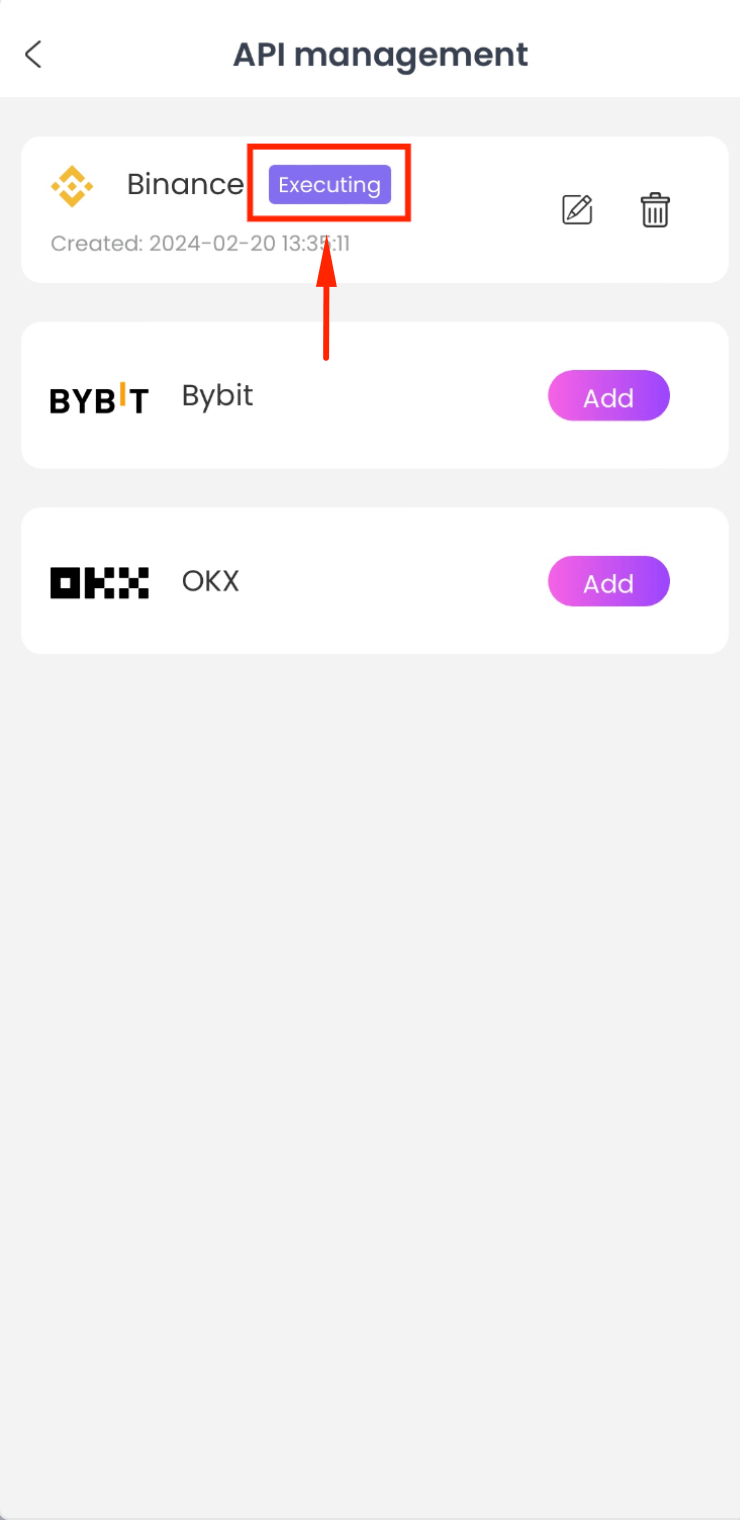
Step 19: Sub-Account API Bound Successfully
When it shows "Executing," your sub-account API is successfully bound to CoinTech2u.
Frequently Asked Questions
Why should I create Binance sub-accounts for CoinTech2u?
Sub-accounts allow you to run multiple trading portfolios independently. Each has its own wallet and API key, so you can diversify strategies, manage risk separately, and track performance individually. This is ideal for running multiple CoinTech2u portfolios simultaneously.
What is the maximum number of Binance sub-accounts I can create?
Binance allows up to 20 sub-accounts under a single main account by default. If you need more, contact Binance support to request an increase. Each sub-account requires a unique email address and can have its own API key for CoinTech2u.
How do I transfer funds between my main account and sub-accounts?
Log in to binance.me on desktop, go to Sub Accounts > Asset Management > Transfer. Select your main account (Spot wallet) as the source, your sub-account (USD-M Futures wallet) as the destination, enter the USDT amount, and confirm. Transfers are instant and free.
What's Next?
Your sub-accounts are set up and API keys are bound. Now learn how to start automated AI trading on CoinTech2u.
Next: Start AI TradingReady to Trade with Multiple Portfolios?
Register CoinTech2u for free and bind multiple Binance accounts for diversified AI trading.
Register CoinTech2u Free